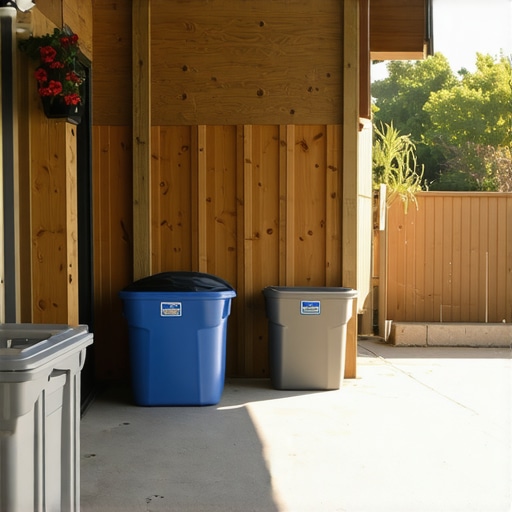
I remember the moment it hit me—standing in my backyard on a humid summer day, opening the door to my new outdoor storage area, only to be greeted by that instantly recognizable, mildew-like stench. It was so overwhelming that I felt like I was walking into a damp basement instead of a handy storage space beneath my deck. That lightbulb moment made me realize how quickly neglecting proper ventilation and maintenance could turn a promising outdoor area into a stinky nightmare.
Why Your Under-Deck Space Turns into a Mildew Magnet
Having spent hours researching and troubleshooting, I learned firsthand that moisture buildup is the main culprit. When water gets trapped or doesn’t have a way to escape, it creates the perfect environment for mold and mildew to flourish. This isn’t just an issue of bad smells; it can lead to structural damage over time and even pose health risks for your family. I initially thought simply sealing the space would solve the smell, but that only made things worse by trapping even more moisture. That early mistake taught me a valuable lesson about the importance of proper airflow and drainage in outdoor storage areas.
Question: Will Proper Ventilation Really Make a Difference?
Absolutely. The idea of installing vents or drainage systems seemed simple enough, but I was skeptical at first. I worried it might be too complicated or expensive, and wondered if it would even work. Well, it did. Proper ventilation drastically reduced moisture levels, and with a few strategic drainage fixes, I finally saw the stinky, moldy smell dissipate. If you’ve faced this frustrating problem, know that the solution isn’t just about cleaning—it’s about creating an environment that discourages mold growth from the start. Want to learn how I achieved this? Stick around, because I’ll walk you through the steps to transform your under-deck storage into a fresh, mildew-free zone.
In fact, studies show that adequate airflow is a key factor in preventing mold growth in outdoor spaces (source: deck design principles). Plus, the earlier you act, the easier it is to maintain your deck and storage area in tip-top shape. Ready to rid your space of that musty smell once and for all? Let’s dive into the practical solutions that worked for me—and can work for you, too.
Before we get into the technical fixes, I want to address a common misconception that many DIYers experience: believing that sealing the space is enough. That was my mistake initially. A sealing approach might seem like a quick fix, but without breathable materials and proper drainage, you’re just locking in moisture. For a long-lasting solution, it’s crucial to design your under-deck area with ventilation and drainage in mind. And if you’re unsure about the best material choices, I recommend exploring composite decking options. Now, let’s explore how you can implement these fixes step-by-step.
Install Proper Vents to Promote Airflow
Begin by adding vents at strategic points—preferably near the top and bottom of your space—to allow air to circulate freely. I once drilled small holes near the ceiling of my storage area using a hand drill and a masonry bit, ensuring they aligned with existing gaps in my deck framing. After installing vent covers, the immediate improvement in airflow was noticeable; the musty smell diminished within days, and moisture no longer pooled. Think of vents as lungs for your space—they breathe in fresh air and expel dampness, preventing mold from settling in.
Choose the Right Vent Material
Opt for weather-resistant, corrosion-proof materials such as aluminum or stainless steel. These materials withstand the elements without rusting or degrading over time. I recommend integrating vents seamlessly into your design for a clean look. During my project, I used aluminum vents painted to match the deck’s color, which not only protected against rust but also blended discreetly with the surroundings.
Design a Drainage System that Moves Water Away
Effective drainage is crucial—standing water under your deck encourages mold growth. I installed a slope under my storage area, angling the floor away from the center and towards small, screened drains I embedded at the edges. This setup mimics a tiny river, redirecting water effortlessly. When heavy rain occurred, water was immediately funneled out, and the space stayed dry. Consider using gravel or paver systems that facilitate quick runoff while supporting the structural integrity of your floor.
Use Permeable Materials for Flooring
Materials like crushed stone, gravel, or decking tiles with gaps allow water to seep through rather than pooling. I replaced my wooden floor with interlocking composite deck tiles designed for drainage. This not only improved ventilation but also made cleaning easier. Think of it as creating a sponge-like base that absorbs and redirects water, preventing humidity buildup beneath your storage area.
Seal and Insulate Strategically
While ventilation is vital, sealing gaps in your enclosure prevents unwanted intrusions of moisture-laden air. Seal all joints with weatherproof caulk, but ensure vents remain unobstructed. During one sealing session, I used weather-resistant sealant around the edges and added weatherstripping to doors—this helped stabilize the internal environment while still allowing airflow through the vents. This balanced approach shields your space from external humidity without trapping internal moisture.
Regular Maintenance Ensures Long-Term Success
Inspect vents and drains periodically—clear debris, and check for corrosion or blockages. I set reminders to clean out my vents and inspect drainage filters every few months. A simple brush or hose can keep things flowing smoothly. Remember, just like regular tune-ups keep a car running efficiently, consistent upkeep prevents moisture problems from returning.
Implementing these steps—adding effective ventilation, designing proper drainage, and maintaining it regularly—transformed my damp, moldy storage space into a dry, fresh environment. It’s a straightforward yet powerful way to protect your outdoor investments and prolong the life of your deck area.
While many DIY enthusiasts and homeowners believe they know the essentials of outdoor construction, there are nuanced pitfalls often overlooked. One prevalent misconception revolves around stairs. Many assume that straightforward stringer installation guarantees safety and aesthetic appeal, but this oversimplifies complex load calculations and code compliance requirements. For example, the height and depth of risers must be uniform to prevent tripping hazards—a detail that even experienced builders sometimes neglect, leading to unsafe stairs that might not pass inspections. Instead of guessing, consulting detailed guidelines like stair design best practices is crucial to ensure both safety and style.
When it comes to composite decking, many assume that all products are equally low-maintenance and durable. Yet, misjudging the importance of choosing the right composite material can cause long-term problems. For example, opting for cheaper, unfilled composites might save upfront costs but could lead to warped, stained, or slippery surfaces over time. The subtle differences in mineral-based versus PVC composites significantly impact performance, as highlighted in latest trends in composite decking. A common trap is ignoring the product’s UV stability and anti-slip features, which can turn a beautiful deck into a maintenance nightmare.
Expert deck builders often emphasize that outdoor projects aren’t just about aesthetic choices. Skipping professional consultation or comprehensive planning can lead to structural issues or code violations, especially with complex layouts involving multiple levels or performance zones. Many homeowners underestimate the importance of proper framing, drainage, and ventilation, which are critical for longevity—and this is where a seasoned professional deck builder can make a difference. For instance, neglecting drainage solutions beneath your deck can result in persistent moisture issues, mold, and decay.
What makes these misconceptions particularly insidious is that they often stem from surface-level research or budget-focused decisions. But in reality, success hinges on understanding the subtle factors—accurate measurements, material specifications, detailed code adherence—that safeguard your investment and enhance your outdoor living experience. Selecting the right composite decking and ensuring structural integrity are more than just details—they’re essentials.
Have you ever fallen into this trap? Let me know in the comments. Remember, a thoughtful approach today prevents costly corrections tomorrow, especially for something as vital as stairs and decking in your outdoor space.
Invest in Quality Power Tools for Durable Results
When it comes to maintaining or building your outdoor living spaces, having the right power tools makes all the difference. I personally rely on a high-quality cordless drill with adjustable torque settings and a lithium-ion battery that holds a charge longer, especially during extended DIY projects. A good oscillating multi-tool is invaluable for detail work, such as trimming composite decking or smoothing edges around stairs. These tools save time and ensure precision, leading to professional-looking results that stand the test of time.
Use Precision Measuring Instruments for Consistency
Accurate measurements are the backbone of a safe, long-lasting deck or stairs. I always use a combination square, a laser distance meter, and a digital level when designing or repairing outdoor structures. For example, a laser level ensures your stairs are perfectly aligned and consistent in riser height, which is critical for safety and comfort. Precision tools help prevent costly mistakes and reduce the need for future adjustments, ultimately saving resources and frustration.
Leverage Software for Planning and Visualization
Modern deck builders often turn to design software to visualize projects before breaking ground. I recommend tools like SketchUp or specialized deck design platforms that allow you to model your space in 3D. This approach helps you plan the positioning of stairs, railings, and lighting, and ensures everything fits harmoniously within your outdoor area. Integrating software into your workflow can streamline decision-making and provide clarity, especially when working on complex multi-level designs or custom features.
Maintain Your Equipment Regularly to Extend Lifespan
Beyond selecting the right tools, regular maintenance is key. I advise cleaning power tools after each use to prevent debris buildup, lubricating moving parts, and storing them in dry, protected cases. For outdoor-specific equipment, such as masonry bits or drainage tools, inspecting for rust or damage before each project ensures safety and efficiency. Proper upkeep not only preserves your tools but also guarantees optimal performance over years of outdoor DIY and professional work.
Stay Ahead with Weather-Resistant Materials
Choosing weatherproof materials for tools and hardware makes ongoing maintenance easier and more effective. For example, selecting stainless steel screws for deck attachments or corrosion-resistant fasteners from trusted brands reduces the frequency of replacements. Additionally, adopting composite decking with proven UV stability and anti-slip features can significantly reduce the effort needed for cleaning and upkeep, keeping your outdoor living space beautiful and functional longer.
How do I keep my outdoor structures functioning smoothly over time?
Consistent inspections are crucial—check for loose fasteners, ensure drainage paths remain unobstructed, and reseal gaps or seals as needed. Investing in quality tools and maintaining them properly ensures your outdoor projects continue to perform well. I’ve found that setting a seasonal maintenance schedule, coupled with using reliable, weather-resistant hardware, effectively prolongs the lifespan of both your deck and stairs. Want to take your maintenance game to the next level? Try regularly applying anti-corrosion sprays to fasteners—this small step can make a noticeable difference in preventing premature wear and tear, especially in coastal or humid environments.
By equipping yourself with the right tools, maintaining them diligently, and selecting durable materials, you’re setting the foundation for outdoor spaces that will serve your family for years. From professional-grade drills to precise measurement devices, these investments pay off in safety, appearance, and longevity. Ready to boost your outdoor living setup? Check out these expert tips and start planning your next project today!
What No One Told Me About Building Safe, Lasting Outdoor Stairways
My biggest breakthrough came when I realized that following code guidelines isn’t just about compliance—it’s about ensuring safety for my family and guests. I once overlooked the importance of uniform riser heights, leading to wobbly stairs that felt unstable and made me nervous every time I used them. That lightbulb moment encouraged me to invest in proper measurements and professional-grade brackets, transforming my outdoor stairs into a safe, sturdy feature.
Hidden Tricks That Elevate Your Deck Game
One lesson I wish I grasped earlier was how subtle design choices, like the angle of your stairs or the placement of lighting, can dramatically improve both aesthetics and functionality. For instance, incorporating integrated lighting into the stair risers not only enhances safety after sunset but also adds a modern touch. These nuanced details turned my basic deck into a luxurious outdoor oasis, inspiring me to explore more creative ideas for my space.
Design Myths That Are Sabotaging Your Outdoor Plans
A common misconception I encountered is that all composite decking is equally maintenance-free. In reality, material differences can impact longevity and slip resistance. Prioritizing UV-stable, anti-slip varieties from trusted brands has saved me time and money in ongoing upkeep. Understanding these subtle distinctions helped me avoid costly mistakes and design a deck that combines beauty with durability.
The Power of Strategic Ventilation and Drainage
Implementing effective airflow and water management was a game-changer. I learned that adding vents at the right locations and creating a slight slope under my deck kept moisture at bay. This not only prevented mold but also protected my investment. Discovering that small adjustments—like installing proper weep holes—can have such a lasting impact made me appreciate the intricacies behind quality outdoor design.
Resources That Made My Projects Shine
- Composite Decking Trends 2025: This guide enlightened me on the latest innovations, helping me choose materials that resist warping and staining. I trust it because it’s backed by industry experts and recent research.
- Professional Deck Builder Tips: Learning from seasoned professionals through blogs and videos gave me practical insights that textbooks alone couldn’t provide. Their real-world experience helped me avoid pitfalls and achieve a flawless finish.
- Design Software Platforms: Tools like SketchUp allowed me to visualize my ideas before building, saving me time and ensuring precision. I recommend these to anyone serious about crafting their ideal outdoor space.
- Trusted Hardware Brands: Investing in high-quality fasteners and brackets has paid off by preventing issues like rust and wobbling, ultimately extending the lifespan of my deck and stairs.
Your Next Step Toward a Dreamy Deck
Building or upgrading outdoor spaces is rewarding, especially when you incorporate lessons learned from experience. Embrace the process, focus on detail, and don’t hesitate to seek expert advice or explore innovative resources. Your ideal deck and stairs are within reach—start turning your outdoor vision into reality today!
Have you ever faced a surprising challenge with outdoor stairs or deck design? Share your story below—I’d love to hear your experience!
,
Comments are closed.