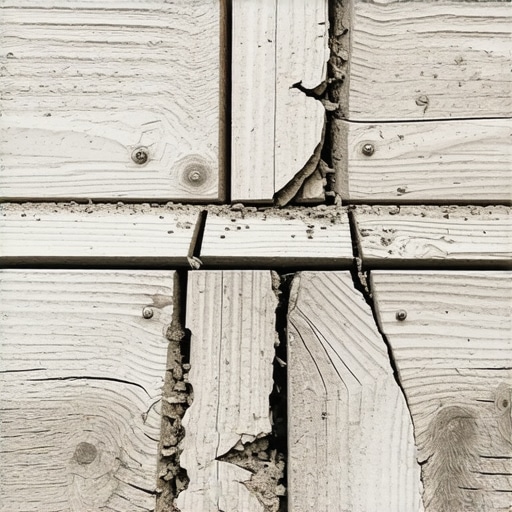
Ever since I built my outdoor staircase last summer, I kept noticing tiny cracks forming along the risers. At first, I brushed it off as harmless. But as weeks went by, those cracks grew bigger, and I started to wonder: am I doing something wrong? Turns out, many homeowners face this frustrating issue, and trust me, you’re not alone. Those little cracks can become a big headache, especially if left unchecked. I want to share what I’ve learned from personal experience and a bit of research to help you troubleshoot and fix this problem.
Tackling the Mystery of Cracking Risers
Cracking on stair risers is more common than you might think. I found that it often starts with the materials used or the way the stairs are installed. If you’re like me, you probably want your outdoor stairs to be both beautiful and durable. But cracks can undermine both of those goals. The good news? Often, it’s something simple to diagnose and fix, saving you from costly repairs later.
Is Cracking Only Cosmetic or Could It Be Harmful?
One mistake I made early on was dismissing small cracks as just doing their thing over time. But I learned that cracks can allow water seepage, leading to wood rot or structural issues. According to experts, delaying repairs can cause the damage to worsen, especially in climates with freeze-thaw cycles. You wouldn’t want your beautiful outdoor stairs to become unsafe, would you?
If you’ve faced this pesky problem or want to prevent it from happening again, stick around. Next, I’ll walk you through the most common causes of stair riser cracking and how to address each one. For inspiration on creating stunning and long-lasting outdoor spaces, don’t miss our detailed guide on [innovative outdoor living ideas with composite decking in 2025](https://deckdesignbuild.com/innovative-outdoor-living-ideas-with-composite-decking-in-2025). Let’s get started on giving those cracks the attention they deserve and making your deck safer and more beautiful.
Remove and Inspect the Damaged Risers
Start by carefully removing the cracked risers using a circular saw with a fine tooth blade, setting the depth just enough to cut through the riser without damaging the treads or stringers. Take your time to gently pry off the damaged boards with a crowbar, avoiding splintering the surrounding material. Examining the underside of the risers will reveal if water seepage or rot contributed to the cracks, helping you understand the root cause and prevent future issues.
Prep the Area for Installation
Clear debris, dust, and old fasteners from the stringers and framing to ensure a secure and clean surface for installing new risers. Use a vacuum or compressed air to remove dust in tight spaces. Double-check measurements for new risers by measuring at multiple points to account for uneven framing. Precise measurements prevent future cracking caused by improper sizing. For consistent results, set up a temporary straightedge or level to verify all measurements before cutting.
Choose the Right Material for Replacement
Select a high-quality composite or PVC board designed for outdoor stairs, such as those discussed in this guide. These materials are resistant to moisture and temperature changes, reducing the chance of cracking. When purchasing, verify the thickness and expansion properties match your existing structure. Remember, using a compatible material ensures longevity and minimizes future maintenance.
Cut the New Risers Accurately
Use a miter saw with a carbide blade to cut the new risers to the measured length, adding a slight extra margin (about 1/8 inch) for adjustments. Cut with the protective cover on to prevent splinters and ensure safety. For rounded or irregular stringers, scribe the shape onto the board using a template or a flexible ruler, then cut carefully along the marked lines. This personalization provides a snug fit, reducing movement and stress that can cause cracks.
Prepare and Install the New Risers
Apply a weather-resistant adhesive, such as construction adhesive designed for composite materials, to the top edge of the stringer before placing the riser. Position the riser carefully, aligning it with adjacent boards, then secure it with stainless steel screws spaced approximately every 12 inches. Pre-drilling small pilot holes prevents splitting of the board. Tighten screws just enough to hold the riser in place without inducing stress—over-tightening can crack the material. As you work, keep the riser level and flush with the existing structure.
Seal and Finalize the Repair
Once the riser is secured, seal the edges with a high-quality outdoor sealant to prevent water infiltration. Focus on joints and gaps where water typically seeps in, leading to further damage. Use a putty knife to smooth excess sealant, then let it cure according to the manufacturer’s instructions. After sealing, walk around the staircase and inspect that all fasteners are tight and the risers are secure. Regular inspections and resealing every few years will extend the life of your outdoor stairs. For more ideas on creating durable outdoor living spaces, check out this inspiring guide.Many homeowners believe that installing composite decking and outdoor stairs is a straightforward process, but in reality, there’s a layer of complexity often overlooked. A common myth is that all composite materials perform identically, yet advanced nuances—like thermal expansion rates and UV resistance—can significantly impact long-term durability. As I learned from years of experience, choosing the right product involves understanding these subtle differences, which most people tend to ignore. For example, some brands offer enhanced UV protection, but at the cost of increased expansion in hot climates, a detail crucial for avoiding cracks and warping over time. _ _ Moreover, many assume that a professional deck builder’s primary role is construction speed, but their expertise in material science and environmental considerations can prevent costly mistakes and safety issues. An often-missed detail is the importance of proper framing to accommodate material expansion, which, if neglected, leads to the cracking issues frequently blamed solely on poor quality boards. Experts like the [Rarely Discussed Experts](https://deckdesignbuild.com/composite-decking-trends-2025-the-ultimate-guide-for-outdoor-enthusiasts) emphasize that understanding these hidden factors makes the difference between a lasting outdoor oasis and ongoing maintenance nightmares. Disregarding these nuances is one of the most significant pitfalls amateur DIYers and even some contractors make. They focus on aesthetics, overlooking the importance of correct installation practices that align with local climate patterns. Weather patterns, in particular, play a vital role; for example, in freeze-thaw cycles, expansion joints are often neglected, leading to premature cracks. To get this right, consult the detailed [creating seamless transitions](https://deckdesignbuild.com/creating-seamless-transitions-stairs-as-key-elements-in-outdoor-living) guide, which explores the critical details of integration. Making assumptions about cost-saving without considering environmental factors can cost you more in repairs later. This hidden nuance underscores why engaging with a professional who understands advanced materials science is a smart investment—more than just a luxury, it’s a necessity to ensure longevity. Consider the advanced trends outlined in the [Ultimate Guide for 2025](https://deckdesignbuild.com/composite-decking-trends-2025-the-ultimate-guide-for-outdoor-enthusiasts), which highlight the importance of environmental adaptability. To navigate these complexities effectively, ask yourself: Are you accounting for climate-specific installation nuances when planning your outdoor project? Remember, a more detailed understanding upfront helps you avoid both costly repairs and safety hazards down the line. Have you ever fallen into this trap? Let me know in the comments.Maintaining your outdoor deck and stairs requires the right tools and a strategic approach to ensure durability and safety over time. Personally, I rely on a few specific pieces of equipment that make the process efficient and effective. First, a high-quality cordless drill with variable speed settings is indispensable for fasteners and minor adjustments. I prefer models with lithium-ion batteries because they provide sustained power without added weight, allowing me to work longer without fatigue. For cleaning, I use a power washer with adjustable pressure settings—typically between 1300 and 2000 PSI—to remove dirt and mold without damaging the composite surface. It’s crucial to avoid excessive pressure that can gouge the material; I set mine to the lower end for daily maintenance.
A handheld oscillating multi-tool is another champion in my toolkit. It’s perfect for detailed trimming around stair risers or tight corners where larger tools can’t reach. My personal preferred blades are those with segmented carbide grit—they last longer and cut cleaner, reducing the risk of splintering. Regular inspections are made easier with a quality flashlight, preferably with LED lighting, to check for cracks or water damage in shaded or hard-to-see areas.
To track and visualize progress, I use specialized decking software that helps plan repairs, replacements, and scaling. These programs allow me to input measurements, keep records of materials, and generate maintenance schedules, ensuring nothing slips through the cracks.
Looking ahead, I see an increasing trend in automated maintenance systems, like robotic cleaners and drone inspections, which could revolutionize how we manage outdoor spaces. Investing in devices compatible with smart home integration might become a standard practice for proactive upkeep.
How do I keep my decking performing well over time? The secret lies in consistent cleaning, timely repairs, and applying protective sealants at recommended intervals—usually every 2-3 years depending on climate exposure. For sealing, I choose breathable, waterproof sealants designed specifically for composite materials. I highly recommend trying an application with a sprayer for even coverage, which saves time and effort compared to brush-on methods.
Don’t forget, proper maintenance isn’t just about appearance; it’s about safety and long-term value. For example, inspecting fasteners and replacing any that are corroded or loose keeps your structure stable. When you notice early signs of wear, act quickly—delaying can lead to costly repairs down the road. For detailed guidance on fixing fastener issues, see our post on [the 2-bolt fix for wobbly deck railing posts](https://deckdesignbuild.com/the-2-bolt-fix-for-wobbly-deck-railing-posts). And for a comprehensive overview of long-term maintenance strategies, check out our guide on [creating safe and stylish stairs](https://deckdesignbuild.com/designing-safe-and-stylish-stairs-for-outdoor-decks-in-2025).
One advanced tip I personally use is applying a UV-resistant polymer coating during annual maintenance. This adds an extra layer of protection against sun damage, which is especially beneficial in exposed outdoor locations. Try incorporating this into your routine and see how it extends the life of your deck’s surface. Remember, staying proactive with these tools and methods ensures your outdoor living space remains beautiful, functional, and safe for years to come.
Through my journey fixing cracked outdoor stairs, I discovered that overlooked details—like proper framing, seasonal climate considerations, and material selection—are the secrets to lasting durability. These lessons transformed my approach, saving me time and money, and I believe they can do the same for you. Embracing these insights not only fortifies your stairs but also deepens your understanding of outdoor design, making every project more rewarding. Remember, every crack tells a story—your task is to understand and prevent it before it becomes a real problem.