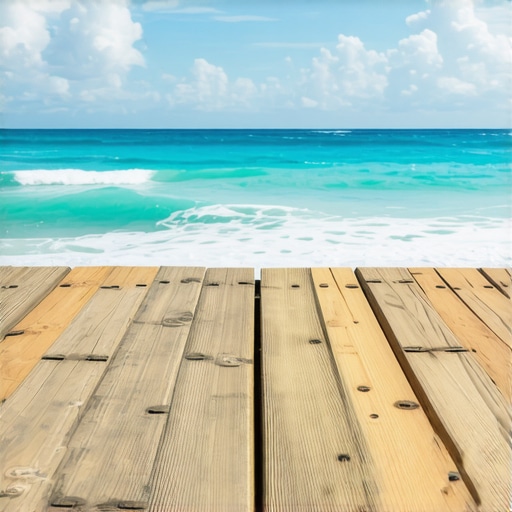
I remember the first summer I spent working on my backyard deck. The sun blazed overhead, and I was feeling pretty proud of my DIY skills—until I stepped outside after a couple of months and saw my efforts wasting away. The screws holding my beautiful hardwood decking had started to corrode, turning a rusty, ugly brown. It was a frustrating sight, and it hit me: I hadn’t paid enough attention to the materials I used in a coastal environment, where saltwater and humidity are relentless enemies. That realization became my personal lightbulb moment—understanding that the choice of hardware could make or break the longevity of my outdoor oasis.
The Power of a Small Change: Switching to Stainless Steel Screws
Fast forward to today, and I can confidently say that swapping out my standard galvanized screws for stainless steel ones revolutionized my deck’s durability. It’s a seemingly simple decision, but trust me, it’s a game-changer—especially if you’re dealing with salty air and high humidity. I want to share the story of how this small change saved me hundreds of dollars in repairs and a lot of sleepless nights worrying about deck safety. Today, we’ll explore exactly why stainless steel screws are the secret weapon for coastal decks, what pitfalls to avoid based on my early mistakes, and how you can ensure your outdoor space stands the test of time.
Is the Cost Worth the Commitment or Overhyped?
When I first heard about using stainless steel screws, I was skeptical. They cost more, and I wondered if they really made that much difference. Early on, I made the mistake of underestimating the impact of corrosion, leading me to choose cheaper options that seemed more economical at first. But the truth is, cutting corners with hardware can lead to more expenses down the line, including replacing rotted framing and dealing with safety hazards. An external study found that stainless steel fasteners can last up to 70 years in corrosive environments, compared to galvanized ones, which might fail in just 10-15 years (source). So, the initial investment pays off in the long run when you prioritize quality from the start.
If you’re tired of watching your deck succumb to rust, warping, or squeaking, and want a solution that can handle the coastal climate’s brutal conditions, then keep reading. I’ll walk you through the key reasons to make the switch and how to choose the right stainless steel screws for your project, so your outdoor space remains beautiful and functional for years to come. Ready to ditch the rust and worry? Let’s dive into the practical steps that will protect your deck like a seasoned pro.
Screw Selection and Preparation
First, choose corrosion-resistant stainless steel screws rated for outdoor use, specifically designed for decking material. Take my experience with a rusty deck as a lesson—using high-quality screws can drastically extend your deck’s lifespan. I suggest opting for screws with a coating or finish suitable for coastal environments; these are less likely to seize or corrode over time. Before starting, gather a power drill with a clutch setting, a measuring tape, and a safety gear like gloves and goggles to protect against metal shavings. I learned this the hard way when a misstep caused a small injury, so safety comes first. Ensure your screws match the deck’s thickness and the material’s density to prevent over-penetration or insufficient holding power.
Preparing the Surface and Marking
Prior to screwing, clean the surface thoroughly with a brush or compressed air to remove dirt and debris that can interfere with screw placement. Use a pencil or chalk line to mark the spots where each screw will go—spacing them 16 inches apart along joists creates a sturdy connection, similar to the way I measured every footmark along my previous project. Marking prevents misalignment, which can lead to weak points or surface unevenness. For composite decking, ensure that the screw holes align with joists, not the gaps, to maximize support. I once drilled without proper marking, ending up with a wobbly first step, so precision matters. This preparatory step ensures your deck’s stability and longevity.
Pre-Drilling and Fastening
Pre-drill holes slightly smaller than your screws to reduce splitting in wood or deformation in composite boards. For thick or dense materials, a pilot hole prevents cracking and makes driving the screw easier. Use a drill bit with a stop collar set to the depth of the screw; this consistency avoids over-tightening and damaging the material. When screwing in, apply steady pressure and turn slowly to prevent stripping the head or damaging the surface—trust me, rushing leads to wasted time and frustration. To achieve flush or slightly countersunk screws—especially important for safety and aesthetics—I recommend a bit with a depth stop or a screw setter. This method keeps your deck smooth and safe for barefoot traffic, which is a consideration I learned after a friend got splinters from uneven boards.
Tightening and Securing
Once all screws are in place, go back and tighten them to secure the connection fully—over-tightening can cause deformation, while under-tightening leads to loose boards. Use the drill’s clutch to avoid overtightening, similar to how I adjusted the tension on a bicycle brake—precise control yields better results. Check each fastener, and if any resist turning or feel loose, tighten further, but stop at the point where the surface remains flush. This step is crucial for preventing squeaks and wobbling over time. Regularly inspecting screw tightness, especially in areas exposed to weather shifts, prolongs the deck’s integrity and avoids costly repairs, much like maintaining a good foundation in other outdoor projects.When embarking on a deck project, many DIY enthusiasts fall prey to misconceptions that can sabotage their efforts. One widespread myth is that all composite decking is equally resistant to staining and scratching, but in reality, the quality and composition greatly influence durability. For instance, mineral-based composites often outperform traditional wood fiber blends in high-traffic outdoor environments, as highlighted in recent industry analyses. Understanding these nuances can save you both time and money, and ensure your deck stands the test of time.
What Advanced Factors Should I Consider When Choosing Deck Materials?
Beyond basic aesthetics and price, seasoned builders evaluate the long-term performance of materials under specific conditions, such as UV exposure and climate shifts. For example, some decks suffer from excessive warping when exposed to intense sunlight over a few summers, despite initial appearances. A study by the Forest Products Laboratory emphasizes that using properly rated materials and following manufacturer guidelines significantly reduces warping risks.
One critical oversight is neglecting the importance of proper framing and support structures. Even the most durable decking can falter if the underlying framework isn’t engineered to handle load and environmental stresses. For example, steel joists, when correctly installed, offer superior longevity in coastal environments compared to traditional wood, which is prone to rot and insect damage. To avoid these pitfalls, consider consulting professional resources or expert builders familiar with advanced techniques. You can learn more about the latest trends in outdoor living by exploring our comprehensive guide on composite decking trends for 2025. Moreover, mistakes in stair design or placement can compromise safety and accessibility; reviewing standards for stairs and outdoor transitions is essential for a seamless, durable result. Remember, a well-constructed deck isn’t just about looks—it’s a combination of informed choices and meticulous execution. Have you ever fallen into this trap? Let me know in the comments.
Achieving a durable, low-maintenance outdoor living space requires more than just quality materials—it hinges on having the right tools and consistent maintenance practices. In my experience, investing in specific equipment has made the difference between a deck that lasts and one that quickly falls apart. For example, I swear by using a cordless impact driver with torque settings calibrated precisely for each task. This allows me to drive screws with minimal stripping and ensures tight, secure connections without damaging the material. Over time, this prevents loosening and the squeaks often associated with poorly fastened decking, which I learned to avoid after several repairs. Looking ahead, I believe handheld power tools will evolve further, integrating smart technology to monitor torque and recommend optimal settings, making DIY projects even more foolproof.
How do I maintain my outdoor structures over time?
Regular upkeep is vital for longevity. I perform biannual inspections, focusing on hardware integrity and surface cleanliness. Using a silicon-based spray on fasteners can prevent corrosion and ease future tightening. For large-scale cleaning, I rely on a pressure washer set at low pressure, combined with biodegradable cleaning agents—this keeps the composite decking looking fresh without risking surface damage. Marking problem spots early and addressing minor issues before they escalate can save hundreds in repairs and preserve safety. To keep your deck in prime condition, I recommend maintaining clear drainage paths around the structure, preventing water pooling which accelerates rot and corrosion (see my related post for more tips). Consistent upkeep, coupled with the right tools, is the secret to long-term success.
Best equipment I trust for deck upgrades
When I upgrade or repair a deck, I rely heavily on a spirit level with a magnetic edge, so I can set joists and railings perfectly level—even in tight corners. For screwing into composite materials, I prefer a drill with a reversible clutch, which prevents over-driving that can damage the board’s surface or the fastener head. I also advocate for using a pneumatic nail gun when installing railing posts—this speeds up the process and ensures a secure fit without damaging the wood or composite. For precise measurements, I use a laser distance meter that provides quick, accurate readings, which is indispensable for aligning stairs and deck transitions accurately. In the future, I predict that integrated smart sensors will notify owners of hardware loosening or material stress, reducing the need for manual inspections and catching problems early. For now, equipping yourself with these specialized tools streamlines your project and prolongs its life.
Top tools to keep your deck looking fresh
Maintaining a beautiful outdoor space is about more than just fixing problems; it’s about proactive care. I recommend a high-quality brush with stiff bristles for scrubbing away dirt and mold, coupled with eco-friendly cleaners. A soft-bristled brush is perfect for detailed areas, like stairs or railings, where grime tends to accumulate. When dealing with scratches or minor surface imperfections on composite decking, a dedicated scratch removal kit that contains a gentle abrasive and a matching camo stain can restore appearance without the need for full replacement. Incorporating a periodic application of a reflective UV-protective spray also helps prevent fading and warping, keeping your deck vibrant for years. As I see the trend moving, I believe that integrated maintenance apps will increasingly assist owners in scheduling inspections and notifying them of potential issues—imagine your deck telling you when to check bolts or clean surfaces! For now, using these tools effectively means better results and less long-term fuss.
Don’t be afraid to try one of these advanced tools or techniques—like the impact driver with customizable torque—because they can revolutionize your maintenance routine. Embracing the right equipment from the start can make all the difference, giving you a deck that performs beautifully with minimal ongoing effort. If you want to see how professional builders stay ahead, explore more about the practical steps for seamless outdoor transitions. Remember, a well-maintained deck isn’t just about appearances; it’s about creating a space that endures the test of time and weather. Start applying one new tool or technique today, and watch your outdoor living area flourish with less hassle.
What I Wish I Knew Before Starting My First Coastal Deck
One of my biggest realizations was how overlooked environmental factors can sabotage even the most well-planned deck. Accurate assessment of salt exposure, humidity, and wind conditions is crucial—covering these early on saved me from costly mistakes later.
Another lesson was the importance of framing materials. Choosing steel joists over traditional wood in salty environments revolutionized the longevity of my deck, proving that investing in proper support structures is worth every penny.
Finally, I learned that proactive maintenance and regular inspections are your best allies. Applying protective coatings and tightening fasteners periodically keep your outdoor space resilient and beautiful for decades.