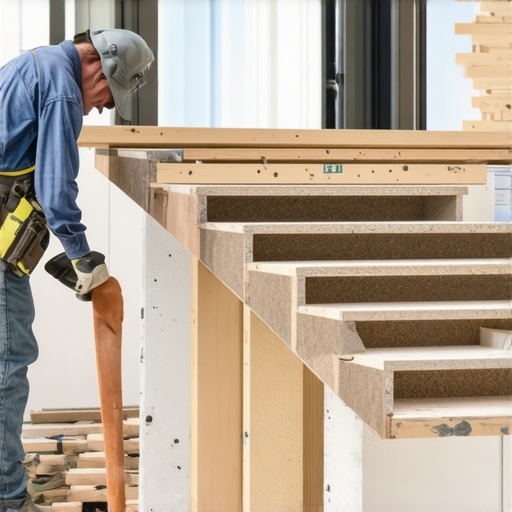
I remember the moment vividly. I was midway through building a new set of outdoor stairs for my deck, eager to finalize the project. But as I stepped back to admire my work, something felt off. The risers looked awkward—either too tall, too short, or uneven—that little inconsistency kept nagging at me. It was a frustrating experience, and honestly, I nearly scrapped the entire project just to avoid those unsightly stairs.
Then, I had a lightbulb moment. I realized that the secret to making outdoor stairs look natural isn’t just about precise measurements but about understanding the importance of the stair riser trick—how adjusting the riser heights can make your steps feel more seamless and inviting. Once I cracked that code, building beautiful, safe, and harmonious stairs became much easier.
Today, I want to share that insight with you. Whether you’re a seasoned DIYer or just dipping your toes into outdoor projects, mastering the stair riser trick can dramatically improve your outcomes. We’ll cover simple adjustments and best practices that help create a natural flow, making your steps feel like an extension of your outdoor space rather than a sore thumb.
Why Paying Attention to Riser Heights Can Transform Your Outdoor Stairs
Can Small Changes Really Make a Difference?
Absolutely. The human eye and foot are surprisingly sensitive to uneven steps. A slight variation of just a quarter-inch in riser height can cause discomfort, missteps, or a staircase that looks suspiciously homemade. Early on, I made the mistake of relying solely on measurements without considering the visual impact of tiny differences, and it showed in the final look.
Understanding and applying the stair riser trick—where you adjust the height of each riser for a consistent and comfortable ascent—can turn a flawed staircase into a masterpiece. Moreover, thoughtful riser adjustments ease movement and enhance safety for everyone using your stairs, especially children and seniors.
It’s also worth noting that in regions with fluctuating temperatures and humidity, precise measurements become even more critical to prevent warping or shifting over time. As experts point out, small inaccuracies can lead to uneven wear and long-term structural issues (learn more about innovative stair solutions here).
Have you ever built stairs where the risers felt awkward or uneven? If so, you’re not alone. Many DIYers struggle with creating steps that look natural and feel comfortable. But don’t worry—by understanding the nuances of riser heights and how to adjust them, you can achieve a professional-grade finish. Ready to see how this works in practice? Let’s dive into the step-by-step process that will boost your confidence and set your outdoor stairs apart from the rest.
Measure and Mark Accurately for Consistent Risers
The first step is clarity: picture your staircase as a series of dominoes that must fall in perfect sequence. I once built stairs without double-checking my measurements, leading to uneven risers and a lopsided look. To avoid that, measure the total rise from the ground to the deck platform, and divide it by the number of steps you want. Use a carpenter’s pencil to mark the riser lines on stringers, ensuring each mark corresponds to the same height. Remember, precision here lays the foundation for smooth, natural-looking stairs. Use a framing square to verify each mark, and double-check your measurements against the final riser height to prevent surprises.
Adjust Riser Heights During Stringer Cutting
Once your marks are set, cut the stringers, but don’t rely solely on the plan. My own experience included a messy, time-consuming redo because I didn’t account for slight variations in material thickness or the uneven terrain. To make corrections, measure each riser after cutting and compare with your layout. Slightly modify the cut at the bottom or top after testing to see if the stair tread sits evenly. Think of this step like fine-tuning a musical instrument—you want each note (riser) to sound in harmony. Small adjustments—just a fraction of an inch—can prevent that awkward When it comes to designing and building outdoor decks, stairs, and composite decking, many enthusiasts and professionals alike fall prey to misconceptions that can compromise safety, durability, and aesthetic appeal. One pervasive myth is assuming that choosing the most popular materials automatically guarantees success. In reality, understanding the *nuances of material performance*—like how different composites react to environmental conditions—is crucial. For example, some DIYers rely solely on aesthetic preferences without considering thermal expansion, which can lead to warping or buckling over time. To avoid these pitfalls, consulting with a professional deck builder—like those at our team—can save valuable time and money. Just adopting trendy design ideas without understanding *long-term implications* might result in needing costly repairs soon after completion. Moreover, many overlook the importance of seamless transitions between stairs and decks. Proper framing techniques, such as utilizing innovative stair solutions discussed here, ensure safety and visual harmony. Remember, the devil is in the details—small adjustments in riser heights or spacer placements can significantly enhance comfort and appearance. An advanced mistake often made is neglecting proper drainage, leading to moisture accumulation and rot. Experts suggest incorporating drainage solutions from the outset rather than attempting to retrofit later. Have you ever fallen into this trap? Let me know in the comments. To truly elevate your outdoor living space, consider a comprehensive approach that blends expert insights with attention to detail. For ongoing learning, check out these insightful tips on designing your perfect outdoor area.
Maintaining a beautiful and durable outdoor deck requires more than just initial construction; it demands the right tools and methods to ensure longevity and a polished appearance over time. One of my personal favorites is using a stainless steel fastener kit. I prefer stainless steel because it’s resistant to corrosion, especially in coastal or humid environments, which dramatically extends the lifespan of the fasteners and, consequently, the entire structure. For precise measurement and layout, I rely heavily on a quality digital laser level. Unlike traditional bubble levels, a laser level provides quick, accurate, and consistent readings across large spans, making it essential for aligning composite decking boards and stair stringers seamlessly.
Invest in High-Quality Power Tools
My go-to power tool for decking projects is a cordless impact driver. Its torque efficiency helps drive fasteners quickly and reduces user fatigue, enabling me to work faster and with greater precision. I recommend models that accept multiple bit sizes and have brushless motors for durability and longer runtime. When cutting composite decking, I use a diamond-tipped blade designed specifically for plastics. This prevents melting and chipping—common issues when using standard saw blades—ensuring clean, professional cuts every time.
Software That Reshapes Outdoor Living Planning
On the design side, I now use deck design software. It’s invaluable for visualizing layouts, estimating materials, and testing different color schemes before any physical work begins. This not only saves money but also prevents costly errors, especially important when planning complex stairs or integrated features.
Mastering Maintenance Using Smart Approaches
Regular inspections are pivotal for long-term results. I schedule seasonal checkups, focusing on loose fasteners, small cracks, or early signs of rot. Applying a high-quality, breathable sealant—preferably one with UV protection—helps preserve composite decking and wood stairs from weathering. Additionally, employing a pressure washer with a soft brush setting periodically cleans accumulated dirt and moss without damaging the surface.
How do I keep my deck looking great over time?
Adopting preventive measures like installing under-deck drainage systems and ensuring proper airflow around your structure can prevent moisture buildup, reducing mold growth and rot, which are common pitfalls in outdoor living spaces. Experts suggest incorporating a proper flashing technique during construction to protect critical joints from water infiltration. I highly recommend trying out the corner bead tool I discussed earlier to mark and attach finishing trims accurately—small but impactful details that elevate your project’s professionalism. For ongoing maintenance, I encourage you to explore innovative products like bondable deck coatings, which can reinforce existing surfaces and restore lost color, extending the deck’s aesthetic appeal. Remember, investing in the right tools today guarantees that your outdoor living area remains inviting and resilient for years to come—making it a true extension of your home. If you’re curious about expanding your deck-building skills further, consider reaching out to a professional for personalized advice. You can contact us here to discuss your project and discover custom solutions that suit your needs.
Discover the secrets behind creating outdoor stairs that blend perfectly into your landscape, elevating both safety and style.
Lessons from the Trenches: Hidden Gems About stair riser tricks
- One of my biggest lightbulb moments was realizing that tiny adjustments in riser height could salvage an entire staircase. I once built a set without double-checking measurements, only to find uneven steps that looked unprofessional and felt uncomfortable. Now, I always fine-tune each riser after cutting, ensuring harmony and comfort.
- I learned that material imperfections and terrain variations mean plans are just starting points. When I changed my mindset from rigid adherence to adaptability, I could make quick corrections during construction, saving time and frustration.
- It’s tempting to rely solely on standard measurements, but understanding the visual impact of riser adjustments—how they influence perceived quality—is a game-changer. This insight transformed my approach from basic building to artistic craftsmanship.
- Engaging with expert resources like composite decking trends and stairs solutions opened my eyes to innovative techniques that ensure seamless transitions and safety. Embracing these ideas elevated my projects beyond basic structures.
- Lastly, I realized that paying attention to detail, such as proper drainage and fastener choices, complements riser adjustments perfectly—resulting in a durable, attractive, and safe outdoor staircase that lasts for years.
Plotting the Next Step: Tools and Inspiration for Your Outdoor Project
- Start with a top-quality composite decking to ensure longevity and low maintenance. Its weather-resistant properties mean your stairs stay pristine longer.
- Use a deck design software to visualize your stairs and experiment with riser heights before cutting. Prevention is always better than correction.
- Invest in impact drivers and diamond-tipped blades to streamline your work. Reliable tools make precise cuts and fasteners effortless, turning a daunting task into a rewarding experience.
- Enhance your understanding through books like deck builder tips that reveal craft secrets. Continuous learning keeps your skills sharp and your projects impressive.
- Regular maintenance, including seasonal inspections and proper sealing, preserves your stairs’ beauty and safety. Gentle cleaning with soft brushes and sealants helps your hard work age gracefully.
Keep Moving Forward and Build with Confidence
Remember, the magic of outdoor stairs lies not just in their practicality but in how they elevate your entire outdoor experience. When you master the art of riser adjustments, you’ll find that creating natural, inviting stairs becomes second nature. This journey is about more than construction; it’s about transforming your outdoor space into a harmonious extension of your home.
Are you ready to give your stairs that seamless, professional look? Share your experiences or questions below—I love hearing how your projects are coming along!