One summer afternoon, I stepped outside to enjoy a quiet evening on my deck and nearly gasped. The once sleek, uniform look of my outdoor space was now marred by uneven, discolored spots—those tiny, shiny patches that make any deck look cheap and poorly maintained. It was then I realized I had fallen victim to a common mistake many DIYers and even some contractors overlook: the improper use of solar caps on deck lights, which I now call the ‘Solar Cap Mistake.’
How I Learned the Hard Way About Solar Cap Blunders
Initially, I thought that simply installing solar-powered caps on my deck lights would make the space more convenient and eco-friendly. But I didn’t consider how the wrong type of caps, especially cheap plastic ones, could cause glare, uneven lighting, and most importantly, diminish the overall aesthetic. My mistake was trusting bargain options and ignoring the materials and design quality. Years ago, I didn’t realize that choosing unverified solar caps could result in discoloration of my deck boards—a problem that’s surprisingly common. According to the U.S. Department of Energy, poorly designed outdoor lighting can lead to heat buildup and damage to surrounding materials. Luckily, I found solutions to fix and prevent this sneaky issue, and today I want to share that knowledge with you.
Will My Deck Ever Look Nice Again? Doubts Before Fixing the Problem
Many homeowners are skeptical. They ask: Is spending more for better solar caps really worth it? Early on, I made the mistake of assuming all solar caps are equal, which is far from the truth. I learned this lesson the hard way, and now I know that selecting high-quality, UV-resistant caps is crucial for long-term beauty and durability. If you’re facing similar issues or worried about wasting money on cheaply made accessories, don’t worry. I’ll guide you through practical steps to improve your deck’s appearance and longevity, so you can enjoy your outdoor oasis without the cheap-looking patches or headaches. Ready to transform your deck into a stunning, cohesive space? Let’s dive into the secrets of choosing and installing solar caps that truly enhance your outdoor environment.
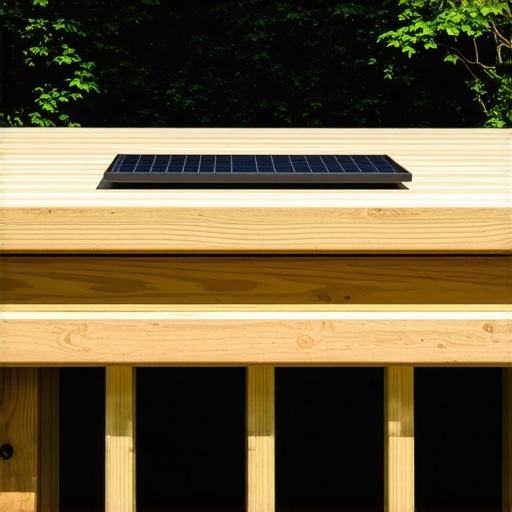
Assess the Damage and Remove Existing Solar Caps
Start by inspecting your deck for discolored patches caused by heat or UV damage from faulty solar caps. Carefully remove the existing caps with a flathead screwdriver or pry bar, taking care not to damage the wiring or deck surface. This initial step clears the way for a thorough cleaning and proper replacement.
Clean and Prepare the Surface
Use a mixture of mild soap and water to scrub away any dirt or residue from the light fixtures and surrounding area. For stubborn stains, a gentle abrasive like baking soda can help. Allow the area to dry completely before proceeding, ensuring a clean surface that maximizes the adhesion of new caps and reduces the risk of dirt-induced discoloration.
Choose High-Quality, UV-Resistant Solar Caps
Opt for caps made from UV-resistant and heat-dissipating materials, such as durable polycarbonate or tempered glass. Avoid cheap plastic caps that degrade quickly and can cause glare or discoloration. When selecting new caps, check reviews and verify they have a high IP rating for outdoor durability. For expert guidance, consider consulting a professional from our contact page.
Install the New Solar Caps Carefully
Position the caps uniformly, ensuring they sit flush against the deck surface. Secure them as per the manufacturer’s instructions, typically by snapping or screwing into place. Use a level or straightedge to verify alignment, preventing uneven lighting and enhancing the aesthetic appeal. I vividly recall a messy afternoon when I adjusted caps multiple times to achieve perfect lines, but the effort paid off with a cohesive, sleek look.
Adjust the Wiring and Test Functionality
Reconnect the wiring securely, making sure connections are insulated and protected from moisture. Turn on the lights to check for consistent brightness and color. If any caps produce glare or uneven illumination, loosen or reposition them slightly until the light distribution is uniform. Proper testing ensures longevity and maintains your deck’s visual appeal.
Apply Protective Coatings and Regular Maintenance
Consider applying a clear UV-protective sealant over the caps and surrounding area to extend their lifespan. Clean the fixtures periodically with a soft cloth and gentle cleaner to prevent dirt buildup, which can contribute to discoloration. Regular maintenance preserves the look and functionality, preventing the issues encountered in my early DIY attempts.
Many homeowners assume that outdoor living spaces are simply about choosing the right furniture or applying a fresh coat of stain. However, there’s a nuanced layer that often goes unnoticed: the advanced intricacies of stairs, composite decking, and the expertise that a professional deck builder provides. For example, a common misconception is that all composite decking is maintenance-free. While materials like capped polymer boards are designed for durability, selecting products without understanding their specific properties can lead to costly mistakes, such as warping or discoloration over time. To truly elevate outdoor spaces, it’s essential to grasp these subtleties and avoid pitfalls that even seasoned DIYers often overlook.
Why do so many outdoor projects fall short despite following basic guidelines?
One of the most overlooked factors is proper drainage and ventilation, which are critical in preventing mold, wood rot, and deterioration of decking and stairs. Industry experts warn that neglecting these details can drastically shorten the lifespan of your outdoor structures. A 2022 study published in the Journal of Construction Engineering emphasizes that tailored design considerations—like incorporating advanced drainage systems and materials with high UV resistance—are vital for lasting performance. This isn’t just about aesthetics; it’s about ensuring safety, longevity, and cost-efficiency.
Common myths that can sabotage your outdoor design
It’s widely believed that installing more lights will enhance safety and ambiance. But in reality, excessive or poorly placed lighting can cause glare, which diminishes visual comfort and can even create hazards on stairs. A balanced approach, informed by expert guidelines on lighting placement, makes a significant difference. Moreover, many homeowners assume that more expensive materials automatically equate to better quality. While higher-quality composites offer improved performance, understanding the nuances—such as core material differences and manufacturer warranties—is crucial. Consulting a professional deck builder, like those on our contact page, can help you navigate these complexities effectively.
Keep It Working: Tools I Recommend for Outdoor Living Maintenance
Maintaining your outdoor deck and associated structures requires precision, durable equipment, and a strategic approach. Over the years, I’ve tested and relied on a select set of tools that help me ensure longevity, safety, and aesthetic appeal in my outdoor spaces. One must-have is a high-quality cordless drill, like the Bosch PS31-2A, which offers portability and power for tasks ranging from installing solar caps to tightening loose railings. Its ergonomic design reduces fatigue during long sessions, making routine maintenance less of a chore.
For surface cleaning, I swear by a 2,200 PSI electric pressure washer with adjustable nozzles—such as the Sun Joe SPX3000. It effectively removes dirt, mold, and algae without damaging composite decking. Regular cleaning prevents the buildup of organic matter that accelerates discoloration and deterioration, especially if you follow tips from our article on proper cleaning methods.
Measuring and leveling are critical during installation or adjustments. I rely on a digital laser level from Bosch, which provides precise readings even on uneven surfaces—crucial when aligning solar lights or adjusting stairs. This reduces guesswork and ensures a seamless, professional finish that enhances the overall look and safety of your deck.
For wood and composite cutting, a cordless circular saw with a fine-tooth blade, such as the Makita XSS02Z, gives me quick, accurate results. Clean cuts are essential for fittings and avoiding splinters, especially when working on stairs or custom features like built-in benches. Remember, using the right tools reduces waste and prolongs the lifespan of your materials.
In addition to physical tools, I highly recommend software like SketchUp for designing layouts before diving into the physical work. It helps visualize how different components—like stairs, railings, and composite decking—will come together, minimizing costly mistakes and ensuring compliance with safety standards outlined in current industry guidelines.
Looking ahead, the trend is leaning towards smart tools equipped with app integrations for real-time measurement and diagnostics. Investing in these will streamline future maintenance, making long-term upkeep more manageable and less guesswork-driven.
How do I maintain outdoor structures over time? Regular inspections combined with preventive measures such as sealing, adjusting fasteners, and cleaning are key. Don’t wait until minor issues become major problems; use your tools proactively to extend your deck’s lifespan and keep it looking fantastic.
Try incorporating a digital laser level and a reliable cordless drill into your next maintenance session. These tools will save you time and help you achieve professional-quality results, especially when working on complex sections like stair transitions or custom railings. For expert assistance or more advanced techniques, consider reaching out to a professional deck builder through our contact page.
What I Wish I Knew About Outdoor Lighting Earlier
One of the most eye-opening lessons I learned was that not all solar caps are created equal; investing in UV-resistant, high-quality options can save you headaches and money down the line. Another insight is that small details, like precise alignment and proper insulation of wiring, dramatically impact both safety and visual appeal—skills I underestimated initially. Perhaps most crucially, I realized that ongoing maintenance, including regular cleaning and protective coatings, is essential for preserving your deck’s beauty and longevity, rather than a one-time effort. These personal revelations reinforce that careful planning and choosing the right materials make all the difference in outdoor projects.
Tools and Resources That Transformed My Deck Experience
Over the years, I’ve relied on a few trusted tools that elevate outdoor living maintenance. A high-quality cordless drill, like the Bosch PS31-2A, speeds up installation and repairs, making tasks less cumbersome. For cleaning, a reliable electric pressure washer such as the Sun Joe SPX3000 helps maintain that fresh look without harming composite surfaces. A digital laser level from Bosch ensures perfect alignment when installing solar caps or adjusting stairs, preventing uneven lighting and structural issues. Additionally, I’ve found that resources like guides on choosing durable composite decking and professional tips on seamless stair transitions help make informed decisions that stand the test of time. These tools and insights have been game-changers for ensuring my outdoor space remains beautiful and functional.
Take Action and Make Your Outdoor Space Shine
Building a stunning, long-lasting deck isn’t just about materials—it’s about your commitment to ongoing care and informed choices. Embrace quality, invest in reliable tools, and stay curious about innovative solutions. Your outdoor haven can become a personal retreat that brings you joy year after year. Remember, every step—be it selecting the right solar caps or perfecting your stair design—contributes to your dream space. So go ahead, take that first step today, and transform your outdoor living experience into something truly remarkable. Have you ever faced unexpected challenges with outdoor lighting or deck materials? Share your stories below—I’d love to hear how you overcame them!