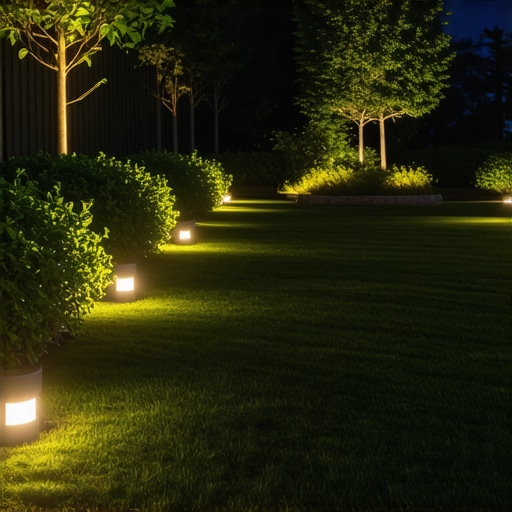
I remember the first time I attempted to install outdoor lighting on my deck. Eager to create a cozy, inviting atmosphere, I envisioned warm glow illuminating my backyard gatherings. But as I peered into the dark corners, I was face-to-face with a frustrating dilemma: how to wire those beautiful lights without ugly, visible conduits ruining the clean lines of my design? It felt like trying to hide a sour secret — no matter how much I planned, those wires kept giving me away. That lightbulb moment hit me hard: there had to be a better way.
The Beauty of Invisible Wiring: A Game-Changer in Outdoor Living
Imagine enjoying your outdoor space without the distraction of visible wires snaking across your deck or stairs. That’s the magic of mastering the art of hidden wiring. Not only does it enhance the aesthetic appeal, but it also reduces tripping hazards and creates a seamless, professional look that elevates your entire outdoor area. Over the years, I’ve learned that with a few clever techniques, you can achieve this elusive goal—wiring your outdoor lights without sacrificing style.
Have you ever faced the frustration of wires cluttering your perfect deck setup? If so, you’re not alone. Many homeowners get discouraged, thinking they need invasive conduits or expensive professional help. But the good news is, with some strategic planning and practical DIY tricks, you can overcome this hurdle. According to research from the American Lighting Association, well-placed outdoor lighting not only boosts curb appeal but also enhances safety and security—a win-win for any outdoor enthusiast.
In the sections ahead, we’ll explore the proven methods and insider tips that can help you achieve beautifully lit outdoor spaces without visible wiring clutter. Ready to transform your backyard into a sleek, inviting retreat? Let’s dive into the secrets that experienced deck builders swear by.
Plan Your Wiring Path Strategically
Before digging into installations, visualize where your lights will go and how wires will traverse your deck. Picture your property as a puzzle; every piece—light fixture, wire, and conduit—must fit seamlessly. I once marked out my path with chalk, tracing behind stones and under railings, to avoid running wires across visible areas. This foresight saved me from needing to hide unsightly conduits later.
Use Underdeck and Concealed Channels
Installing wires beneath your deck or stairs can be like hiding a secret passage. Use low-profile cable raceways or flexible conduit that can be tucked beneath the joists. For instance, I secured flexible plastic tubing along the underside of my deck’s framing, running wires inside. This approach kept the wiring invisible from above, maintaining a clean aesthetic. Be cautious to avoid pinching or damaging the cables during installation.
Secure Wires with Proper Fasteners
Anchoring cables is crucial. I used UV-rated zip ties and clips, fastening wires tightly along framing members. Think of this as keeping a garden trellis tidy; loose wires can sag or flap in the wind. Proper fastening prevents wear over time and keeps wires out of sight, especially around stairs and railings.
Drill through Decking and Structural Components
When wires need to pass through the decking surface, drilling precise holes is essential. Measure carefully to avoid splintering composite boards. I drilled through the deck joists at an angle, allowing cables to pass beneath the surface seamlessly. Using a spade or hole saw bit designed for composite material helped prevent chipping and gave a smooth passage for the wires.
Install Weatherproof Junction Boxes
Every connection point should be in a weatherproof box. I recessed junction boxes behind a corner post, making them virtually invisible. Not only does this protect the connections, but it also keeps the wiring hidden from view. Use waterproof covers and ensure boxes are properly sealed, just like any outdoor electrical installation.
Hide the Power Source and Transformer
Placing transformers and power sources underground or behind landscaping can hide them entirely. I buried my transformer in a small, decorative shrubbery planter, making it look like part of the landscape. This technique keeps power components out of sight and reduces the risk of accidental damage or tampering.
Test and Adjust for a Cohesive Appearance
Once installed, step back and assess the lighting setup. Adjust wire routing and fixture positioning to eliminate any visible cables. In my case, a little tightening and repositioning of clips made all wires disappear behind railings and under stairs. Remember, patience during this step ensures your outdoor space remains uncluttered and visually appealing.
While many homeowners believe that choosing the cheapest materials guarantees quick savings, seasoned deck builders know there’s more to the story—especially when it comes to composite decking and stairs. A prevalent misconception is that all composite materials wear similarly; in reality, not all are engineered equally. For example, some newer composite trends focus on mineral cores for enhanced fire resistance, offering superior longevity in certain environments, as detailed in the latest industry reports. Overlooking these nuances can lead to costly mistakes, like early warping or fading, particularly if you ignore UV resistance factors.
Another common mistake involves stair design. Many assume standard riser heights and tread widths suffice, but advanced outdoor projects demand precise calculations to ensure safety and aesthetic harmony. Incorrect uniformity can cause trips or discomfort, which is why consulting a professional can save your project from long-term issues. Properly designed stairs also facilitate seamless transitions between levels—an aspect often overlooked but vital for unified outdoor living spaces. For deeper insights on safe and stylish stair designs, visit our guide on top stairs innovations.
A critical area where misconceptions abound is concealed wiring for lighting. It’s tempting to think that running wires above ground isn’t problematic, but this approach increases exposure to the elements and damages. Skilled builders enforce underground conduits and weatherproof junctions, ensuring durability. This attention to detail can make the difference between a functional outdoor space and one that becomes a maintenance nightmare.
What most homeowners get wrong is underestimating the importance of precise framing, especially when integrating heavy features like hot tubs. Investing in steel framing or double joists isn’t just about weight capacity; it also significantly extends the lifespan of your deck, as experts have affirmed. Misjudging load requirements can result in sagging or structural failure over time.
Beyond material choices, nuances like properly installing drainage gaps beneath decks prevent rot and pest infestation—an often ignored detail that saves headaches later. Combining this with strategic placement of lighting and privacy features creates an outdoor environment that’s not only beautiful but also resilient.
Have you ever fallen into this trap of underestimated complexities? Share your experience in the comments! For comprehensive guidance, consider consulting a professional deck builder, who can help you navigate these subtle but critical details, ensuring your outdoor oasis stands the test of time. To see innovative ideas on transforming your space, explore our latest composite decking trends or learn about enhancing your outdoor living with expert tips.Maintaining your outdoor deck, stairs, and composite decking over the years requires the right tools and a proactive approach. One of my go-to investments is a high-quality cordless oscillating multi-tool. I rely on mine regularly for quick repairs, trimming loose or damaged deck boards, and cleaning tight spaces around stairs. Its versatility saves me hours and prevents small issues from becoming costly problems. Pair this with a pneumatic palm sander fitted with 220-grit sanding pads, which I use periodically to remove weathered finishes and prepare surfaces for re-coating—staying ahead on maintenance prolongs your deck’s lifespan. For cleaning, a powered pressure washer with adjustable setting is indispensable. I set mine to the lowest suitable pressure to clean composite decking without etching or damage. Programming a cleaning schedule with this equipment reduces mold and grime buildup, especially in shaded areas under stairs or porch covers. Remember, routine upkeep is key to keeping your outdoor living space inviting and safe. In the future, I predict advancements in smart assessment devices—like sensors embedded in deck structures to monitor moisture, wood strain, and decay—making maintenance even more precise and predictive. When it comes to long-term results, staying vigilant with these tools helps prevent minor issues from escalating. Curious about a specific tool or method? Visit our [contact page](https://deckdesignbuild.com/contact-us) to ask more.
How do I maintain my composite decking over time?
Regular cleaning with a soft-bristle brush and water, avoiding harsh chemicals, maintains appearance. Applying a water-repellent sealant every few years helps keep decks resistant to stains and moisture. Keep an eye out for loose or protruding screws, tightens nails, and potential warping—addressing these early saves money and preserves safety. For upgrading your deck’s durability and aesthetics, consider integrating hidden fasteners and protective coatings, as detailed in our guide on modern deck finishing techniques. Remember, using quality fasteners like stainless steel screws not only ensures structural stability but also resists corrosion, especially near coastal areas. Investing in proper tools and routine inspections will make deck maintenance less of a chore and more of an achievable DIY task. Take the initiative today—try using an oscillating multi-tool for your next repair. It’s a game-changer in quick fixes and detailed maintenance tasks, helping your outdoor space stay beautiful for years to come. For more expert tips and insights, explore our [deck builder insights](https://deckdesignbuild.com/deck-builder-insights-designing-your-dream-outdoor-space).
What I Wish I Knew Before Hiding Wires on My Deck
One of the biggest lessons I learned was the importance of meticulous planning. Darting wires behind pillars or inside walls without a clear blueprint often leads to chaos and unsightly messes. Taking the time to map out your wiring path saves headaches and keeps your outdoor oasis looking pristine. Also, I underestimated how much flexibility flexible conduit provides—it’s a game-changer for neat, concealed wiring.
Tools and Techniques That Turn DIY Into Art
Investing in the right tools makes all the difference. A high-quality cordless drill and a flexible conduit bender allowed me to navigate tricky spaces effortlessly. Using weatherproof junction boxes positioned behind existing features kept connections protected yet hidden. These resources, paired with a little patience, empower you to achieve professional results without hiring an electrician.
Stay Ahead: The Emotional Impact of Invisible Wiring
There’s a unique satisfaction in creating an outdoor space that feels both welcoming and flawlessly styled. When your wiring is hidden, the focus is on the ambiance—soft lighting that invites relaxation, without eyesore cables drawing attention away. To me, mastering concealed wiring elevates your entire outdoor experience, making every gathering feel like a touch of luxury.
Want to Keep Your Outdoor Space Perfect? Here’s My Secret
The key is ongoing maintenance combined with smart design. Regularly inspecting junctions, tightening fasteners, and cleaning beneath fixtures prevent issues before they start. Plus, choosing durable materials like UV-rated zip ties and weatherproof conduit extends the life of your wiring install. Remember, a little effort keeps your outdoor retreat looking—and functioning—remarkably well for years to come.
Have you faced challenges hiding wires in your outdoor projects? Share your experiences below—I love hearing about creative solutions or lessons learned along the way!