I remember the exact moment I realized my outdoor oasis was secretly rotting away. It was a sunny Saturday, and I was admiring my freshly built deck, proud of my DIY efforts. Suddenly, I noticed a slight give in one corner of the ledger board—a crucial connection where the deck meets your house. That small shift set off alarm bells, and I soon discovered that a common mistake in ledger board installation was to blame for my nightmare—house rot threatening my home’s integrity.
Protecting your investment and ensuring your outdoor living space stands the test of time hinges on understanding this silent killer. Today, I promise to share what I’ve learned about the ledger board error that can cause serious damage, and more importantly, how to prevent it. Because believe me, catching this issue early saved me thousands in repairs.
Why the Ledger Board Mistake Could Be Your Biggest Nightmare
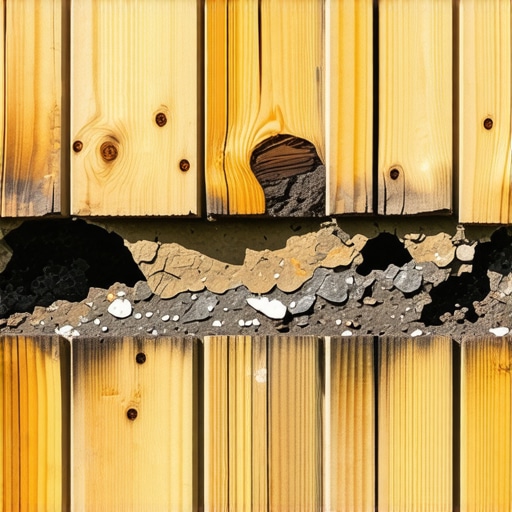
Have you ever wondered why some decks start to deteriorate or cause water problems inside your home? Well, a lot of it boils down to a simple yet overlooked mistake during installation: improper flashing and sealing of the ledger board. When water gets behind the ledger, it doesn’t just cause surface stains; it seeps into your wall framing, leading to rot, mold, and structural weakening. And the worst part? Many homeowners don’t realize the problem until it’s too late.
Early in my project, I made the mistake of assuming that a good seal was enough. I didn’t realize that without proper flashing and drainage, water could wade right into the house’s framing. Over time, moisture build-up caused hidden rot, which I only uncovered when I noticed some wall drywall swelling and a musty smell infiltrating my indoor space. That was a wake-up call.
According to experts, more than 60% of deck failures are linked to water damage caused by improper ledger installation (source: Home Improvement Institute). It’s staggering, yet avoidable if you know what to look for.
If you’ve faced similar fears—wondering if your deck is quietly damaging your home—know that you’re not alone. Many overlook the importance of correctly attaching and flashing the ledger. It’s a detail that seems minor, but as I learned the hard way, it’s vital for long-term durability.
Now, I’ll walk you through the specific steps to ensure your ledger board isn’t the weak link in your outdoor living plans. But first, let’s tackle some common skepticism about this topic—because I get it. You might think, “Is ledger flashing really that crucial?” or “Won’t regular sealing do the trick?” Let’s address those doubts next.
Secure a Solid Foundation: Prepare the Attachment Site
Begin by inspecting the area where your ledger board will attach. Remove any old siding or paint to expose a clean, dry surface. Use a level to check the wall’s flatness; if uneven, shim or adjust the framing as needed. Accurate preparation prevents future water intrusion and ensures a level deck.
Choose the Right Flashing Materials and Placement
Select corrosion-resistant flashing, such as 26-gauge galvanized or stainless steel, to direct water away from your ledger. Wrap the flashing under the siding and over the ledger before attaching it to the wall. Ensure that the flange extends at least 2 inches below the ledger to create an effective barrier. Proper flashing acts like a raincoat for your deck, guiding water away.
Secure the Ledger Board Correctly and with Proper Spacing
Attach the ledger with galvanized or stainless-steel lag bolts, not nails, to prevent loosening over time. Drill through the flashing and wall sheathing into the wall framing, not just the sheathing, for maximum stability. Maintain a 1/4-inch gap between the ledger and the house since this allows for drainage and ventilation, similar to how a rain gutter prevents water buildup.
Apply Sealant and Check for Gaps
Seal all joints, bolt holes, and around the edges with a high-quality, exterior-grade sealant designed for water barriers. Use a caulking gun to ensure a continuous, watertight seal, much like sealing a leak in a boat. This additional step minimizes water ingress and prolongs the life of your ledger.
Implement Drainage and Ventilation Strategies
Install and maintain proper drainage slopes behind the ledger, directing water away from the wall. Vents or open weep holes in the flashing allow trapped water to escape, functioning like tiny drains for your deck’s foundation. These measures prevent moisture from lingering and causing rot.
Validate Your Work with a Visual Inspection
Once assembled, visually verify that the flashing overlaps adequately, bolts are tight, and there’s a clear gap between the ledger and your siding. Use a level to double-check the ledger’s alignment. A thorough inspection mirrors a quality check, ensuring all components work harmoniously to protect your home.
Apply Finishing Touches and Regular Maintenance
Add sealant around bolts and seams periodically. Keep the ledger free of debris, leaves, or standing water. Regular inspections help catch minor issues before they escalate. Think of this like routine health check-ups — essential for longevity and peace of mind.Many homeowners and even aspiring builders fall into common traps when designing decks, stairs, or choosing composite materials, often because they rely on superficial knowledge or outdated myths. Let’s dig deeper into some of these misconceptions, revealing nuances that can save you time and money.
One widespread myth is that more extensive use of identical materials and straightforward designs always guarantees durability and style. In reality, advanced deck builders understand the importance of customizing details like stair designs or flashing techniques to suit specific environments. For instance, when installing outdoor stairs, considering the local climate and foot traffic patterns can make a significant difference, a nuance often overlooked by DIYers. Check out top stair design ideas for modern outdoor spaces.
Misunderstanding composite decking also leads to costly mistakes. Many think all composite boards are equal, but in fact, the core material varies and affects long-term performance. Mineral core composites, for example, offer better dimensional stability and resistance to moisture, a nuance discussed in this comprehensive guide. Choosing the wrong type can result in boards warping or fading faster than expected.
A critical yet often ignored detail is the precision in flashing and drainage solutions around ledger boards and stairs. Proper installation involves more than just covering the area with flashing; it requires understanding water flow patterns and ventilation. Skipping these nuances can enable hidden moisture ingress, leading to rot and mold inside the structure—a mistake I learned through bitter experience. Experts emphasize that even small oversights here become costly repairs down the line.
Are you aware of how the structural choices influence outdoor living comfort? For example, the height of stairs and the width of treads not only affect accessibility but also safety and aesthetics. Implementing the right measurements can create seamless transitions, enriching your outdoor experience. Curious? See this article for detailed insights.
Finally, one often-missed advanced mistake is neglecting proper ventilation and shading for composite decks. Without proper airflow, decks can become uncomfortably hot, and the surface may deteriorate faster. Integrating design features such as overhangs, pergolas, or strategic plantings can make a huge difference, a nuanced approach thoroughly covered in this resource.
Have you ever fallen into this trap? Let me know in the comments. Paying attention to these subtle details transforms a simple outdoor space into a durable, safe, and stylish retreat, saving you unnecessary expenses and regrets. Remember, mastery in deck building and outdoor design often resides in the nuances—those small choices and precise techniques most overlook.Maintaining your outdoor living area requires the right tools and a solid routine to ensure longevity. One essential piece of equipment I personally rely on is a **digital moisture meter**, such as the Protimeter Surveymaster. Using this device regularly helps me detect hidden moisture lurking behind siding or beneath decking boards, preventing costly rot before it becomes visible. This proactive approach aligns with expert recommendations found in [this technical resource](https://deckdesignbuild.com/the-hidden-cost-of-cheap-deck-screws-youll-pay-for-later).
For cleaning composite decking, I swear by a **stiff-bristle brush** paired with a dedicated composite deck cleaner. Unlike a garden hose, this combination tackles stubborn dirt and prevents surface grime buildup, maintaining that fresh appearance without damaging the material. Regular cleaning not only preserves aesthetics but also averts slip hazards—crucial for safety in high-foot-traffic areas.
When it comes to sealing and treating your deck, I recommend a **high-quality, water-based penetrating stain**. It penetrates deep without altering the surface texture, keeping the composite or wood well-protected against UV damage and moisture. Applying this product every 2-3 years, especially before winter, prolongs the structure’s lifespan and reduces the need for extensive repairs.
For stairs, a **laser distance measurer** like the Leica Disto offers pinpoint accuracy when measuring tread and riser dimensions. Precise measurements ensure that your stairs are safe and comfortable, which is especially important if you’re designing or remodeling your outdoor staircase to meet current standards. Properly fitted stairs prevent accidents and enhance the overall appeal, a topic extensively covered here.
Looking ahead, I predict that trendwise, smart maintenance tools will incorporate IoT sensors, providing real-time updates on moisture, temperature, and structural integrity. This technological leap could revolutionize outdoor space care by offering instant alerts and guided repair suggestions, saving homeowners from surprise pitfalls.
How do I maintain outdoor structures over time? Consistent inspections with a moisture meter, regular cleaning, resealing, and early repair of small issues are your best bets. Incorporating these practices now, alongside recommended tools, helps keep your deck and outdoor living areas not just beautiful but durable. Don’t hesitate—try out a digital moisture meter and see the difference it makes in extending your deck’s life. Ready to take your maintenance game up a notch? Check out our comprehensive guide to [designing safe and stylish stairs](https://deckdesignbuild.com/designing-safe-and-stylish-stairs-for-outdoor-decks-in-2025) for more expert tips.
The Hardest Lesson I Learned About Deck Building and Maintenance
During my journey into outdoor living, I discovered that the tiniest overlooked detail—like proper flashing—could make the difference between a durable deck and a costly disaster. It taught me that patience and meticulousness are invaluable, especially when caring for composite decking and stairs that must withstand the elements. Rushing through installation or neglecting maintenance can harbor hidden issues, leading to rot or safety hazards. Now, I make it a point to inspect and reinforce every component, knowing that small efforts yield long-term peace of mind.
3 Surprising Myths About Outdoor Decks That Held Me Back
One myth I believed was that regular sealing was enough; I didn’t realize how critical proper flashing and ventilation are to prevent moisture intrusion, especially around ledger boards. I also thought composite decking was entirely maintenance-free—that’s only half the truth. Recognizing these misconceptions saved me from unnecessary repairs and helped me choose smarter materials. Lastly, I underestimated the importance of designed drainage and airflow, which have kept my outdoor space safe, dry, and beautiful for years. Busting these myths has transformed my approach to outdoor living.
What No One Tells You About Crafting Safe and Stunning Outdoor Stairs
It’s easy to overlook the subtleties of stair design—like correct riser heights and secure handrail attachments—that ensure safety and style. Proper construction prevents accidents and enhances aesthetics, making your deck area more inviting. I’ve learned that investing time in precise measurements and quality fasteners, while considering weather influences, pays dividends. For more insights into elevating your outdoor space, check out top stair design ideas that can inspire your next project.
Tools and Resources That Made a Difference in My Deck Maintenance Routine
A digital moisture meter, like the Protimeter Surveymaster, has been crucial for early detection of hidden issues. Regular cleaning with a stiff-bristle brush helps preserve composite surface integrity, while a high-quality water-based stain prolongs the deck’s life. A laser distance measurer ensures accurate measurements for stairs and railings, preventing safety hazards. I trust these tools because they provide measurable results and peace of mind, unlike guesswork. For comprehensive guidance, our articles on seamless stairs and transforming outdoor spaces are invaluable resources.
Your Next Step: Embrace the Art of Outdoor Living with Confidence
Every deck, stair, and outdoor feature holds the potential to be a personal oasis—if you pay attention to the details, learn from experiences, and select the right tools. Remember, mastering outdoor living isn’t about perfection but persistence and passion. With informed choices and a proactive mindset, your outdoor space can become a haven for years to come. Want to share your progress or ask questions? Drop a comment below—I’d love to hear your stories and help you succeed!