It was a hot summer afternoon when I finally faced the reality that my tired, fading composite deck just wasn’t cutting it anymore. The kids’ bike tires left scuffs, and the faded color made the whole backyard look neglected. That’s when I had my lightbulb moment: why not replace that worn-out deck with a durable, elegant stone patio that would last for decades? Transitioning from composite decking to stone can seem overwhelming, especially with all the DIY advice out there promising quick fixes. But trust me, there’s a better way.
Why You Need to Consider a Stone Patio Over Composite Decking
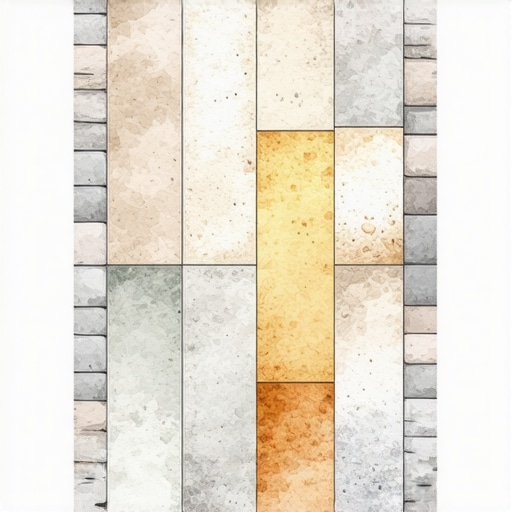
Let’s be honest: composite decking is popular because of its low maintenance. But over time, especially in harsh weather conditions, it can start to look tired, stained, and even damaged. I learned this early on when my boards warped and the fasteners loosened after just a few seasons. That mistake taught me the importance of thinking long-term about outdoor surfaces.
A stone patio not only boosts your home’s curb appeal but also adds significant value and durability. Natural stone withstands the test of time, resists weathering, and offers endless design options. Plus, as research indicates, stone surfaces can increase property value and are easier to maintain in the long run, reducing future costs and headaches. Interested in elevating your outdoor living space? Check out our guide on top stairs design tips for modern outdoor spaces, which complements a seamless transition from deck to patio.
Have you ever felt frustrated with your composite deck’s short lifespan or maintenance demands? You’re not alone. Many homeowners face similar dilemmas and wonder if there’s a smarter, more inviting alternative. Starting fresh with a stone patio could be the game-changer you need.
But how do you move from feeling stuck to creating a stunning new outdoor feature? Well, that’s exactly what I’ll walk you through next. Before diving into the DIY process, let’s address one of the biggest fears homeowners have about switching materials.
Is Installing a Stone Patio Really Worth the Effort and Cost?
Early in my project, I made the mistake of underestimating the complexity of working with natural stone. I thought it would be straightforward—just lay down some gravel and set the stones. But I quickly learned that proper foundation and planning are crucial for a long-lasting result. According to experts, skipping these essential steps can lead to uneven surfaces and cracking over time. To avoid common pitfalls, consider consulting a professional or at least reading up on foundation techniques. You can explore the benefits of working with a professional here.
Now that I’ve shared my experience, let’s delve into how you can plan your transition smoothly, ensuring your new stone patio will be the envy of your neighborhood for years to come.Begin by marking your desired patio area with stakes and string, ensuring the space aligns with your backyard layout. Use a spray paint or chalk to outline the perimeter clearly. Next, remove any existing grass, plants, or debris within the marked zone to create a clean working space. Excavate the area to a depth of about 6-8 inches, accounting for gravel and sand layers, using a utility shovel or power trencher for efficiency. Level the excavated area with a rake, ensuring a uniform surface, and then compact it thoroughly with a hand tamper or plate compactor to prevent settling over time. Spread a layer of coarse gravel, approximately 4 inches deep, and compact it firmly, checking for levelness with a level or straightedge. Following this, add a 1-inch layer of sand over the gravel, screeding it flat with a straightedge or screed board to create a smooth, even surface for laying stones. During my project, I used a loose gravel mix first, then realized the importance of proper compaction and leveling—skipping this step led to uneven stones and shifting later. After preparing your base, it’s time to lay the stones, starting from a corner and working outward, staggering joints for stability. Use a rubber mallet to gently tap each stone into place and a level to keep the surface even. Finally, fill the gaps with sand or fine gravel, sweeping it into the joints and compacting for a tight fit that prevents wobbling. This method ensures longevity and stability, transforming your outdoor space into a durable, attractive retreat.When it comes to designing outdoor stairs and decks, many homeowners and even some professionals focus solely on the visible elements—materials, aesthetics, or basic safety. But let’s dig deeper into the nuances that differentiate a truly durable, safe, and visually appealing outdoor space. One common misconception is that choosing high-end materials alone guarantees longevity. While premium materials like natural stone or advanced composite decking are essential, the real secret lies in understanding the complex interplay of structural support, weatherproofing, and load distribution. For instance, improper joist spacing or neglecting proper drainage can cause significant issues over time, leading to costly repairs or safety hazards.
A frequently overlooked aspect is the foundation beneath stairs and decks. Many assume a level ground is sufficient, but in reality, ground conditions vary greatly. Without proper footings and anchorage, even the most beautifully crafted stairs can sway, settle, or crack. According to structural experts, up to 70% of outdoor deck failures are due to foundation issues rather than material flaws. Don’t fall for the myth that surface-level upgrades are enough; the hidden support system is critical.
One of the most common pitfalls seen in DIY projects is installing stairs with uniform stringers on wide spans without accounting for load distribution. This mistake can cause treads to sag or wobble, compromising safety and comfort. A better approach involves precise calculations of load capacity and employing multiple stringers or specialized supports—details that most amateurs overlook. For advanced readers, considering the dynamic forces at play, including snow loads and foot traffic, is vital. Expert advice consistently emphasizes that achieving a seamless safety and aesthetic balance requires understanding these nuances.
Why does improper stair support lead to long-term problems, and how can I prevent it?
Proper stair support starts with accurate calculations of load, precise placement of stringers, and quality fasteners to prevent wobbling or collapse. Incorporating additional support brackets and using pressure-treated or metal components resistant to corrosion can vastly improve lifespan. When in doubt, consulting a professional or referencing trusted guides like our designing safe stairs article can save you from costly mistakes.
An extra layer of complexity lies in integrating outdoor lighting or decorative elements without compromising structural integrity. For example, installing post cap lights requires careful wiring considerations, so as not to weaken the support posts. A balanced approach, informed by expert insights, is key. For those ready to elevate their outdoor living, our resources on top stairs design tips offer valuable ideas.
In summary, understanding the unseen but critical support systems, foundation stability, and advanced load considerations helps avoid common pitfalls. It’s about more than just choosing materials; it’s about knowing where and how to support them. Remember, a well-designed, safe, and durable outdoor space results from attention to these hidden factors.
Have you ever fallen into this trap? Let me know in the comments.Maintaining your outdoor structures, like stairs and decks, demands the right tools and a consistent approach. I swear by a reliable cordless impact driver, such as the Milwaukee M18 Fuel, because it provides the power needed to tighten or replace fasteners quickly, especially when dealing with weather-resistant hardware like stainless steel or coated screws. For precision in aligning posts or checking levelness during repairs, I rely on a digital laser level like the Bosch GCL 25, which offers accuracy to within fractions of an inch over long distances, ensuring your structures stay safe and visually appealing over time.
Regular inspections are vital. I schedule quarterly checks for signs of rot, loose fasteners, or shifting foundations. A sturdy pry bar allows me to assess wood integrity and remove damaged sections promptly before issues escalate, saving time and money down the line.
When it comes to cleaning, I avoid harsh chemicals. Instead, I use a high-pressure hose combined with specialized cleaners designed for composite material, such as Corte-Clean, to remove algae or stains without damaging the surface. This approach prolongs the life of your decking and keeps it looking fresh for years.
Long-term results depend on deliberate upkeep. Applying a protective sealant tailored for your decking material, like the Penofin Hardwood Gel, helps resist moisture and UV damage. For stairs, reinforcing stringers with corrosion-resistant brackets ensures they stay structurally sound despite exposure to elements.
What’s more, I recommend investing in a small portable power sander with variable speed. It’s perfect for stripping down any rough spots or preparing surfaces for renewal. These tools not only extend the lifespan of your projects but also enhance safety by preventing slips or failures.
Looking ahead, I predict smart maintenance technology will become more accessible, allowing homeowners to receive real-time alerts about structural issues via mobile apps. This integration will revolutionize outdoor upkeep, making preemptive action easier than ever.
How do I maintain my outdoor structures over time
Regular inspections with a quality flashlight, like the Streamlight Protac, can reveal hidden problems before they worsen. Keeping fasteners tight, treating weathered surfaces, and promptly addressing settling issues create a cycle of preservation that supports long-term durability.
Finally, don’t forget the power of professional consultation. If you’re unsure about the integrity of your foundation or support systems, reaching out to specialists through our contact page can provide reassurance and expert guidance. Try implementing a scheduled maintenance routine with these tools and tips, and watch your outdoor living space thrive season after season.
The Deep Lessons I Learned About Outdoor Living
One striking realization was that attention to the unseen foundations can make or break a project’s long-term success, emphasizing the importance of investing in proper footing and support structures. I also discovered that integrating aesthetics with structural integrity isn’t just a detail—it’s the backbone of durable outdoor spaces. Additionally, I learned that patience during the planning and execution phases often saves time and money later, proving that rushing can compromise safety and style. Lastly, the importance of continuous learning became clear; staying updated with innovations and best practices can elevate your outdoor projects from basic to breathtaking.
My Toolbox for Outdoor Project Success
Three tools I trust deeply include a high-quality digital laser level like the Bosch GCL 25, which ensures precision and saves time on leveling. A reliable impact driver, such as the Milwaukee M18 Fuel, is essential for fastening tasks, especially when dealing with weather-resistant hardware. I also swear by a sturdy portable power sander for surface prep and touch-ups. For guidance, I often turn to industry-leading resources like expert articles on composite decking and stair safety guides, which have been instrumental in refining my approach.
Your Next Big Step Begins Today
Transforming your outdoor space with a durable, elegant stone patio or a thoughtfully designed deck is more than a project—it’s a journey toward creating a sanctuary that lasts. Embrace the learning curve, leverage trusted tools and advice, and remember that the right foundation—both literal and metaphorical—can elevate your outdoor living for years to come. Ready to make that leap?
Comments are closed.