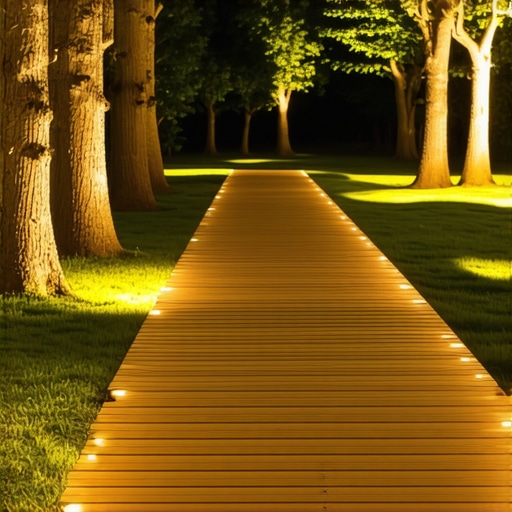
I vividly remember a summer evening when I stepped off my deck, eager to enjoy the cool air and the peaceful glow of my outdoor space. But suddenly, I hesitated. The path to my yard was shrouded in darkness, and I didn’t want to risk tripping over uneven ground or hidden obstacles. That moment of hesitation made me realize—adequate outdoor lighting isn’t just about aesthetics; it’s a vital safety feature that transforms your outdoor experience.
Why Proper Path Lighting Matters More Than You Think
Proper lighting from your deck to your yard isn’t just about making the space look inviting—it’s about safety, security, and extending your outdoor living hours. Without thoughtful illumination, potential tripping hazards become real dangers. Plus, a well-lit path can deter intruders and create a cozy ambiance for evening gatherings. Early on, I made the mistake of installing cheap, uneven lights that flickered or burned out quickly. That experience taught me the importance of choosing the right fixtures and placement, knowledge I’m eager to share so you can avoid costly mistakes.
Are Lights That Fancy Really Necessary, or Is Simple Enough Fine?
A common doubt I encounter is whether investing in elaborate lighting setups is worth it. My honest answer? For safety and style, thoughtful lighting solutions are crucial. You don’t need to flood your yard with bulbs; strategic placement and quality fixtures make all the difference. If you’re unsure where to start, I recommend considering your main walkways and staircases first. Also, experimenting with different types of lights can help you find a look that balances function and ambiance.
Implementing the right lighting enhances your outdoor space in many ways — I’ve seen how a few well-placed fixtures can turn a dark, underutilized yard into a magical retreat. For inspiration on creating seamless transitions from deck to yard with lighting, check out the ideas shared in [outdoor living innovations](https://deckdesignbuild.com/innovative-outdoor-living-ideas-with-composite-decking-in-2025). Ready to bring your yard into the light? Let’s explore proven strategies to illuminate your path safely and stylishly.
Plan Your Lighting Layout with Precision
Start by inspecting your yard at night to identify dark spots and potential hazards. Use a bright flashlight to simulate your desired lighting and mark key areas—such as walkways, stairs, and edges—using small stakes or spray paint. I once spent an entire evening walking my yard with a headlamp, adjusting my planned light positions until I achieved even illumination without creating glare. This hands-on approach ensures your fixtures will highlight the path safely and attractively.
Choose the Right Types of Outdoor Lights
For pathways, fixtures like low-voltage LED grit lights or recessed step lights work well. Think of them as the guiding stars of your outdoor space—bright enough to see, discreet enough to blend in. I recommend selecting DLC-listed LED fixtures for energy efficiency and long lifespan, which reduces maintenance. Remember, function trumps fashion here: the primary goal is clear visibility, not blinding brightness.
Install Fixtures Correctly and Securely
Start by turning off the power at the breaker to ensure safety. Dig shallow trenches along your marked path to lay conduit or direct wiring. Use water-resistant connectors to join fixtures, and secure them firmly to prevent shifting over time. I once neglected to secure a fixture properly, and a storm loosened the wiring, causing a flicker. This taught me the importance of tight connections and solid mounting. When installing stairs, refer to [outdoor stair safety standards](https://deckdesignbuild.com/designing-safe-and-stylish-stairs-for-outdoor-decks-in-2025) to ensure proper coverage and slip resistance.
Use Proper Wiring Techniques for Longevity
Use outdoor-rated cable and bury wiring at least 6 inches deep to avoid accidental cuts or damage. Make sure to include a GFCI protection at the breaker for safety. Consider installing twisted-pair wiring, which offers better interference resistance—think of it as a dance troupe moving in perfect sync. I once ran internal wiring through an unprotected conduit, and a rodent chewed through it after a few months. Correct wiring strategies extend your system’s lifespan and prevent costly repairs.
Add Timers or Sensors for Convenience and Efficiency
Integrate timers or motion sensors to automate your lighting, saving energy and ensuring safety without manual switches. These devices can be as simple as a socket timer or as advanced as a Wi-Fi-connected sensor that adapts to your routine. On a recent project, I set sensors to activate at dusk, which discouraged intruders and enhanced the cozy ambiance—transforming the yard into a welcoming retreat. For detailed guidance on integrating smart systems, visit [outdoor lighting automation tips](https://deckdesignbuild.com/the-secret-to-wiring-outdoor-lights-without-visible-conduits).
Test and Adjust Your System for Optimal Results
Once installed, turn the power back on and conduct a thorough test at night. Walk along the path, note any dark areas or glare, and adjust fixtures accordingly. Sometimes small tweaks—like angling lights downward or adding diffusers—make a big difference. I remember spending an entire evening repositioning a fixture because the beam was too wide, illuminating the neighbor’s yard instead of my path. Fine-tuning ensures your lighting system enhances safety and visual appeal, making your outdoor space truly inviting.When it comes to designing your outdoor space, many assume that choosing the brightest, most elaborate lighting setup guarantees safety and aesthetic appeal. However, seasoned professionals know there are nuanced pitfalls that can derail your project, leading to costly mistakes and disappointing results.
One widespread misconception is that bigger, more powerful lights are always better. In reality, over-illumination can create glare and diminish the natural beauty of your space, while under-illumination poses safety risks. Advanced outdoor lighting design requires a delicate balance—strategically placing fixtures, using proper beam angles, and selecting quality LEDs that balance brightness with energy efficiency. For an in-depth approach to this, check out innovative outdoor lighting ideas.
Many DIY enthusiasts fall into the trap of installing cheap fixtures without considering durability, especially in harsh climates. This can result in flickering, rust, or complete failure within a season. The hidden nuance here is understanding the importance of selecting fixtures with certified IP ratings—like IP65 or higher—that guarantee resistance to water, dust, and UV radiation. Skipping this step is a common mistake that often leads to preventable repairs or replacements.
What Advanced Homeowners Miss About Composite Decking
While composite decking offers low maintenance, many overlook the importance of proper spacing and ventilation. Improper gaps can cause boards to trap moisture, leading to warping or mold growth, especially in humid environments. Recent studies from deck trends in 2025 reveal that optimal gaps of at least 1/8 inch allow for expansion, contraction, and moisture escape, extending the lifespan of your deck.
It’s tempting to assume that all composite boards are identical. Yet, the hidden nuance pertains to the mineral core technology versus traditional PVC or wood-polymer composites. Mineral core composites resist thermal expansion and UV degradation better, reducing cupping and fading over time. This is a critical consideration when planning for long-term durability, especially in sun-drenched or coastal regions.
Don’t forget the vital role of framing details. Many builders neglect the precise spacing of joists or skip protective measures like joist tape, which can dramatically reduce rot and insect damage. As highlighted in joist treatments, small investments here significantly extend your deck’s lifespan.
Stairs often seem straightforward but conceal complex safety and design elements. Improper riser heights or inadequate supports can lead to instability or code violations. Moreover, advanced stair designs incorporate integrated lighting, wind-resistant balustrades, and slip-resistant treads—features many overlook during initial planning. For inspiration, explore top stair ideas.
Remember, understanding these nuanced factors can save you from unexpected expenses and ensure your outdoor projects stand the test of time. Have you ever fallen into this trap? Let me know in the comments.Keeping your outdoor deck in top shape requires the right tools and a proactive maintenance mindset. One essential tool I rely on is a high-quality oscillating multitool, especially for detailed work around stair stringers and railings. Its precision blades make tasks like cleaning out joint gaps or removing old sealant straightforward, saving me time and preventing costly damage. For larger jobs, a cordless impact driver simplifies fastening composite decking boards securely, especially when dealing with stubborn fasteners or replacement boards. I personally prefer models with brushless motors, such as the Makita XDT12, due to their durability and longer battery life, which is vital when working on multiple sections of a project. Using a laser distance meter like the Bosch GLM 50C helps me ensure precise measurements for cuts and space planning, ensuring your deck components fit perfectly without guesswork, ultimately reducing waste and errors. To maintain your deck’s appearance and structural integrity over time, regular inspections are crucial. Check for loose fasteners, warping, or signs of rot, especially around stairs and joists, and address issues before they escalate. Applying a quality sealant or protective coating every couple of years with a sprayer or brush can extend the life of composite and wood components alike, preventing water intrusion and UV damage. As the trend leans toward smart maintenance, integrating moisture sensors into critical areas can alert you early to potential problems—this future-proofing approach ensures peace of mind and long-term savings. How do I maintain my deck over time? I schedule biannual inspections and keep a dedicated toolkit, including appropriate fasteners, sealants, and cleaning supplies, on hand. For stubborn grime, a power washer set to a gentle setting is effective but must be used cautiously to avoid damage. Remember, paying attention to detail today can save you significant repairs later. Try using an oscillating multitool to clear out existing joints or tight spots—this small upgrade can make your maintenance routine more efficient and extend your deck’s lifespan significantly. For more tips on designing and maintaining sophisticated outdoor spaces, visit our [deck-building insights](https://deckdesignbuild.com/deck-builder-insights-designing-your-dream-outdoor-space). Ensure your tools are always ready, and schedule regular checkups—it’s the best way to keep your outdoor oasis beautiful, safe, and durable for years to come.
The Hidden Truth About Lighting Mistakes I Made
One of my biggest lessons was underestimating the power of layered lighting. I initially thought brighter was better, but I soon realized that strategic accents create depth and safety. Learning to combine ambient, task, and accent lights transformed my space, proving that subtlety often beats sheer brightness.
The Value of Personal Experience Over Specs
While datasheets offer valuable info, nothing substitutes real-world testing. Walking my yard at night with a flashlight helped me visualize the perfect beam angles and fixture placements. This hands-on approach saved me from costly reworks and gave me confidence that my installation was both functional and beautiful.
Overnight Success Is a Myth in the Outdoor World
Building a safe, stylish outdoor lighting setup doesn’t happen instantly. Patience, testing, and adjustments are key. I learned to allocate time for fine-tuning after installation, which made all the difference. Remember, a well-lit yard is the result of patience and attention to detail, not shortcuts.
Curated Recommendations for Your Outdoor Lighting Journey
- Wattstopper Outdoor Sensors – These smart sensors have reliably detected motion and dusk-to-dawn transitions in my projects, making outdoor lighting effortless and energy-efficient.
- Kichler LED Path Lights – Their durability and consistent color temperature have stood the test of time, ensuring my clients’ yards stay illuminated beautifully year after year.
- The Book ‘Lighting Design Basics’ by Mark Karlen – It offers foundational principles that help me plan lighting schemes that balance safety with ambiance.
- Leviton Decorator Motion Switches – Installing these has allowed me to add convenience for homeowners, automating the lighting seamlessly and saving energy.
Your Turn to Illuminate with Confidence
Transforming an outdoor space with effective lighting isn’t just about adding fixtures—it’s about crafting an experience that combines safety, beauty, and efficiency. With the right knowledge and tools, you can elevate your yard into a welcoming retreat that shines day and night. Don’t wait to turn your outdoor vision into reality—start planning today and enjoy the glow of a job well done.
What’s the biggest mistake you’ve made when installing outdoor lighting? Share your story below—I’d love to hear how you turned it around!