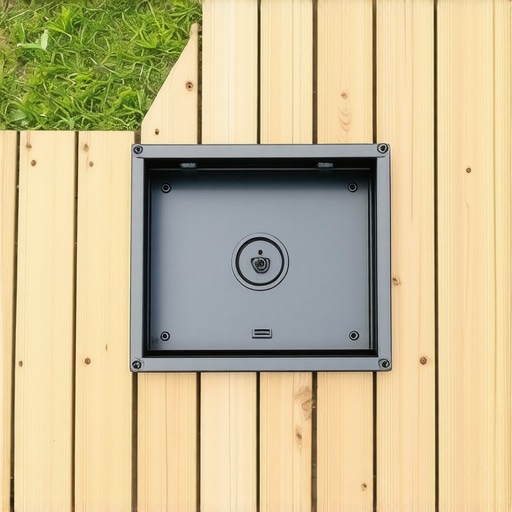
I’ll never forget the day the excavator finished the grading for my new yard, only for me to realize that a massive, grey concrete septic lid was sitting exactly where I planned to put my grill. It was a total eyesore. My first instinct was to just throw a heavy rug over it and hope for the best, but that’s a recipe for rot and a very angry septic technician. I actually made the mistake of framing a solid section of joists right over a cleanout once, thinking I’d ‘just unscrew it’ if the tank needed a pump. Six years later, when the backup happened, I was out there with a reciprocating saw in the rain, destroying my own work just to let the pumper in. It was expensive, messy, and entirely avoidable.
That Concrete Lid is Not the Boss of Your Backyard
If you are dreaming of a stunning outdoor living area but feel limited by utility access, I have good news: you can have your cake and eat it too. We aren’t just covering the tank; we are engineering a ‘trap door’ that blends so perfectly into your low-maintenance composite decking that guests won’t even know it’s there. Today, I’m going to show you how to frame a section that is light enough to lift but sturdy enough to support a crowd. The secret lies in using the same techniques we use when we frame a trap door for crawl space access, ensuring the structural integrity of the floor remains rock-solid while keeping the health department happy. Have you ever felt like a utility pipe or a tank lid was personally sabotaging your backyard design? I’d love to hear your horror stories in the comments.
Will a Removable Panel Actually Pass an Inspection?
This is the big fear everyone has, and for good reason. Most local codes are very strict about maintaining ‘unobstructed access’ to septic components. According to the Environmental Protection Agency (EPA), a typical septic system needs a professional inspection at least every three years, and if you’ve buried that access under four inches of fixed timber, you’re looking at a code violation. However, a properly designed removable hatch usually satisfies these requirements because it doesn’t require ‘permanent destruction’ to reach the tank. The key is making sure the panel isn’t so heavy that it requires a crane to move. If you’re worried about the technical side of the build, working with a professional deck builder can ensure your ‘hidden’ door meets every local safety standard without sacrificing the look of your yard. We want the transition to be seamless, not a trip hazard.
Build a Frame That Won’t Sag or Settle
To keep your deck from sagging where the hole is, you have to treat it like a window in a house wall. You cannot just cut a joist and call it a day; you need to redirect that load. I start by identifying the exact center of the tank lid and marking out a square that is at least six inches wider on all sides. This gives you vital wiggle room for the pumper’s hose and ensures you are not struggling with a tight fit when every second counts.
Double Up Those Joists for Extra Strength
One mistake I see constantly is DIYers trying to hang a hatch on a single joist. If you want a floor that doesn’t bounce, you should know why I always use double joists under composite seams and especially around access points. These act like headers, carrying the weight of the deck and the people standing on it around the opening. I remember a project in 2019 where I skipped the double-joist on a small access panel for a water shut-off. Within three months, the boards were dipping every time the homeowner walked near it. I had to crawl under there and retrofit a second joist, which is ten times harder than just doing it right the first time.
Construct a Hatch That is Easy to Lift
Once the frame is solid, you need to build the door itself. Think of it as a mini-deck that sits inside your main deck. You want to use the same low-maintenance composite decking to keep everything looking uniform, but keep the internal frame of the hatch light. I prefer using aluminum angles or a simple 2×4 box frame. When you frame a trap door for crawl space access, the goal is always a flush fit. If you leave too much of a gap, it is a trip hazard; too little, and the boards will bind when they expand in the sun. To keep the look clean, we use hidden clips for the field but screws for the perimeter of the hatch to ensure it stays locked in place when it is not being moved. This approach is key to transforming your space with expert deck builder tips that prioritize both form and function.
Keep Utility Access Truly Accessible
It sounds obvious, but you have to make sure you can actually lift the thing. I have seen hatches that weighed 150 pounds because the builder used 4x4s for the hatch frame. Do not do that. Use lightweight materials and consider recessed pull handles that sit flush with your boards. If the lid is near a change in elevation, you might even need to consider how it interacts with designing safe and stylish stairs for outdoor decks. You do not want a removable panel right at the landing of a staircase where it could compromise the structural integrity of stairs as key elements in outdoor living. Ensure the supports for your hatch are independent of the stair stringers to prevent any dangerous shifting over time.Everyone tells you that hidden fasteners are the only way to go for a premium look. While I love them for the main field, using them on a removable hatch is a rookie move. In my experience, if you try to use hidden clips on a panel that needs to come out twice a year, you’ll end up stripping the grooves or fighting a losing battle with a pry bar. Instead, I use color-matched structural screws for the perimeter of the hatch. It sounds counterintuitive, but it allows for a zero-clearance fit that stays secure until the moment you actually need to pull it up. This is part of the truth about maintenance-free decking claims—the boards are low-maintenance, but the engineering underneath requires smart choices to stay functional.
Stop Over-Engineering Your Hatch Fasteners
When you are transforming your space with expert deck builder tips, you have to account for the ‘oops’ factor of natural debris. If you build your hatch too tight, pine needles and grit will wedge into the gaps, essentially ‘gluing’ the panel into the deck. I always leave a consistent 3/16-inch gap around the entire perimeter. If you’re worried about the gap looking messy, why picture framing your deck is more than just a style choice becomes clear here—it creates a visual border that makes the gap look intentional rather than like a mistake.
How Do You Manage Thermal Expansion Without the Hatch Binding?
This is the advanced question that separates the pros from the weekend warriors. Composite decking expands and contracts significantly more than wood. If you install your hatch on a 40-degree morning with tight tolerances, that panel will be physically impossible to remove by 2:00 PM when the sun has been beating on it. This is why your composite boards are expanding more than expected, and on a small hatch, that expansion is concentrated. I always calculate for at least 1/8-inch of movement per 10 feet of board length.
The Hidden Danger of Standard Wood Stringers
Another nuance people miss is the interaction between the hatch and your stairs. Many builders think they can just notch a stringer to make room for a utility pipe, but that’s a structural nightmare. According to the North American Deck and Railing Association (NADRA), stair failures are the leading cause of deck-related injuries. If you compromise a stringer for a utility line, you’ve created a pivot point for rot. This is why I stopped using wood for deck stair stringers and moved toward steel or reinforced LVL for complex layouts. If you stick with wood, you must ensure you aren’t creating the mistake that makes your deck stairs trip hazards by allowing the stringers to settle at different rates than the main frame.
Don’t Let Your Hatch Become a Trap
Finally, consider the weight. A 3×3 foot hatch made of solid-core composite can easily weigh 60 pounds. If you don’t use innovative stairs solutions for safe outdoor deck access like gas struts or recessed pull-rings, you’re asking for a back injury. I once saw a homeowner try to lift a water-logged cedar hatch and drop it right on their toe—it wasn’t pretty. Have you ever fallen into this trap of building something so ‘permanent’ that you couldn’t actually use it when the time came? Let me know in the comments.When I’m in the thick of a build, the most important tool in my belt isn’t a saw—it’s my iPad. I never start a complex deck project without a digital 3D walkthrough first because it’s the only way to visualize exactly where that septic lid lands in relation to the joist layout. If you’re off by even two inches, you’re back to the drawing board. For the actual construction, I’ve moved away from standard impact drivers for the hatch frames and started using a high-torque right-angle drill. It allows me to get into those tight corners between the double joists where a standard drill just won’t fit. And when it comes to the hardware, I strictly use stainless steel structural screws instead of old-fashioned lag bolts. They have a lower profile and a much higher shear strength, which is vital when you’re constantly pulling a panel in and out.
How can you keep your hidden access door from sticking?
Maintenance is where most people fail. They assume ‘low-maintenance’ means ‘zero-maintenance,’ but that’s the truth about maintenance-free decking claims—the mechanical parts still need love. Twice a year, I take a thin putty knife or a specialized gap-clearing tool to remove organic debris. The best way to clean pine needles out of deck gaps is to use compressed air or a shop vac before they break down into compost. If that organic matter sits there, it holds moisture against your frame, and how to keep your deck joists from rotting becomes a much bigger conversation. Whatever you do, never power wash your composite deck near the hatch seams; the high pressure can force water into the utility tank or underneath the framing where it can’t easily evaporate. 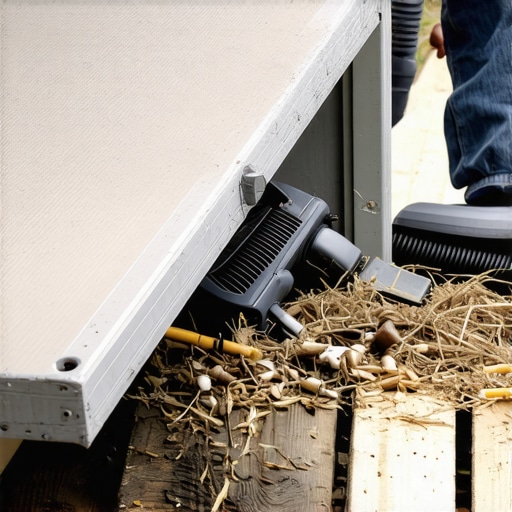 I predict that in the next few years, we’ll see integrated smart sensors becoming standard for utility-heavy decks. Imagine a deck that sends a notification to your phone when the septic tank is at 80% capacity or when moisture levels under the hatch are too high. According to the Simpson Strong-Tie Deck Connection and Fastening Guide, using G90 galvanized or stainless steel hardware is non-negotiable for any area with restricted airflow, like a utility hatch, to prevent premature corrosion. If you’re ready to take your project to the next level, I challenge you to try picture framing your deck hatch this weekend. It’s the single best way to make a functional utility access look like a deliberate design choice rather than an eyesore.
The Hardest Lesson I Learned About Deck Framing Over Pipes
After years of building, I realized that the perfect fit is actually your enemy. If you make that hatch too snug, the first time your composite decking experiences a 40-degree temperature swing, the boards will lock together like a puzzle you can not solve. I also learned that painting the top of the concrete septic lid matte black is a game-changer; it makes the utility disappear into the shadows of the framing so you do not see grey concrete through the 3/16-inch gaps. Finally, never assume the septic pumper hose is long enough; always leave a clear path from the driveway to that hatch when maximizing outdoor space for your guests.
#IMAGE_PLACEHOLDER_E#
Tools That Make Hidden Access Panels Actually Work
To pull this off, you need more than just a standard tool kit. I swear by structural screws because they offer incredible holding power without the bulky head of a lag bolt; check out the reason we use structural screws instead of old-fashioned lag bolts to see why they are essential for hatch integrity. I also recommend using a high-quality joist tape on every cut surface of your frame to prevent water from sitting in the seams. For the design phase, using a 3D modeling app is the only way to ensure your hatch does not collide with your picture frame border on a deck.
The Future of Your Modern Outdoor Space Starts Here
Do not let a utility lid dictate the layout of your dream backyard. By engineering a smart, removable access panel, you are transforming your space with expert deck builder tips that balance aesthetics with necessary maintenance. It is about taking control of your design and ensuring that your deck remains a place of relaxation, not a source of future headaches. What is the one utility eyesore in your yard that has been stopping you from building? Let us talk about how to hide it in the comments below!