
I remember the first time I built outdoor stairs that felt more like a dance than a climb. After hours of painstaking work, I stepped back to admire my handiwork—and immediately tripped over the very first step. Frustration tagged along with a realization: not all stairs are created equal. That’s when I discovered the magic of the 11-inch tread rule—an overlooked gem that transformed my approach to deck stairs.
Why Getting Your Stair Treads Right Matters So Much
When designing outdoor stairs, comfort and safety are paramount. An ill-proportioned tread can make even the most beautiful deck seem awkward and difficult to navigate. Early on, I made the mistake of assuming standard measurements would suffice, only to find family members gripping railings tightly or hesitating at the steps. It dawned on me—stair design isn’t just about appearance but about creating an experience that feels natural.
This insight led me down a fascinating rabbit hole of ergonomic design principles. The 11-inch tread rule, in particular, caught my attention. It states that stair treads should ideally be about 11 inches deep—any less, and walking feels rushed or cramped; any more, and the proportion looks odd or becomes unwieldy. According to experts, this specific measurement strikes a balance between safety and comfort, making your outdoor steps feel instinctively right.
But here’s the kicker: many DIY projects or even professional installs overlook this detail, resulting in stairs that are either too steep or unnaturally long. The consequences? Trips, slips, and frustration that could have been avoided.
Are you tired of designing stairs that don’t quite feel right? Have you faced issues with uneven or uncomfortable steps? You’re not alone. I’ve been there, and I can tell you—getting the tread depth right with the 11-inch rule could change your entire outdoor experience.
Before we dive into how to apply this rule effectively, it’s worth noting that early in my projects, I made the mistake of ignoring this detail altogether. It led to uneven risers and an overall sense of imbalance that’s hard to fix once the stairs are built. Trust me, learning from these mistakes has saved me countless hours—and strained knees. For more tips on designing safe and stylish stairs, check out [Designing Safe and Stylish Stairs for Outdoor Decks in 2025](https://deckdesignbuild.com/designing-safe-and-stylish-stairs-for-outdoor-decks-in-2025).
Now that we’ve established why this detail really matters, let’s explore exactly how to implement the 11-inch tread rule and why it makes your outdoor stairs feel genuinely natural and inviting.
Measure Your Stairs Precisely
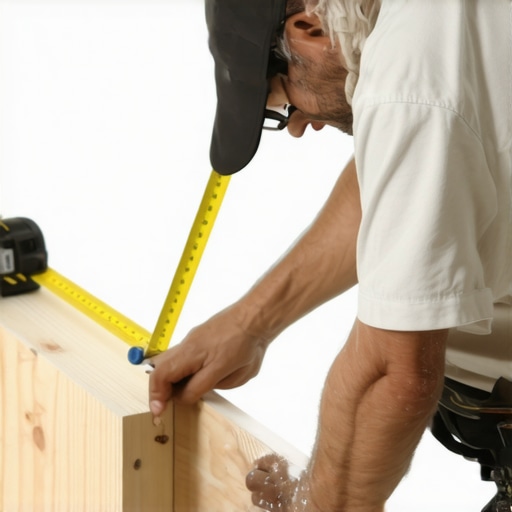
Start by determining the total rise from the ground to your deck level. Using a tape measure, mark the height of each riser, ensuring accuracy. For my last project, I used a chalk line to mark the riser locations, which helped keep everything straight and consistent.
Calculate the Tread Depth
To adhere to the 11-inch rule, measure 11 inches horizontally from the face of the riser along the stringer. Mark this point; this will be the front edge of your tread. This precise measurement ensures each step feels natural underfoot, reducing fatigue and increasing safety.
Mark and Cut Your Stringers
Using the calculated points, mark the cut lines on the stringers, ensuring they follow a consistent slope. I used a framing square and a speed square to draw the cuts precisely. Cutting the stringers with a reciprocating saw allowed for clean, accurate edges. Remember, every slight deviation can make your stairs feel uneven, so double-check your measurements before making cuts.
Tip: Use a Level During Assembly
As you attach the stringers to your deck frame, verify each tread’s level with a carpenter’s level. This step prevents any wobbling or tilting once the stairs are completed, which can happen if the stringers are slightly uneven.
Install Treads with Consistency
Cut your composite decking boards to 11 inches deep, matching your calculated tread depth. When securing these to the stringers, use corrosion-resistant screws, tightening them just enough to prevent movement but not so tight as to cause damaging stress. I chose stainless-steel screws for durability, especially since these stairs will face the elements.
Check Your Work Frequently
After installing each tread, step back and test their feel. It’s easier to correct small misalignments early, rather than after completing the entire staircase. When I built my first set, I caught a slight asymmetry early on by simply stepping back and visualizing. It saved me hours of rework later.
Visualize the calculation and cutting process with an illustration showing the stringer being marked at exactly 11 inches for the treads, emphasizing precision.
Fine-Tune the Details
Once all steps are installed, ensure that all treads are level and evenly spaced. Small adjustments can be made by sanding or shim adjustments under the stringers. Remember, minor tweaks enhance overall safety and comfort, making your outdoor space truly inviting.
This process might seem meticulous, but paying attention to each measurement step results in stairs that are both safe and delightful to walk on. For more design tips, consider exploring innovative stair solutions to elevate your project even further.
When it comes to designing and building with composite decking and outdoor stairs, many homeowners and even DIY enthusiasts fall prey to misconceptions that could compromise safety and longevity. One prevalent misconception is that all composite materials are created equal. While it’s true that many composite decks boast low maintenance and durability, the reality is that not all products are suitable for every climate or application. Experts emphasize the importance of selecting a high-quality, UV-resistant composite, especially for outdoor stairs exposed to sunlight, to prevent fading and warping over time. Skipping this nuance can lead to costly replacements sooner than expected.
Advanced MistAKE: Are Hidden Fasteners Actually the Best Choice?
Many believe that hidden fasteners are a universal upgrade over traditional screws, but in my experience, this isn’t always the case. Hidden fasteners can sometimes cause uneven surfaces if not installed perfectly, leading to trip hazards. Moreover, they often require specialized tools or specific boards, increasing project complexity and cost. Industry studies suggest that a careful combination of quality fasteners and expert installation yields optimal results. It’s crucial to understand the specific needs of your deck layout before choosing fastener types.
To avoid common pitfalls, consider consulting with a professional deck builder who understands these nuances — their insights can save you time and money. For guidance on how to maximize your outdoor space with the right design principles, see how modern design tips can enhance your project. Remember, rushing the selection process or ignoring material specifications may lead to issues down the line. Want to dive deeper into the complexities of composite decking? Check out choosing the right decking for your needs to make informed decisions. Have you ever fallen into this trap? Let me know in the comments.Maintaining your outdoor living space requires the right tools and a consistent approach. I always recommend investing in a quality angle grinder fitted with a diamond blade—it’s invaluable for cleaning and restoring composite decking surfaces, especially when dealing with stubborn stains like red wine or moss. A cordless oscillating tool with various attachments is perfect for tight spots and detailed work, ensuring your deck remains in top shape without the hassle of cords.
For sealing and waterproofing, I swear by a high-quality penetrating sealant. Applying it annually with a roller or brush provides a protective barrier against moisture and UV damage, significantly extending your deck’s lifespan. Remember, regular cleaning with a soft-bristle brush and mild soap prevents dirt buildup, reducing the need for harsh scrubbing.
Embracing these tools and routines has helped me keep my deck looking pristine year-round. As technology advances, automated drone inspections and AI-powered maintenance scheduling could become standard, making upkeep even simpler. In the meantime, routine checks and proper cleaning are your best bets.
How do I maintain composite decking over time
Consistent maintenance is key. Use a deck washer attachment on your power washer to remove debris without damaging the surface—be cautious to keep the pressure below 2,000 PSI. Periodically inspect for loose fasteners or warped boards; tightening or replacing them promptly prevents further damage. Incorporating slip-resistant coatings can enhance safety, especially in wet conditions.
I recommend scheduling an annual professional inspection to identify minor issues before they escalate. Professional deck builders can spot signs of structural wear that might go unnoticed during regular checks. For expert insights, check out the benefits of working with a professional deck builder.
One advanced tip I suggest is treating your composite decking with a UV-protectant spray every two years. This maintenance step helps prevent fading and preserves color vibrancy. It’s a small investment for long-term beauty and durability.
Looking ahead, tools like smart sensors embedded in decking can monitor structural integrity and environmental exposure in real time—future tech that promises to revolutionize outdoor maintenance. For now, sticking to routine cleaning and inspections ensures your deck remains a beautiful, safe outdoor sanctuary. Give this UV-protectant trick a try and enjoy how it keeps your space looking fresh for years.
The Hidden Truth About Perfect Stairs I Wish I Knew Sooner
One of the most valuable lessons I learned in outdoor living design is that small details, like the precise 11-inch tread rule, can dramatically elevate the safety and comfort of your deck stairs. I used to think that visual appeal alone was enough, but true mastery comes from understanding the ergonomic secrets behind every step. Making the mistake of ignoring these nuances initially cost me unnecessary rework and frustration, but now, I can build stairs that feel natural underfoot and stand the test of time.
The Tools and Knowledge That Transformed My Deck Projects
My essential toolkit now includes a trustworthy tape measure, a framing square, and a level—simple tools that, when used correctly, save countless hours. I also rely on insightful resources like guides to selecting durable composite decking and expert blogs that clarify material nuances. These sources have helped me choose quality components and avoid common mistakes, ensuring my outdoor stairs are both beautiful and safe.
Inspiring you to embrace the details and elevate your outdoor space
Designing outdoor stairs with confidence is within your reach, especially when you focus on the fundamentals like the 11-inch tread rule. Don’t overlook the power of precise measurements and quality tools—they’re your best allies in creating an inviting, safe, and durable deck. Remember, every great outdoor space begins with a solid foundation, both literally and figuratively. So, take that first measured step today, and turn your backyard into your personal retreat. Have you ever faced a challenge with stair design? Share your experience below—I’d love to hear your story and help guide your next project.