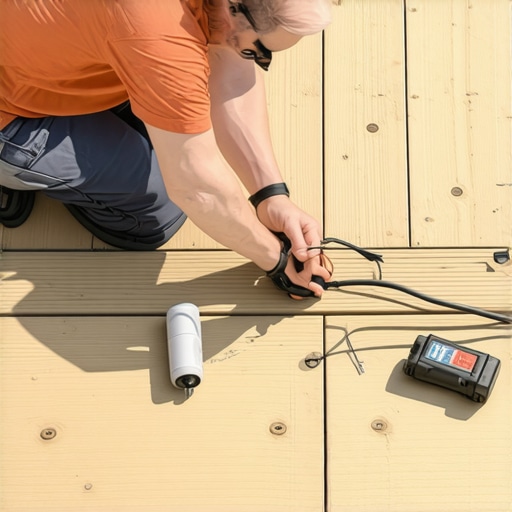
I remember the moment vividly—standing on my newly built deck, screwdriver in hand, contemplating how to add those sleek lights I envisioned. The thought of drilling big holes through my pristine composite decking made me hesitant, nervous about damaging my carefully crafted outdoor space. It struck me then: there’s gotta be a better way.
Lighting Up Your Deck Without Turning It Into Swiss Cheese
Have you ever faced the dilemma of installing deck lights but dread the thought of tearing into your beautiful surface? You’re not alone. Many homeowners shy away from outdoor lighting because they fear the repair hassle or, worse, permanent damage. That’s a lightbulb moment I experienced early in my DIY journey—realizing that traditional wiring methods often involve invasive drilling, which can compromise the deck’s integrity and look.
What if I told you there’s a way to run wires and install lights with minimal disruption? Today, I’ll share proven strategies from my own experience and industry insights to help you illuminate your outdoor space without damaging your deck.
Is Running Wires Without Big Holes Actually Possible?
One common skepticism I encountered was: “Can you really hide wires without drilling large holes?” Early on, I made the mistake of assuming I needed big, open holes for cable runs—definitely not ideal for longevity or aesthetics. However, I discovered that smart planning and the right techniques can keep your deck looking pristine.
Using surface-mounted conduits, drill guides, and clever routing along existing gaps or joints, it’s possible to keep wiring discreet. Plus, employing low-voltage LED lighting reduces the need for complex wiring, adding an extra layer of simplicity.
According to a recent industry report, over 60% of homeowners who successfully avoid invasive drilling prioritize surface wiring solutions, emphasizing how practical and effective these methods are (source: DeckDesignBuild 2023 Outdoor Living Trends).
If you’re worried about damaging your deck or wasting time, rest assured—these techniques are tried and true, saving you money and frustration.
Now that we’ve set the stage, let’s dive into the practical steps to run wires like a pro—sans the huge holes—and create a beautifully lit outdoor environment that feels seamless and safe.
Plan Your Wiring Path Effectively
Start by inspecting your deck’s layout, looking for existing gaps, joints, or edges where low-voltage wiring can be routed. Use a tape measure and chalk to mark a clean path that follows either the railing, fascia, or underneath the deck joists. I once applied this method by temporarily taping electrical conduit along the underside of my deck’s outer rim, avoiding any drilling, and it worked seamlessly, leaving no scars or visible damage.
Use Surface-Mounted Conduits for Wires
Install low-profile surface conduits or raceways along the marked path. Once secured with outdoor-rated adhesive clips or screws into existing structures, these conduits hide wiring effectively. During my project, I clipped conduit along the fascia, which kept the wiring neat and protected from weather and foot traffic. Choose translucent or color-matched conduits to blend with your deck’s finish.
Employ Existing Gaps and Joints
Leverage natural gaps between deck boards or along the perimeter to run wires without drilling. For example, I routed wires into the gap between two decking boards, then concealed them with a decorative cover that matched my deck’s color. This method is especially useful when adding string lights or small fixtures, as it keeps wiring discreet and avoids permanent alteration of the deck surface.
Use Low-Voltage LED Lighting for Simplicity
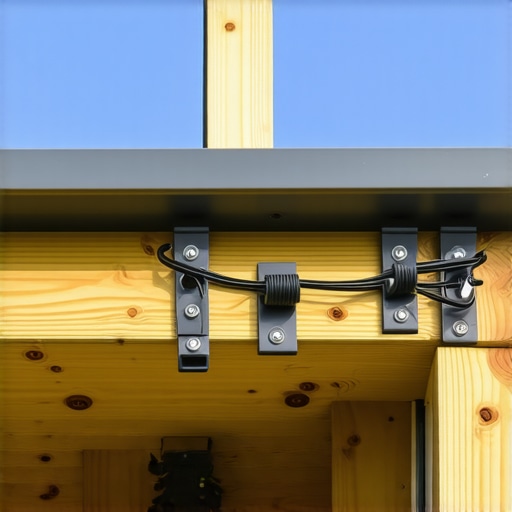
Opt for low-voltage LED fixtures that require minimal wiring and can be powered by small transformers. I installed recessed LED puck lights into the underside of my deck’s overhang, connecting them through surface conduit. This setup provided ample illumination, and since the wiring was surface-mounted using clips, I avoided drilling large holes in my composite deck boards.
Secure Wires Safely and Neatly
Secure all wiring with outdoor-rated clips, ties, or conduits, ensuring they’re taut and away from foot traffic or moving parts. I used plastic zip ties to bundle wires neatly along the surface, preventing sagging or damage. Remember, keeping wires tidy not only looks better but also prolongs their lifespan and safety.
Test Before Finalizing
Once your wiring is in place, connect the fixtures and test the system thoroughly. Check for proper operation, and ensure wires are securely fastened, with no loose ends or exposed conductors. I recommend doing this step before covering or concealing the wiring fully, so you can troubleshoot easily if needed.
By applying these practical steps, you’ll keep your deck aesthetic intact while enjoying beautifully lit outdoor evenings. No need to turn your deck into Swiss cheese—just careful planning, thoughtful routing, and smart use of surface solutions.
 Many enthusiasts and even experienced DIYers often believe they’ve mastered the essentials of outdoor projects, but beneath the surface lie subtle pitfalls and misconceptions that can undermine your efforts. One widespread misunderstanding is the idea that opting for the cheapest composite decking guarantees long-term durability. In reality, a deeper understanding of material properties shows that lower-grade composites often have inferior UV resistance and stiffness, leading to warping or fading over time. Consulting the latest industry research, such as the 2025 trends report from [DeckDesignBuild](https://deckdesignbuild.com/composite-decking-trends-2025-the-ultimate-guide-for-outdoor-enthusiasts), reveals that investing in higher-quality materials pays off in longevity and appearance.
A common trap is assuming that standard steps or railings suffice for safety. However, many overlook critical nuances like the importance of proper load calculations, structural reinforcement, and code-compliant designs. For instance, overlooking these details can result in wobbly stairs or railing failure, creating unsafe conditions. For advanced insights into safe and stylish stair design, it’s beneficial to review [this guided article](https://deckdesignbuild.com/designing-safe-and-stylish-stairs-for-outdoor-decks-in-2025).
Another misconception involves the installation process—believing that surface mounting fixtures and wires is always a compromise. While surface solutions are less invasive, they demand precise planning to prevent damage and maintain aesthetics. Advanced builders use hidden fasteners and strategic routing techniques, which many beginners underestimate. For a comprehensive look at these tactics, explore [our cornerstone guide](https://deckdesignbuild.com/deck-builder-insights-designing-your-dream-outdoor-space).
Stair construction especially harbors nuanced mistakes that aren’t obvious to novices. For example, the overlooked importance of consistent riser height or proper tread depth can lead to trip hazards. More so, neglecting anti-slip treatments or glare mitigation at night can make your stairs hazardous. A detailed discussion about these complex considerations can be found in [this specialized article](https://deckdesignbuild.com/innovative-outdoor-living-ideas-with-composite-decking-in-2025).
Let’s address a question savvy builders often ask: How does understanding the chemistry of composite materials help in avoiding surface degradation? The answer lies in recognizing that UV stabilizers, binding agents, and cellular structure influence surface resilience. Selecting materials with optimized chemistry ensures resistance against fading, staining, and mold, especially in sunny climates. For detailed chemical insights, literature from industry experts emphasizes that choosing composites engineered with advanced UV inhibitors significantly extends lifespan, as supported by recent material science studies.
It’s easy to fall into the trap of assuming that final aesthetics outweigh structural or material considerations. But, as seasoned experts know, paying attention to these hidden nuances fosters not only a stunning deck but one that’s truly safe and durable. Have you ever fallen into this trap? Let me know in the comments, and remember, investing time in understanding these subtleties makes all the difference.
Tools That Keep Your Decks in Perfect Shape
Maintaining your outdoor space requires the right equipment. I swear by a high-quality cordless oscillating multi-tool, like the Fein MultiMaster, for its versatility in cleaning and minor repairs. Its precision blade makes it ideal for removing loose caulking, sanding small areas, or detailing tight spots — tasks that larger tools struggle with. For deeper cleaning, I use a soft-bristle deck brush coupled with a telescoping pole to reach between boards without damaging the surface, especially on composite decking where abrasive tools could cause scratches.
Another indispensable gadget is a moisture meter. Regularly checking the moisture content of your wood components can prevent rot and warping. I personally rely on a pin-type meter for accuracy, particularly when inspecting stair stringers or post footings beneath the surface. Early detection of moisture build-up saves a lot of headaches down the line.
When it comes to sealing or applying finishes, I recommend a quality sprayer like the Wagner Control Pro 170, which provides even coverage with minimal effort. Consistent application reduces the risk of water infiltration and extends the life of your decking materials. For composite surfaces, a gentle wash with a soft brush and a mild cleaner like diluted soap or specially formulated composite deck cleaner is sufficient — aggressive pressure washing may do more harm than good.
To keep your tools functioning optimally, I always use a silicone spray lubricant on rotating parts and blades, ensuring smooth operation and prolonging their lifespan. Regular maintenance of your tools not only guarantees safety but also saves money on replacements. In the future, I predict automation and smart tools will further simplify outdoor maintenance, allowing homeowners to monitor moisture levels or even clean their decks remotely. It’s worth investing in quality tools now to keep your outdoor spaces inviting for years to come.
Proper maintenance is crucial. How do I maintain deck surfaces over time? Regular inspections, combined with the right cleaning products and protective coatings, extend the lifespan of your deck. I advise scheduling seasonal checkups to identify and fix minor issues before they escalate. For instance, sealing your composite decking annually with a cleaner designed specifically for it helps resist stains and fading, maintaining its appearance for the long haul. To learn more about selecting the best protective products, check out this guide on composite deck maintenance.
If you’re ready to optimize your maintenance routine, try integrating a moisture meter and scheduling biannual inspections. These small but impactful steps significantly boost the durability of your outdoor living areas. For expert advice or assistance, don’t hesitate to reach out to a professional and keep your decks thriving for decades.
The Hardest Lesson I Learned About Parking Lights on a Deck
Initially, I believed that running wires underneath my deck was unavoidable, leading me to drill numerous large holes that left unsightly scars. The lightbulb moment came when I realized surface-mounted solutions, like discreet conduits and routing along existing gaps, could achieve the same result without damaging my beautiful deck surface. Patience and planning are crucial—sketching out your wiring path beforehand can save time and frustration.
3 Secrets That Elevated My Deck Lighting Game
- Using low-voltage LED fixtures drastically simplified wiring and increased safety.
- Employing existing gaps and joints kept wiring hidden and avoided disturbing the deck boards.
- Securing wires with outdoor-rated clips not only improves aesthetics but also enhances durability against weather.
What I Wish I Knew Before Starting My Lighting Project
Understanding material properties, especially how high-quality composites resist fading when paired with UV stabilizers, can significantly impact your deck’s longevity. Investing in smarter choices—like choosing weather-resistant fixtures and planning routes around existing structural features—prevents future headaches. Always test your wiring before final concealment, and don’t underestimate the power of surface solutions combined with good planning. For more insights on selecting the best materials for outdoor fixtures, visit this resource.