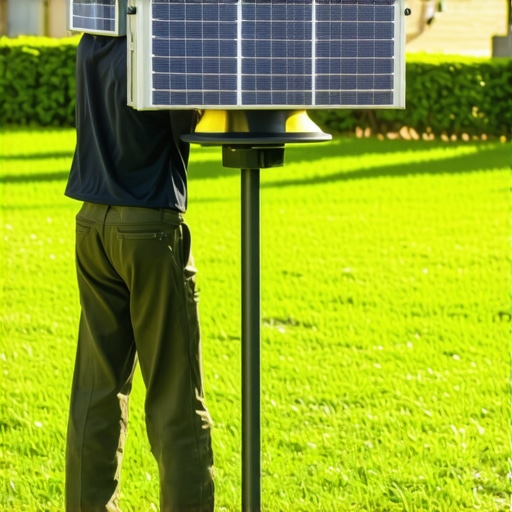
I remember the moment clearly — after finally installing a row of solar lights along my garden pathway, I was excited to enjoy warm evenings outdoors. But come spring, half of those lights were flickering or completely out. Frustration set in. Why do solar lights seem to last just a season or two, leaving your yard dim and dull?
Why Your Solar Lights Keep Failing — And What Really Works
Many homeowners fall into the trap of thinking all solar lights are created equal. The truth is, poor quality fixtures, cheap batteries, and improper installation can turn your outdoor illumination into a short-lived nightmare. Early on, I made the mistake of choosing inexpensive lights without checking reviews or understanding their design. That mistake cost me dearly — replaced batteries yearly, and still, some didn’t last beyond a summer.
Fortunately, after some trial, error, and a bit of research, I discovered proven strategies that help solar lights not just survive but thrive year after year. In this post, I’ll share the practical tips I wish I knew earlier, so you don’t waste money or time on products that won’t stand the test of time.
**Have you faced this problem? Are your outdoor lights flickering or dying sooner than you’d like?** If so, keep reading — I’ve got solutions that can transform your yard into a beautifully lit oasis that endures for seasons to come.
Is All Solar Lighting Worth the Hype?
Initially, I believed that any solar light would do the trick. But I learned the hard way that not all are designed for durability or full functionality. Early on, I ignored the importance of quality components; for example, using lights with cheap solar panels that underperform in cloudy weather. Did you know that a high-quality solar panel can generate more power in less sunlight, extending the life and brightness of your lights? According to industry experts, investing in better components dramatically improves longevity — and saves you money in the long run.
Getting the basics right is key. That’s why I recommend careful product selection and proper installation. Think of solar lights not as cheap décor but as long-term investments in your outdoor ambiance. And the good news? With the right approach, you can enjoy radiant evenings for many seasons.
Next, I’ll walk you through the essential steps to ensure your solar lighting setup is optimized for durability and performance. Ready to shed some light on how to make those outdoor fixtures truly last? Let’s dive in.
Choose High-Quality Solar Fixtures
Start by selecting solar lights with robust components, such as high-efficiency solar panels and corrosion-resistant casings. I once replaced a batch of budget-friendly lights after just one season; switching to premium fixtures eliminated that recurring expense. Look for reviews emphasizing longevity and performance, especially in your climate.
Install Properly for Maximum Exposure
Placement is key. Position lights where they receive full sun during the day, avoiding shaded areas behind trees or structures. When I installed mine along a shaded corner, I initially thought placement didn’t matter—until they barely lit at night. Clear, unobstructed sun exposure boosts battery charging and light output.
Prepare the Site Carefully
Prior to installation, clear debris and ensure the ground is level. Use a spade to loosen soil, then set the stake firmly so the solar panel remains upright. I learned this when my lights kept tilting or falling, causing inconsistent performance. A stable, level base is the foundation of durability.
Optimize Battery Maintenance
Regularly check and replace batteries as recommended. I once overlooked this, which led to dim lighting mid-summer. Use rechargeable batteries recommended by the manufacturer, and replace them every couple of years for consistent brightness. This simple step can triple the lifespan of your lights.
Protect Against Environmental Damage
Shield lights from harsh weather with strategic placement—avoid puddles, heavy rain zones, or places with snow buildup. Use weatherproof housings if necessary. My experience installing lights near a pond taught me that splash resistance is vital for longevity. Applying clear sealant over connectors can also prevent corrosion.
Adjust for Seasonal Variations
In winter, shorter days mean less sunlight. Manually adjust the angle of solar panels or relocate lights temporarily to maximize exposure. I experimented with tilting panels during winter, which noticeably improved illumination. Seasonal tweaks can significantly extend the usefulness of your setup.
Regularly Clean and Inspect
Keep solar panels clean from dust, leaves, and bird droppings. Use a soft cloth and mild detergent, as I did when my lights lost brightness after a dusty summer. Regular inspections help identify issues early, such as cracked panels or damaged wiring, preventing larger failures.
When it comes to designing stunning outdoor living spaces, many assume that choosing composite decking and engineered stairs is a straightforward decision. However, beneath the surface lies a web of misconceptions that can lead to costly mistakes. For instance, it’s commonly believed that all composite decking is maintenance-free; in reality, different brands and materials require tailored care to ensure longevity. As a seasoned deck builder, I’ve seen clients fall for the myth that cheaper options last as long as premium brands, which isn’t true—premium composites often feature advanced UV inhibitors and better fade resistance, backed by industry research such as the “2025 Decking Trends” report.
Are Modern Composite Decks Truly Damage-Resistant?
Many think composite materials won’t scratch or stain easily, but aggressive cleaning agents or heavy furniture can damage surface finishes. Improper installation, especially overlooking proper flashing or drainage, can lead to hidden rot or buckling over time. For example, poorly secured stairs can pose safety risks and degrade faster if they don’t meet modern standards. Take a look at creating seamless transitions between deck and stairs to understand how integration impacts durability. One trap I urge homeowners to avoid is assuming that all stairs are equally safe; opting for standard stringers without considering load calculations can cause structural failure. Advanced mistakes often involve neglecting the nuances of hidden fasteners or finishing techniques—something I guide clients through during detailed consultations. Have you ever fallen into this trap? Let me know in the comments. Knowing the subtle differences in materials and installation practices ensures your deck stands the test of time, turning your outdoor space into a true haven rather than a recurring project.Maintaining your outdoor living area designed with composite decking or custom stairs requires precision tools and expert methods to ensure longevity and seamless expansion. One essential tool I rely on is a cordless oscillating multi-tool; its versatility allows me to sand tight corners, remove old sealants, or trim materials precisely without risking damage to the surrounding structure. For large-scale projects, a pneumatic nailer speeds up deck board installation while maintaining consistent fastening, which is crucial for both safety and aesthetic appeal.
When it comes to cleaning and ongoing maintenance, I recommend a high-pressure washer equipped with adjustable pressure settings. I personally set mine to around 1500 psi to effectively remove dirt without harming the composite surface. Using a nozzle with a broader spray pattern reduces the risk of etching or gouging the material. Regularly inspecting fasteners, like hidden clips or screws, helps prevent loose boards or uneven surfaces—an often-overlooked aspect that can cause long-term problems if neglected.
How do I maintain my outdoor deck over time?
Reflecting on my journey with outdoor upgrades, I realize that the most valuable lessons came from mistakes and unexpected challenges. One hard-won insight is that selecting the right materials and installation techniques significantly impacts the longevity of your composite decking and stairs. I once believed that any generic product would suffice, but over time, I saw how premium materials with proper detailing paid dividends in durability — saving me time and money. Additionally, embracing seasonal adjustments, like tilting panels or adding protective coatings before winter, extended performance well beyond initial expectations. These lessons underscore the importance of attentiveness and quality when creating outdoor spaces that truly stand the test of time.