I remember the first time I tried to build outdoor stairs on uneven ground. I was eager, confident even, but when I laid down the first stringer, it immediately became obvious that things weren’t as straightforward as the neatly measured plans I had followed. The result? Wobbly steps, uneven risers, and a sinking feeling in my stomach. That moment was a lightbulb—this isn’t just about measuring; it’s about understanding the ground beneath your feet.
If you’ve faced a similar dilemma, you’re not alone. Uneven terrain is one of the most common challenges for DIYers and even seasoned contractors. It can turn what was supposed to be a simple project into a frustrating puzzle. But here’s the good news: with some practical know-how, you can navigate this terrain confidently and build stairs that are safe, level, and sturdy.
The Importance of Precise Stair Rise Calculations on Uneven Surfaces
Before we dive into the step-by-step process, let’s talk about why this matters. When your ground isn’t level, each riser must be carefully tailored to maintain a consistent, comfortable ascent—otherwise, you’ll end up with stairs that feel bouncy, wobbly, or look downright unprofessional. Interestingly, experts say that improper calculations can shorten the lifespan of your stairs by causing uneven wear or structural stress (source).
I learned this the hard way early in my DIY journey. My initial mistake was assuming that just measuring the height in one spot would suffice. It didn’t. The ground was uneven, so each step needed a different riser height. This oversight led to constant adjustments, more waste, and a lot of second-guessing. From that mistake, I realized that calculating the exact rise involves more than just height—it requires meticulous measurement, planning, and a clear understanding of your terrain.
So, if you’re about to add stairs to your deck or garden and want them to stand the test of time, understanding how to accurately measure and compensate for uneven ground is essential. Now, let’s start unraveling this puzzle with some practical steps that will save you time, money, and headaches in the long run.
Marking Your Stairs for a Custom Fit
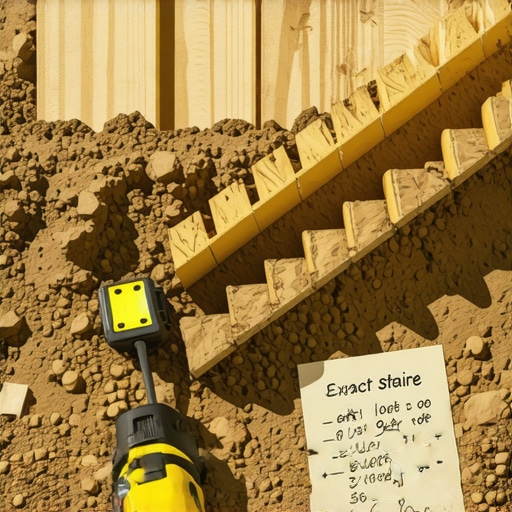
Start by measuring the total height from the ground to your deck or desired landing point. Use a level and a measuring tape to record the highest and lowest points of your uneven terrain. Think of it as drawing a contour line on a map—every bump or dip needs identification. I once skipped this step and ended up with stairs that looked like a roller coaster; after re-measuring, I marked where each riser would be, tailoring each stringer accordingly.
Calculating Each Riser Height
Divide the total height by the number of steps you want—typically 3 feet in height divided by 4 steps equals a riser of 9 inches. On uneven ground, however, measure the height at each stringer location individually. For example, one spot may need a riser of 8.5 inches, another 9.5 inches. It’s like resizing puzzle pieces to fit a crooked puzzle—precision matters. I once used a digital level with a laser to get quick measurements, which cut my calculation time in half.
Constructing Adjustable Stringers
Use carcass joinery or adjustable brackets designed for stairs, which allow fine-tuning later. Cut your stringers to match each height, then fit them temporarily to check the fit. Think of it as building a custom shoe—fitting and adjusting until perfect. I found that assembling a quick jig on sawhorses helped hold the stringers steady during fitting. This approach saved me from repeated cuts and ensured each step was level relative to its specific ground point.
Securing and Fine-Tuning for Stability
Once aligned, secure each stringer to the deck with heavy-duty fasteners. Use shims or wedges between the stringer and ground for stabilization. If your terrain dips unexpectedly, wedge the stringer to prevent wobbling. I once used scrap wood to shim under a stringer, which not only stabilized it but also prevented future shifting after rains. Remember, consistency in riser height enhances safety and comfort, so double-check each step’s level before permanently attaching.
Confirming Overall Flatness and Safety
After installation, step across your newly built stairs to assess uniformity. Use a long level or a string line stretched along the risers’ top edge to spot deviations. Pay attention to any wobble or unevenness. Fix minor discrepancies by adding or removing shims or slightly adjusting fasteners. Think of this final check as a dress rehearsal—once everything looks and feels right, your stairs are ready for use.
Many homeowners and even seasoned builders believe they have a solid grasp of outdoor living projects, but beneath the surface lie some misconceptions and overlooked details that can make or break a project. While it’s common to focus on choosing the right materials or following standard procedures, the real expertise involves delving into nuances that can significantly impact longevity and safety.
One prevalent myth is that all composite decking is inherently low-maintenance and warp-proof. In reality, not all composites behave the same, especially under harsh sunlight or fluctuating temperatures. For instance, dark-colored composite boards tend to absorb more heat, leading to faster warping and distortion, a fact often ignored by DIYers eager to pick aesthetically pleasing options. Experts recommend checking recent composite decking trends to select materials that balance appearance, durability, and environmental resilience.
A common oversight is underestimating the importance of proper framing and support systems, especially when integrating stairs. Many assume that standard joist spacing and ledger board attachments suffice, but specific structural details crucial for outdoor stairs often go unnoticed. Incorrect framing can lead to wobbling, uneven risers, or even failure over time. An advanced builder knows that using hidden fasteners and steel brackets, for example, not only enhances aesthetics but also provides stability and longevity. For deeper insights, check out this guide on heavy-duty joist hangers.
The ‘Oops’ factor often appears when neglecting environmental factors. For instance, not accounting for water runoff and drainage can cause wood or composites to rot prematurely or sustain mold issues. A nuanced project considers proper grading, waterproof flashing, and ventilation solutions to prevent moisture entrapment. Ignoring these details may seem trivial but can cost a fortune in repairs and replacements.
For those contemplating outdoor stairs, there’s another layer of complexity in designing for safety and code compliance. A frequent mistake is constructing risers and treads without considering slip resistance or sufficient lighting, which can lead to accidents. Incorporating textured stair treads and integrated LED lighting not only elevates aesthetic appeal but also enhances safety. For innovative ideas, explore this comprehensive guide on stair and deck safety.
Ever wondered about the impact of climate on material choices? Studies show that climatic factors like humidity and UV exposure drastically affect material performance, especially with composites. Selecting materials with UV inhibitors and moisture-resistant properties tailored to your zone can prevent warping and color fading. For an in-depth understanding, review expert analysis on composite material performance.
Remember, real expertise distills down to mastering these nuanced details. The difference between a good outdoor project and a great one often lies in anticipating and addressing these subtle yet critical factors. If you’re serious about elevating your outdoor space, consider working with a professional deck builder who understands these complexities. They can save you time, money, and headaches, ensuring your outdoor living space isn’t just beautiful but also durable and safe.
What hidden pitfalls have you encountered in your outdoor projects? Share your experiences below—I’d love to hear your stories and insights!
Choosing the Right Tools for Long-Term Durability
Investing in quality tools is essential to ensure your outdoor living projects stand the test of time. I personally rely on a high-grade power drill with adjustable torque settings, like the Milwaukee M18 Fuel, which allows me to avoid overtightening fasteners that could damage composite decking or compromise stair stability. A oscillating multi-tool is invaluable for gentle sanding or removing stubborn debris without risking damage to delicate surfaces. Additionally, a digital moisture meter helps monitor wood or composite material health, preventing future warping or rot caused by hidden moisture buildup.
Another critical tool is a laser level. It ensures that every step, rail, or surface remains perfectly aligned over time, even if ground conditions shift slightly. Using a laser level is more precise and less cumbersome compared to traditional bubble levels, especially for larger projects like decks or extensive staircases. Remember, maintaining consistency now reduces maintenance costs later, making your outdoor space safer and more attractive for years to come.
Essential Maintenance Procedures to Keep Things Running Smoothly
Regular inspections are the cornerstone of long-term outdoor living success. Every few months, I check stair stringers, fasteners, and joist connections for signs of wear or movement. Tightening loose screws and replacing corroded fasteners with stainless steel equivalents is a simple task that prevents more significant issues down the line. For composite decking, I suggest applying a specialized cleaner designed for that material—like Dirt Dragon Composite Deck Cleaner—to remove dirt and prevent mold growth, which can cause slips or surface degradation (source).
It’s also wise to seal or coat wooden components periodically. Newer composite materials often come with warranties on fading and staining, but to maximize their lifespan, avoid neglecting routine cleaning and minor repairs. For example, inspecting and replacing worn-out stair riser boots or tightening railings not only enhances safety but also keeps your project looking pristine.
Future Trends in Outdoor Maintenance and Tools
Looking ahead, I predict smart-enabled tools will become standard in outdoor building maintenance. Imagine a Bluetooth-connected moisture meter that alerts you when wood absorbs excess moisture or a drone that surveys your entire deck for loose boards or wobbling stairs—saving time and preventing accidents. Additionally, advances in biodegradable sealants and self-healing composites could dramatically reduce ongoing maintenance needs, allowing your outdoor space to remain vibrant with minimal effort.
How do I keep my outdoor structures functioning over time?
Implementing a routine, proactive maintenance schedule with the right equipment is crucial. Regularly cleaning surfaces with appropriate products, inspecting fasteners, and updating protective coatings are foundational steps. Incorporating tools like a digital moisture meter or a laser level can make these tasks more precise and efficient, extending the lifespan of your deck and stairs. Don’t forget, partnering with a seasoned professional can also bring insight into hidden issues before they escalate. For expert guidance and advanced techniques, consider consulting a professional deck builder. Try integrating a high-quality moisture meter into your maintenance routine today—it’s a game-changer for long-term success.
3 Unexpected Lessons That Changed My Approach to Building on Uneven Ground
One of the most profound insights I gained was realizing that meticulous measurement isn’t enough; understanding ground behavior is crucial. I learned to observe how soil shifts with weather and foot traffic, which influenced my decision to use adjustable supports that accommodate these changes. This approach prevented future wobbling and maintained safety over time.
Another lesson was the importance of customizing each riser rather than forcing uniform measurements. By tailoring riser heights to the terrain’s nuances, I created stairs that felt natural and secure, avoiding the uncomfortable bounces typical of uneven sets. Embracing this flexibility transformed my projects from satisfactory to professional-looking.
Lastly, I discovered that planning for water runoff and drainage is vital. Ignoring these factors led to early deterioration, even with premium materials. Incorporating subtle slopes and strategic drainage paths during construction protected my stairs from moisture damage, extending their lifespan. This experience highlighted that the details matter just as much—if not more—than the initial design.
Tools and Resources That Elevated My Outdoor Construction Skills
My go-to tool has become a digital laser level, which ensures precise alignment across uneven surfaces and saves me hours of manual adjustments. I trust it because it delivers consistent accuracy, essential for professional-looking results. For planning, I rely on site mapping software like SketchUp, helping me visualize custom supports and riser adjustments before cutting material.
When it comes to materials, I’ve found that working with steel adjustable brackets offers the flexibility needed for uneven terrain. Paired with quality fasteners like stainless steel screws, they create a durable and adaptable framework. For learning, I often revisit my favorite resource, Expert Tips for Outdoor Projects, which provides insights that bridge DIY enthusiasm with professional standards.
Additionally, a moisture meter has become indispensable in monitoring wood and composite components’ health, preventing future warping. Regular maintenance tools like impact drivers and shims complete my toolkit, empowering me to tackle adjustments quickly and confidently, ensuring safety and longevity.
Your Next Outdoor Adventure Starts Now
Building stairs on uneven ground is undeniably challenging, but with the right mindset, tools, and attention to detail, you can create stunning, safe outdoor spaces that stand the test of time. Remember, every obstacle is an opportunity to learn and refine your skills. Embrace the journey, and don’t hesitate to seek expert guidance when needed—your outdoor haven awaits, and it’s worth every effort.
What unexpected challenge have you faced when leveling ground for outdoor stairs? Share your story below—let’s grow together as outdoor living enthusiasts!
.