I remember the day I finally decided to spruce up my backyard—visions of cozy evenings and lively gatherings danced in my head. But as I started planning, I hit a snag I hadn’t anticipated: how to add a comfortable bench without sacrificing half my yard or turning my deck into a maze of bulky furniture. The realization hit me hard—most built-in benches tend to take up too much space, cluttering what could be a sleek, open outdoor area. Have you ever faced that frustration, staring at a design you’re excited about but feeling overwhelmed by the potential loss of usable space? Well, you’re not alone. Many homeowners struggle with finding the perfect balance between functionality and flow when it comes to outdoor seating.
Why Your Deck Bench Shouldn’t Feel Like a Clunky Obligation
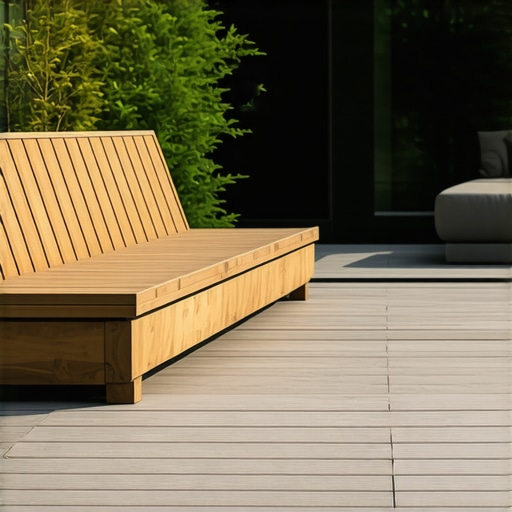
Challenge of Space-Starved Outdoor Living
Creating a welcoming outdoor environment often means making tough choices—do you opt for extra seating at the expense of open space? Or do you sacrifice style for functionality? I learned early on that many traditional bench designs are simply too bulky, turning what should be an inviting nook into a visual and physical obstacle. According to experts in outdoor living design, optimizing space isn’t just a luxury—it’s a necessity, especially when your yard isn’t sprawling. A well-designed, space-efficient bench can elevate your deck, providing comfort without constricting your overall layout.
One mistake I made at first was choosing a built-in bench with overly thick supports, which ate up precious real estate and made the area feel cramped. That’s a classic misstep—believing more mass always equals more comfort. Instead, I discovered that clever use of lightweight materials and smart construction techniques can make all the difference. For detailed insights on transforming your space, you might want to check out this comprehensive guide to outdoor transformations. It emphasizes how strategic design can create stunning, functional outdoor areas without overcrowding.
So, if you’re tired of your current setup feeling more like a storage closet than an inviting lounge, stick around. I’ll walk you through proven strategies to build a deck bench that complements your space, not crowd it. Ready to make your backyard both beautiful and practical? Let’s dive into core principles that will help you craft a bench that’s just right—neither too bulky nor too flimsy—so you can enjoy your outdoor sanctuary to the fullest.
Gather Your Tools and Materials
Start by assembling all the essentials. You’ll need lightweight, weather-resistant materials like composite decking planks, stainless steel screws, a saw, screwdriver, drill, and measuring tape. For a clean finish, consider edge trim and water-resistant sealant. Think of this step as laying the foundation for a sturdy, sleek piece—like preparing the canvas before painting.
Design Your Bench Dimensions to Maximize Space
Measure your available deck area carefully. For example, if your space is 8 feet wide and 4 feet deep, plan for a bench about 6 feet long and 16 inches high—leaving room for movement and other furniture. Visualize this as drawing a floor plan; simplicity is key. I once tried to fit a bench that was too long, which cramped the walkway. Keep it compact yet functional, like a well-tailored suit.
Cut and Assemble the Frame
Use your saw and drill to cut the decking boards to size. Create a rectangular frame with two parallel supports—think of it as building the skeleton of a house. Secure the supports together with stainless steel screws, ensuring the structure is level. I once mismeasured a support length, which caused wobbliness. Double-check your measurements—precision here is like the backbone of your design.
Attach the Seating Surface
Lay the composite planks across the frame, leaving about 1/8 inch spacing for expansion. Secure each plank with hidden fasteners or screws from underneath to keep the surface smooth. Imagine stacking bricks; ensure tight, even placement. I accidentally fastened a plank too tightly, which caused warping. Remember, controlling expansion is like managing a new plant—give it room to breathe.
Finish with Smooth Edges and Sealant
Sand any sharp edges gently and apply a water-resistant sealant to protect your bench from weathering. This step keeps your creation safe and attractive for years. Think of it as applying a protective coat of armor—simple, yet effective. I once skipped sealing, and the bench developed splinters after a season. Don’t let that happen to you.
Install for Final Touches
Position your bench where it complements your deck layout. For example, place it against a railing or in a corner to maximize space. Secure it to the deck if necessary, using brackets to prevent movement. This is like placing the final piece in a puzzle—everything should come together seamlessly. A well-placed bench enhances flow and usability, turning your yard into an inviting retreat.
While many enthusiasts focus on choosing the perfect composite decking or designing stylish stairs, there’s a less obvious layer of complexity that often trips up even seasoned DIYers and professionals alike. Common myths such as believing that all composite materials are equally maintenance-free or that bigger decks always mean better outdoor living can lead you astray. In reality, the nuances of material selection, proper framing, and transition details can make or break your project’s durability and aesthetic appeal.
A frequent mistake I encounter is oversimplifying the importance of correct framing techniques. For instance, using inadequate support spacing or neglecting proper flashing can cause water infiltration, leading to rot and costly repairs over time. A prime example is the misconception that pressure-treated wood is always the best framing choice—many overlook that mineral core composite boards are less prone to expansion and contraction, which is critical for maintaining long-term integrity.
Furthermore, when it comes to stairs—often the overlooked centerpiece of outdoor spaces—the details matter immensely. Many assume that standard riser heights and tread depths suffice, but advanced principles of ergonomic design highlight that slight deviations can significantly impact safety and comfort. Modeling these details accurately is essential; for example, the stair riser height should ideally follow the “one-inch rule” to ensure even flow and prevent tripping hazards. Not paying attention to proper stringer support or drainage can result in a wobbly, unsafe staircase.
**What do most people misunderstand about the long-term performance of composite decking in coastal environments?** Many believe that capped polymer composites mean zero maintenance, but experts like those at the deck design consultancy warn that improper drainage and UV exposure can cause color fade and surface deterioration, especially without adequate ventilation.
Being aware of these subtle yet impactful factors can save you from costly remedial work and help realize your outdoor living vision. Remember, every detail—from fastening methods to transition trims—carries weight. For deeper insights into the nuances of professional-grade deck building, check our comprehensive guide here. Have you ever fallen into this trap? Let me know in the comments.
Maintaining your outdoor living space is crucial to ensuring its longevity and beauty. As a seasoned deck builder, I rely on specific tools and methods that deliver consistent, high-quality results. One essential device I swear by is a quality digital moisture meter. This tool helps me assess wood and composite boards for moisture content, preventing rot and warping before it becomes a costly problem. For example, when evaluating support beams or stair stringers, knowing the moisture level ensures I select the right materials and apply appropriate sealants, extending the lifespan of your deck.
Another vital piece of equipment is a cordless oscillating multi-tool. It allows me to perform precise sanding, grout removal, or trimming in tight corners without damaging surrounding surfaces. Its versatility is invaluable when refinishing or repairing sections of your deck, especially around intricate details like stair treads or railing joints. Using high-quality blades and attachments designed for outdoor use ensures durability and effective performance under weather exposure.
In terms of software, I recommend Intelligent Deck Planning software, which helps optimize your deck layout and material estimation. This step is crucial for scaling projects or adding enhancements such as composite stairs or benches. Utilizing CAD-based tools streamlines the planning process, minimizes waste, and assists in visualizing the long-term results—making maintenance routines much more manageable over time.
Speaking of long-term results, I advise establishing a routine inspection schedule. For example, every six months, check for loose fasteners, damaged boards, or water infiltration points. A simple cordless drill with a socket set allows quick tightening of bolts and screws, preventing larger issues down the line. Incorporate quality waterproof sealants and coatings—like those recommended by experts at this resource—to protect your materials from UV damage, moisture, and temperature fluctuations.
How do I maintain composite decking and stairs over time?
Regular cleaning with a soft-bristle brush and mild soap eradicates dirt and minimizes surface degradation. Avoid harsh chemicals that can break down protective caps or finish layers. For stubborn stains or mold, I use a pressure washer on a low setting combined with a composite deck cleaning solution—carefully avoiding direct, prolonged contact that can cause surface damage. Inspecting and replacing worn fasteners and trim pieces ensures your deck remains safe and visually appealing for years—long beyond the typical DIY lifespan.
Looking ahead, I believe advanced UV-resistant coatings and smart maintenance sensors integrated into decking will become more popular, offering real-time condition monitoring. Implementing proactive techniques now, like precise evaluation with moisture meters or using high-grade sealants, prepares your outdoor space to withstand future challenges. Start by trying out a digital moisture meter on your deck; it’s a small investment that pays off by preventing larger problems down the line. For more comprehensive tips, visit this upcoming guide and elevate your maintenance routine today.
One of the most transformative changes I made in my outdoor projects was learning that simplicity and strategic planning trump bulky, overbearing furniture. A comfortable, space-efficient deck bench doesn’t have to be a compromise—it’s all about embracing clever design principles and tailored solutions. When I first started, I underestimated the power of lightweight materials combined with thoughtful construction, often resulting in cluttered spaces and compromised aesthetics. The lightbulb moment came when I realized that less can be more—using slender supports and hidden fasteners creates a sleek look that maximizes your yard’s potential. This insight changed my approach, leading to outdoor spaces that are both functional and inviting, without feeling cramped or overloaded. For those eager to elevate their outdoor living, I recommend exploring this expert guide which dives into space-optimized transformations and innovative design techniques.