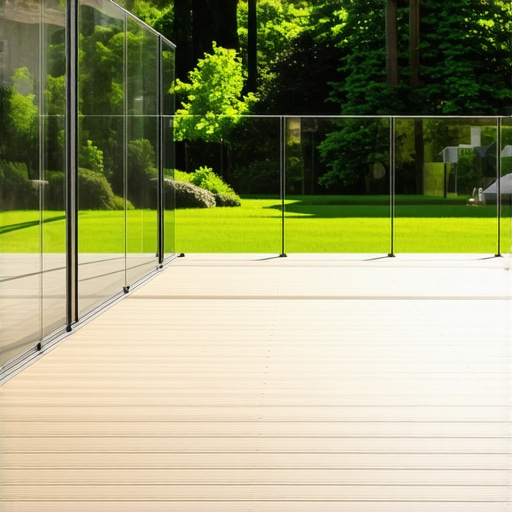
I’ll never forget the first time I sat down on my brand-new composite decking with a cold drink, ready to soak in the mountain vista, only to realize I’d essentially built a prison for my eyes. Those chunky, traditional 2×2 wood balusters were spaced just perfectly enough to block every interesting part of the landscape. It was a classic ‘helpful neighbor’ fail. I spent all that time maximizing outdoor space only to cut off the very thing that makes being outside worth it. My early mistake? I thought ‘open’ meant just having a deck, but true outdoor living requires a visual connection to the world around you. I remember trying to convince myself it wasn’t that bad, but every sunset was chopped into vertical slices. If you have ever felt like your deck railing was acting more like a spite fence than a safety feature, you know exactly the frustration I am talking about. Today, I am going to show you how to swap those view-killing spindles for glass balusters without needing a specialized engineering degree or a $10,000 professional installation kit. We are going to solve the problem of the ‘disappearing view’ once and for all.
Get Your Sunset Back from Those Chunky Wooden Railings
The beauty of glass is that it provides safety without the visual weight. When I finally decided to tear out my old wood pickets, I was terrified I’d break a panel or end up with something that rattled in the wind. I previously tried to save money by using thin acrylic sheets I found at a liquidator, and let me tell you, it looked cheap and scratched if a leaf even blew against it. I learned the hard way that if you want a clear view, you have to use tempered glass. According to the ASTM E2353 standards, tempered glass is engineered to be four to five times stronger than standard glass, making it a safety powerhouse for elevated decks. This isn’t just about looking fancy; it’s about structural integrity. Whether you are designing safe and stylish stairs or just updating a flat section of your porch, glass changes the entire vibe of the home. Have you ever looked at your backyard and felt like you were missing half the scenery?
Will This Actually Look Like Glass or Just a Smudge Fest?
I know what you are thinking because I thought it too. You are worried that instead of a beautiful view, you will just be looking at dog nose prints, bird streaks, and water spots all day. I had a huge fear that I was just signing up for a new weekend chore. But the truth is, how to pick a railing that does not block your sunset view often involves a tiny trade-off in maintenance for a massive visual payoff. Modern tempered glass is surprisingly resilient, and a quick spray with a hose usually does 90% of the work. In the next few paragraphs, I’ll walk you through the easiest way to install glass balusters without a professional kit, so you can stop staring at wood and start staring at the horizon. We’ll talk about the specific brackets that actually hold, how to measure so you don’t end up with awkward gaps, and why I now prefer this over any other railing type.
Lay the Groundwork for a Crystal Clear View
Before you even touch a piece of tempered glass, you have to nail the layout. I remember one humid July afternoon when I tried to eyeball the spacing on a small bump-out. By the time I reached the corner post, the gap had grown by two inches, and it looked like a set of crooked teeth. To avoid my embarrassment, use a string line or a chalk line across your bottom rail to ensure every bracket sits in a perfectly straight file. This phase is where deck builder insights designing your dream outdoor space really come into play; if your baseline is off, the glass will catch the light at weird angles and ruin the effect. You want to space your brackets according to local codes, usually no more than 4 inches apart, to keep things safe for kids and pets while keeping that composite decking looking sleek and modern.
The Secret to Mounting Glass Without the Pro Price Tag
The biggest hurdle for most DIYers is the cost of proprietary ‘kits.’ Instead, look for individual stainless steel glass shoes or ‘boots.’ These are the heavy-duty brackets that screw directly into your top and bottom rails. I prefer these because why we never use nails for deck railing connections anymore is a lesson learned in structural stability; you need the biting power of a stainless steel screw to hold the weight of the glass. When you are mounting these to your durable low-maintenance outdoor areas, pre-drill your holes to prevent the composite from mushrooming or cracking. Once the bottom shoes are in, the rest of the project starts to feel like an adult version of LEGOs. 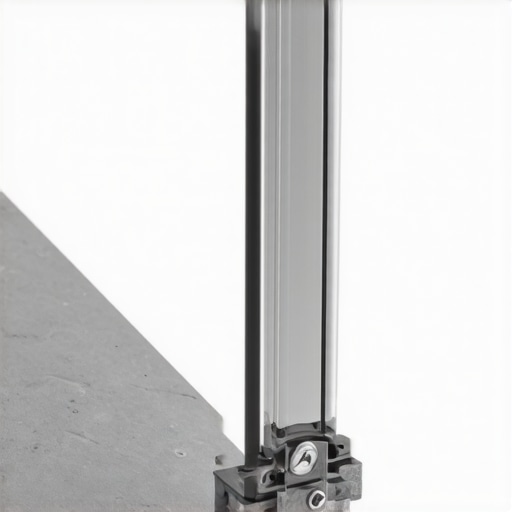
How to Slide Your Panels in Without the Stress
Actually handling the glass is the part that makes everyone’s heart rate spike. My first time, I wore thick gardening gloves that made me feel like I had sausages for fingers, and I almost dropped a panel because I couldn’t get a grip. Pro tip: use rubber-coated ‘sticky’ gloves. They give you incredible control without the bulk. Start by sliding the glass into the bottom bracket, then tilt it into the top. It sounds simple, but if your rails aren’t perfectly level, you’ll struggle. This is why the bolt pattern that finally stops railing post wobble for good is so critical; a wobbly post means shifting glass. Once the panel is seated, use the rubber gaskets that come with the brackets to ‘lock’ the glass in place. These gaskets act like tiny shock absorbers, preventing the glass from rattling when the wind picks up or when the kids are running nearby. If you find a panel is vibrating, a tiny dab of clear silicone inside the shoe can act as a permanent silencer. This method is truly the easiest way to install glass balusters without a professional kit because it relies on simple mechanical tension rather than complex glues or specialized tools. You are essentially building a sandwich of safety and scenery.People often tell me they are scared of glass because they think it’s a giant fingerprint magnet or a fragile liability. But let’s challenge that belief: in my years of experience, a traditional wood railing with its eighty-eight tiny corners, peeling stain, and splintering edges is a far bigger maintenance nightmare than a few glass panels. When you are looking into how to pick a railing that does not block your sunset view, the real ‘hidden’ work isn’t the cleaning; it’s the prep. Most people assume that once the glass is in, they are done. However, if you haven’t accounted for the unique ways that glass interacts with your composite decking, you are setting yourself up for a literal headache. The truth about maintenance free decking claims is that nothing is truly zero-effort, but glass comes closer than almost anything else if you install it with ‘room to breathe.’
Avoid the Death Grip That Cracks Your Panels
The biggest ‘oops’ factor I see with DIY glass installations is what I call the ‘Death Grip.’ New builders often think that the tighter they screw down those stainless steel shoes, the safer the railing will be. This is a dangerous trap. Tempered glass needs a minute amount of space to expand and contract. If you clamp those brackets down until they are bone-tight against the glass without a proper gasket, the natural shifting of your deck—caused by seasonal temperature swings—can create enough pressure to shatter a panel instantly. This is why why we never use nails for deck railing connections anymore; you need the precision of a structural screw and a high-quality rubber gasket to provide that necessary ‘float.’ If the glass can’t move a fraction of a millimeter, it becomes a ticking time bomb. Have you ever fallen into this trap or been too scared to try glass for this exact reason? Let me know in the comments. 
Why Does Your Railing Whistle When It Is Windy?
If you’ve ever sat on a beautiful deck and heard a high-pitched, ghostly whistling sound, you are likely experiencing a common advanced-level mistake: improper gap spacing. When wind hits a solid glass surface and tries to squeeze through a gap that is too narrow or irregularly shaped, it creates a ‘flute’ effect. This is why transform your space expert deck builder tips for stunning outdoor living often emphasize precise 3.5-inch spacing. It’s not just for code compliance; it’s for aerodynamics. According to data from the Consumer Product Safety Commission (CPSC) regarding safety glazing, the structural integrity of tempered glass is unrivaled, but its ‘auditory footprint’ depends entirely on your installation geometry. To keep the peace, ensure your gaps are uniform across the entire run. This is especially true if you are installing something robust like how the TimberTech Fulton rail performs against harsh Utah winters, where high winds are a constant factor. Another pro-nuance? Use a specialized glass coating. Much like the wax on your car, a high-quality hydrophobic coating can keep spiders from building webs on your deck railing and prevent water spots from ever bonding to the surface. It turns a twice-a-month cleaning job into a twice-a-year quick rinse.
The Specialized Gear That Saves Your Back and Your Glass
When I first started doing these installs, I thought I could just manhandle the tempered panels into place. Big mistake. After one near-shatter experience that left me shaking, I invested in a pair of dual-cup vacuum suction lifters. If you are serious about outdoor living, these aren’t just gadgets; they are insurance. They allow you to drop the panel into the shoe with millimeter precision without risking a pinched finger or a chipped edge on your durable low-maintenance outdoor areas. I also keep a bottle of 100% silicone spray in my belt. A quick hit on the rubber gaskets before you slide the glass in makes the fit snug but not impossible. It’s these small, specific moves that separate a frustrated DIYer from a relaxed deck builder. 
How do I maintain this crystal-clear view over time?
The secret to a ‘set it and forget it’ railing isn’t a magic squeegee; it’s a hydrophobic coating. I personally use an automotive-grade ceramic coating on both sides of the glass. It sounds like overkill until you realize that rain just beads off, taking the dust with it, which is the same principle I use when figuring out how to stop bird droppings from staining your composite deck. For the hardware, give the stainless steel boots a wipe with a microfiber cloth dipped in white vinegar once a season to prevent tea-staining, especially if you live near the coast. According to the Vitro Architectural Glass Technical Document TD-142, avoiding abrasive cleaners is the number one rule for preserving the surface tension of safety glass. If you compare this to the maintenance reality of owning an ipe hardwood deck, which requires annual oiling and sanding, you’ll realize you’ve actually bought yourself more time to actually sit and enjoy the sunset.
Prepare for the Future of Transparent Design
I’m calling it now: within the next five years, we are going to see ‘smart glass’ balusters become the standard for high-end composite decking trends. Imagine glass that tints at the touch of a button when the afternoon glare gets too intense. Until then, your focus should be on the structural bones. Every spring, I take a wrench and check the tension on the mounting screws. Even with the bracket that makes your deck stairs feel rock-solid, the freeze-thaw cycle can loosen things a fraction. My best advice? Don’t wait for a rattle. Give every panel a firm ‘bump’ with your palm once a year. If it rings like a bell, you’re golden; if it thuds, it’s time to tighten the gaskets. Go ahead and apply that first coat of ceramic protector this weekend—your future self, sitting there with a clear view and no chores, will thank you.
What I Discovered After 50 Glass Panel Installs
One thing I never anticipated was how much glass changes the perceived size of a deck. By removing the vertical ‘bars’ of traditional wood railing, your brain stops seeing the deck edge as a wall and starts seeing it as a platform in the sky. My biggest lightbulb moment came when I realized that using structural screws instead of old-fashioned lag bolts for the rail-to-post connection is non-negotiable; glass is heavy, and any micro-sag in your rail will eventually cause the panels to rattle. Another hard-earned lesson: always check the glass for tiny chips at the corners before you start. A small imperfection can turn into a full spiderweb crack once the tension of the mounting boots is applied. Finally, don’t let the fear of maintenance stop you. The truth about maintenance free decking claims is that while nothing is truly zero-work, glass is far easier to keep looking new than painted wood pickets, provided you use the right coating.
The Gear That Lives in My Truck for Every Glass Job
If you want to move from a struggling DIYer to a confident deck builder, you need the right kit. First, a pair of dual-cup vacuum suction lifters is the single best investment you can make; they turn a two-person struggle into a one-person precision job. Second, I always keep a high-quality hydrophobic ceramic spray handy. It prevents water spots and is the same strategy I use when researching how to stop bird droppings from staining your composite deck. For those living near the ocean, the only fastener we trust for coastal decks is 316-grade stainless steel for the mounting boots to prevent tea-staining. Lastly, a simple microfiber reach-pole will keep those panels clear without you needing to lean over the edge like a stuntman. These tools make the difference between a frustrating weekend and a professional-grade finish.
Take Back Your Horizon with a Clear Conscience
Building a space that connects you with nature is the ultimate goal of outdoor living. When you finally sit down and see the sunset through clear panels instead of wooden slats, the effort of every measurement and every bracket install will feel immediately worth it. You are not just building a railing; you are removing a barrier between your home and the world. Don’t let the complexity of professional kits intimidate you; with the right shoes and tempered glass, you can achieve a high-end look on a realistic budget. Your view is waiting—go get it. Have you ever felt intimidated by the weight or fragility of glass during a project? Let me know in the comments below!