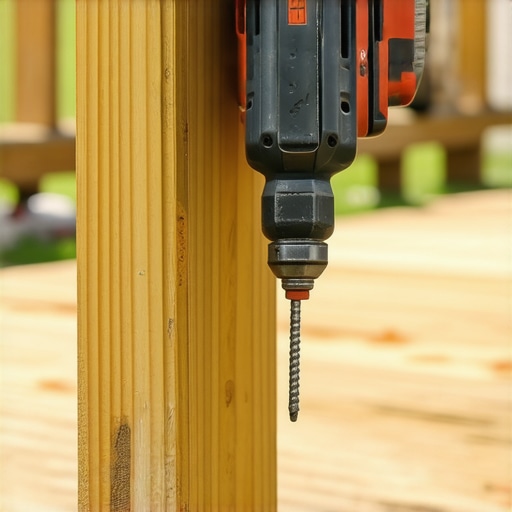
I was leaning against my railing last Fourth of July, burger in hand, when I felt that sickening, microscopic shift—the kind that makes your stomach do a somersault. A loose railing post isn’t just a nuisance; it’s a safety hazard that screams ‘amateur hour’ to every guest at your BBQ. For years, I lived under the terrifying assumption that to fix a wobbly post, I’d have to rip up my expensive boards and start from scratch. I even made the rookie mistake of trying to ‘toe-nail’ the post back into place with a few extra screws, which only split the wood and made the wobble worse. But here is the good news: you don’t need to be a professional deck builder to restore that rock-solid feel. Today, I am going to show you how to anchor those posts back to the frame without touching a single surface board. We are talking about structural integrity that lasts, minus the demolition headache. [image-placeholder]
Stop the Dangerous Wobble from Underneath
If your deck is elevated, you have a secret weapon: access. Most post failures happen because the wood has dried out and shrunk away from the original bolts. When I first started working on my own home, I used nails for everything, and let me tell you, that was a recipe for disaster. Nails pull out; structural hardware doesn’t. According to the Consumer Product Safety Commission, thousands of people are injured every year due to structural failures on decks and porches, and railing stability is a massive part of that. By focusing on the specific bolt pattern that stops wobble, you can create a connection that actually exceeds building codes.
Does this fix really hold up over time?
You might be skeptical. Can a few tension ties and structural screws really replace a full rebuild? The answer is a resounding yes, provided you are attaching the post to the joist, not just the decking. Have you ever felt that heart-in-throat moment when a guest leans a little too hard on a shaky rail? It’s a wake-up call we should all take seriously before the next season hits.
Ditch the Rusty Lag Bolts for Structural Screws
The first thing you need to do is get rid of those old-school lag bolts. You know the ones—the thick, hex-head bolts that require you to drill a massive hole and then hope they do not rust into a single orange lump. The problem with lag bolts is they act like a wedge; as the wood expands and contracts with the seasons, they lose their bite. This is exactly why I use structural screws instead of lag bolts for almost every connection now. These screws have a smaller diameter but higher shear strength, and they pull the post into the joist with a grip that does not quit. Think of it like swapping a heavy, blunt hammer for a precision-engineered surgical tool. It is about creating a connection that stays tight even when the humidity fluctuates.
Why Tension Ties are the Real MVP of Railing Stability
If you really want to stop the wobble, you have to address the fulcrum effect. When someone leans on a railing, they are using the post like a giant lever to pull the joist away from the rest of the frame. This is where tension ties come in. These L-shaped brackets bolt through the post and then tie back into the adjacent joist. It effectively turns the post into an extension of the deck’s skeleton rather than just an accessory. I remember a project back in 2018 where the homeowner had installed beautiful composite decking, but the railings felt like wet noodles. We did not touch a single surface board; we just went underneath and installed two tension ties per post. The change was instant. It went from shaky bridge to concrete wall in about twenty minutes of work. 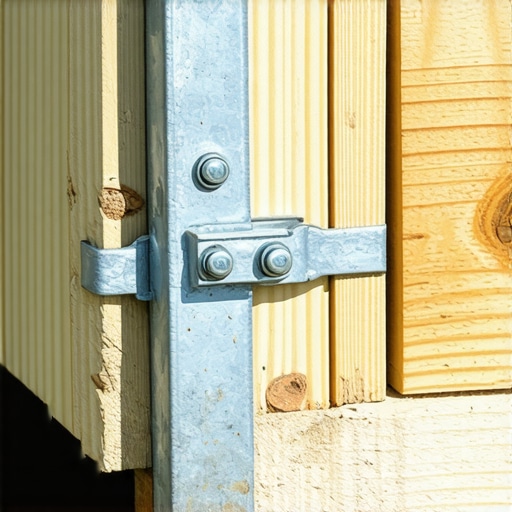
Add Blocking to Create a Rigid Frame
Even with great hardware, if your joists are thin or spaced too far apart, the whole frame will flex when you push the rail. This is the same structural reason your deck feels bouncy when you walk. To fix this, you need to install blocking—extra chunks of pressure-treated lumber—around the base of the post. You are essentially building a wooden sandwich that keeps the joists from twisting. By locking the post between two solid blocks of wood, you distribute the force across three joists instead of just one. While you are down there, it is the perfect time to learn how to protect your deck frame from rot by applying joist tape to the top of your new blocking before the next rain hits.
The Bracket that Solves the Stair Problem
Posts at the top or bottom of a staircase are the hardest to stabilize because they are fighting gravity and lateral force simultaneously. Do not rely on just two screws through a rim joist. Using the bracket that makes your deck stairs feel rock-solid ensures that the transition from the deck to the steps stays tight. If your post is attached to the rim joist, you need to ensure that rim joist is also secured with a tension tie to stay secure. It is all about creating a continuous chain of strength from the handrail all the way down to the structural footings. If you skip this, the first time a kid jumps on the bottom step, that whole railing will start its slow journey toward failure.
Let’s dig deeper into what happens when those connections aren’t quite right. Most homeowners—and even some contractors—fall for the myth that if you buy high-end composite decking, you are suddenly immune to structural movement. I have seen countless DIYers spend a fortune on boards only to ignore the skeleton underneath. The reality is that composite material is more flexible than natural wood. While it won’t rot, it won’t provide the same structural ‘stiffness’ that a thick cedar plank might. This is why you must stop believing the maintenance-free myth and realize that the frame is doing 100% of the work. If your frame isn’t rock solid, that expensive composite will eventually sag and pull at your railing fasteners.
Seal Those Cut Ends to Save Your Investment
Here is an advanced ‘oops’ factor that most beginners miss: failing to seal the ends of their boards. Even if you are using high-grade materials, every time you make a cut, you expose the raw core of the board. Moisture finds its way into those micro-cracks, causing the material to swell and eventually loosen the grip on your railing posts. I always tell my clients that the best way to seal the cut ends of composite boards is to use a specialized end-grain sealer immediately after the cut is made. If you skip this, you are essentially inviting water to live inside your deck’s most critical joints. Have you ever fallen into this trap and noticed your boards swelling at the edges? Let me know in the comments.
Why do my deck stairs feel like they are leaning when the ground is level?
If you have reinforced your posts but still feel a slight ’tilt’ when you walk up the steps, you are likely dealing with stringer fatigue. Most people assume the problem is at the top connection, but the culprit is usually a lack of mid-span support. In my experience, even code-compliant stairs can feel like a diving board if you don’t address lateral sway. This is the structural reason your stairs feel like they are leaning: the stringers are twisting under the weight. To combat this, why we always double block the middle of a long stair run is to provide the lateral rigidity that a single stringer simply cannot offer alone. According to the North American Decking and Railing Association (NADRA), nearly 50% of deck failures involve the stairs or the railing, often because the builder accounted for vertical weight but completely ignored the horizontal force of people walking up and down.
Master the Lateral Load to Prevent Structural Sway
Another nuance that separates a DIY fix from a pro-grade restoration is the concept of ‘lateral load.’ Everyone thinks about things falling down, but few think about things pulling away from the house. If you are fixing a wobbly post, you must also look at how the entire deck is tied to the structure. This is one of the benefits of working with a professional deck builder—they know that a railing is only as strong as the deck’s connection to the ledger. If the deck sways even half an inch, that movement is magnified at the top of a 36-inch railing post. By installing tension ties that pull the deck joists tight against the house’s internal floor joists, you eliminate the source of the vibration before it ever reaches your handrail.
Now that we’ve locked down the structure, let’s talk about the gear that actually makes these repairs possible without losing your mind. I have spent a decade testing different rigs, and I can tell you that a standard drill is your enemy for deck work. You need a high-torque impact driver—specifically something with at least 1,800 in-lbs of torque—to drive those structural screws into pressure-treated lumber. If you are struggling with a wobbly post, it is likely because you didn’t have the mechanical advantage to pull the wood tight. I personally rely on a 12-inch flex-shaft extension for my impact driver. It allows me to reach those tight spaces between joists that a standard drill body just won’t fit into. This is one of the benefits of working with a professional deck builder: we have the specialized tools that solve the ‘unreachable’ problems. 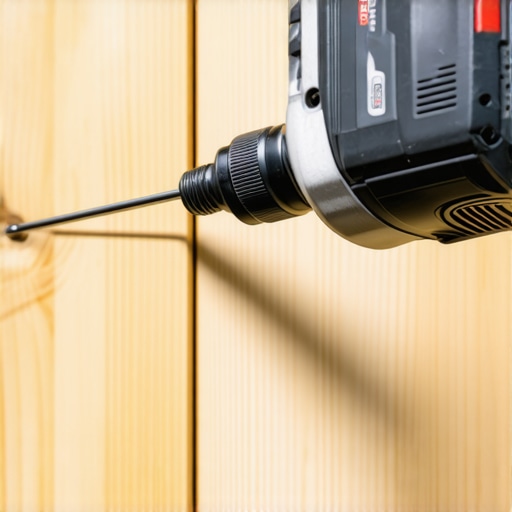
How do I keep my composite deck looking brand new for decades?
Maintenance is where most homeowners drop the ball because they believe the truth about maintenance-free decking claims—which are mostly marketing fluff. Even the best composite decking needs a biannual wash to prevent organic growth from staining the surface. I always keep a bottle of specialized pH-neutral outdoor cleaner on hand because it breaks down algae without stripping the UV-inhibitors from the boards. For those of you with second-story decks, you also need to know how to hide the ugly underside of a second story deck while still allowing for maximum airflow. If you trap moisture under there, you are basically building a giant petri dish for rot. According to the Simpson Strong-Tie technical documentation for lateral load connections (DTT2Z), a railing connection must be able to withstand 750 lbs of force per post to meet the IRC code. If you aren’t using hardware specifically rated for that load, you’re just guessing with your family’s safety.
Digital Planning is Killing the Napkin Sketch
Looking ahead, the biggest shift I see in the industry isn’t just better screws; it’s how we plan. I’ve stopped sketching on wood scraps. I firmly believe why a digital designer is the best move for planning a complex backyard deck is because it catches structural clashes before you even buy a single board. In the coming years, we will see even more augmented reality apps that let you ‘walk’ your innovative stairs solutions before the first joist is even cut. It eliminates the frustration of finished projects not matching your expectations.
Your Next Move for a Rock-Solid Finish
If there is one thing you do after reading this, go buy a pack of high-quality joist tape. It’s the single cheapest way to ensure you are truly protecting your deck frame from rot for thirty years. Applying it to the tops of your new blocking and joists before you put the boards back down creates a waterproof cap that stops the most common cause of deck failure: screw-hole rot. Give it a shot on your next repair—your future self will thank you when the frame is still solid thirty years from now.
Lessons from the Under-Deck Trenches
After years of crawling through cobwebs and tightening bolts, I have realized that a deck’s beauty is only skin deep, but its safety is skeletal. One major lightbulb moment for me was realizing that movement is the enemy of longevity. If a post can move even a fraction of an inch, it acts as a lever that slowly pulls your entire frame apart. I also learned the hard way that over-tightening can be just as bad as leaving things loose; stripping the wood fibers makes the connection useless. Lastly, never underestimate the benefits of working with a professional deck builder to spot the difference between a simple wobbly post and a failing ledger board.
The Load-Bearing Hardware I Swear By
If you are serious about a DIY restoration, stop buying the bulk bins at big-box stores. For my projects, I exclusively use butyl-based joist tape because it creates a self-sealing membrane around every screw. I also recommend a high-torque 18V impact driver; a standard drill will just strip your heads and leave you frustrated. For planning, why I never start a complex deck project without a digital 3D walkthrough first is because it allows you to visualize where tension ties and blocking will actually fit before you start drilling into your joists. These tools aren’t just luxuries; they are the difference between a weekend fix and a thirty-year solution.
[image-placeholder]
Build for the Peace of Mind You Deserve
There is a specific kind of joy that comes from leaning against a railing and feeling absolutely zero give. It is the confidence that your kids, your neighbors, and your friends are standing on a structure built with integrity. Whether you are following composite decking trends for 2025 or simply reinforcing an old cedar porch, the goal remains the same: a safe, beautiful space to gather. Take the extra hour this weekend to go underneath and check your connections. Your future self will thank you every time you step outside. Have you ever felt that terrifying sway while leaning on your railing, and what was the first thing you tried to do to fix it? Let me know in the comments below!