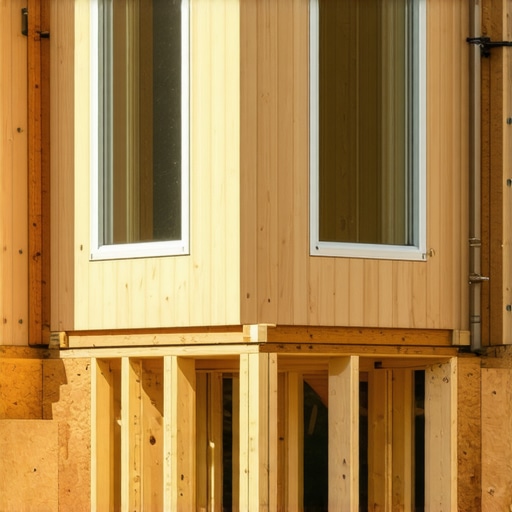
I’ll never forget the first time I tried to frame around a bay window. I stood there with my tape measure, looking at those 45-degree angles, and honestly thought I could just eye-ball the ledger. Big mistake. Within two hours, I had a pile of wasted lumber and a realization that my expert status was mostly self-proclaimed. Framing around a projecting window isn’t just about following the shape; it’s about structural integrity and making sure you don’t trap moisture against your home’s foundation. If you’ve ever looked at a cantilevered window and felt a slight sense of dread, you aren’t alone. Today, I’m going to show you how to tackle those tricky angles and ensure your composite decking looks like it was installed by a pro, not someone guessing in their driveway. Have you ever started a project only to realize the house isn’t as square as you thought?
Why Bay Windows Are the Ultimate Framing Boss Fight
Most people think you just screw a ledger board to the house and keep moving. But bay windows often stick out without any foundation support beneath them. Trying to hang a heavy deck off a cantilevered window is a recipe for disaster. I once tried to force a ledger into a tight corner without a plan, and it took me three days to fix a deck that had started to pull away from the siding because of poor initial layout. You have to think about the dead space under that window. We want a seamless transition where the stairs or the main deck area wrap around like a custom-fit glove. This is where expert deck builder tips really come in handy because a bay window is essentially a hurdle in your joist layout. According to structural experts at Fine Homebuilding, bay windows are rarely designed to carry external loads, which is why a self-supporting beam near the house is often the secret to a long-lasting deck. If you ignore this, you risk the window sagging or the siding cracking.
Does this actually make a difference in the final look?
You might be wondering if you can just square off the deck and leave the window floating. Sure, you could, but you’ll regret it every time you look out that window. A properly framed bay window section allows for why picture framing your deck is more than just a style choice to really shine. It adds that custom architectural touch that separates a DIY weekend project from high-end outdoor living. I learned this the hard way after a particularly rainy spring when I noticed my composite boards were expanding more than expected and pushing against the mitered corners I’d spent hours perfecting. We are going to dive into the specific framing moves that keep things rock solid and prevent you from having to hide the gap between your deck and the house siding with ugly trim later on.
Don’t Trust the House Foundation for Support
Instead of trying to pin your deck’s weight directly to those thin bay window walls, you need to build a self-supporting beam. Think of it like a bridge that bypasses the obstacle rather than leaning on it. The first time I tried this, I spent four hours trying to lag a ledger into a 45-degree bump-out, only to realize I was hitting nothing but air and insulation. Now, I always set my posts about two feet back from the window and run a dedicated beam. This is where the reason we use structural screws instead of old-fashioned lag bolts becomes obvious—they bite into the headers with way more precision when you’re working in these tight, angled spaces.
Master the Miter and Stop Wasting Lumber
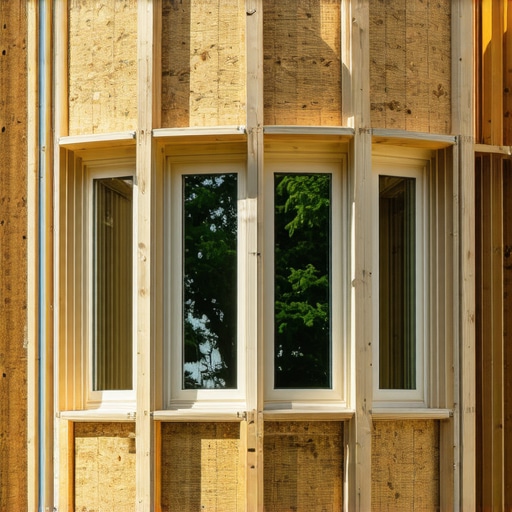
Cutting the framing to match the 45-degree angles of a bay window is like tailoring a suit for someone with three legs. If you’re off by even a quarter-inch, the gap will haunt you once the boards go down. I remember a project in 2019 where I butchered three 2x10s because I kept measuring from the short point of the miter instead of the long point. The trick is to use a scrap piece as a template first. Hold it against the house, mark your angle, and then transfer that to your structural lumber. It’s similar to the trick to cutting perfect deck stringers on the first try—measure twice, cut once, and always account for the thickness of the blade. Once your angles are set, use joist hangers specifically designed for skewed connections to keep everything tight.
Double Up Where the Boards Meet
Because bay windows create non-standard spans, your joist spacing usually gets a bit chaotic. If you’re using high-end materials, you can’t afford a ‘soft’ spot. I always suggest that why we always double joists under every composite seam for a flat floor is non-negotiable here. That extra lumber provides a wider landing for those tricky mitered cuts where the deck boards will converge. Without it, you’re trying to nail two boards into the edge of a single 1.5-inch joist, which is a recipe for splitting. To prevent future headaches, I also apply joist tape to the top of these doubled-up sections. Learning how to keep your deck joists from rotting under the boards is especially critical in the shadows of a bay window where moisture tends to sit longer.
Kill the Bounce Before It Starts
Angled framing often leads to longer spans than you planned for. If you don’t add solid blocking between those joists, you’ll end up with a ‘trampoline’ effect every time someone walks near the window. I once built a beautiful wrap-around section that looked perfect but felt like a sponge. I had to crawl back underneath to add X-bridging. Understanding the structural reason your deck feels bouncy when you walk usually comes down to lateral movement in these complex angled sections. By locking them together with tight blocking, you turn individual boards into a single, rigid platform.
Everyone tells you that symmetry is the gold standard of high-end outdoor living, but after fifteen years in the field, I’ve learned that forcing perfect symmetry on an asymmetrical house is a recipe for a massive headache. Most DIYers try to mirror the framing on both sides of a bay window exactly. The reality? Your house foundation has likely shifted an inch or two since it was built. If you don’t adjust your layout to account for that drift, your joists will look straight, but your deck boards will run crooked relative to the house. This is where the benefits of working with a professional deck builder in your outdoor projects become clear—we know how to ‘cheat’ the lines so the eye sees perfection even when the house itself is out of square. One of the biggest traps is over-fastening the mitered corners where the bay meets the main deck. You might think you’re making the structure stronger by driving extra screws into that tight joint, but you’re actually creating a rigid pivot point that will crack the board when the sun hits it. I’ve seen beautiful composite boards expanding more than expected and buckling because the installer didn’t leave a fraction of an inch for the material to breathe at the angles. According to the American Wood Council’s DCA 6, the way you manage these ledger-to-house connections determines whether your deck can actually handle the shear force of a crowd. Have you ever fallen into the trap of over-tightening your hardware only to see a board pop later? Let me know in the comments.
Why Perfect Symmetry is a Trap for Modern Decks
In my experience, trying to force a deck to be perfectly symmetrical around a cantilevered window often leads to awkward spans that don’t support furniture well. Instead of obsessing over a mirror image, focus on the flow of traffic. I always prioritize a wider walkway on one side of the bay to accommodate choosing the right composite decking for durable low-maintenance outdoor areas that can handle heavy foot traffic. If you’re feeling overwhelmed by the math of these angles, remember that why a digital designer is the best move for planning a complex backyard deck is usually to visualize these spatial challenges before you even buy your first 2×10.
How do you transition stairs from a 45-degree bump-out?
This is the ‘final boss’ of deck building. Most people just square the stairs off to the side, but creating seamless transitions with stairs as key elements in outdoor living requires a wrap-around approach that follows the window’s geometry. You have to be incredibly careful with your stringers here; if the ‘throat’ of the wood is too thin after you cut that 45-degree miter, the whole set of steps will bounce. I always recommend innovative stairs solutions for safe outdoor deck access that include double-blocking at every transition point. This isn’t just about aesthetics; it’s about making sure your stair tread depth feels safest for kids and the elderly, even when they’re navigating an angled descent. If you skip the structural screws for the stair-to-frame connection, you’re basically waiting for a squeak to develop. Use the reason we use structural screws instead of old-fashioned lag bolts to your advantage—they provide the pull-down strength needed to keep those angled stringers from leaning over time.
The Moisture Mistake That Rots Your Rim Joist
The moisture trap is the silent killer. When you frame around a bay, you create small triangular pockets behind the ledger where debris collects. If you don’t use high-quality flashing or learn how to protect your deck frame from rot for thirty years by using joist tape on every cut end, you’re essentially building a compost bin against your home’s rim joist. I once had to tear out a three-year-old deck because the homeowner didn’t realize their bay window’s weep holes were dumping water directly onto the ledger. It’s a common mistake that even some seasoned pros overlook. Instead of just slapping up standard Z-flashing, you need to ensure the water has a clear, unobstructed exit path away from the house siding.
I’ve spent thousands on tools that promised to make my life easier, but when you’re wrestling with a 45-degree cantilevered window, most of them end up back in the truck. For these specific builds, I swear by a 12-inch sliding compound miter saw equipped with a dedicated composite blade—usually something with 60 to 80 teeth. If you use a standard framing blade, you’ll tear the cap layer off your expensive boards, leading you to search for how to repair a hole in your composite decking much sooner than you’d like. My go-to for these angles is a digital protractor because, as I mentioned, the house is never actually 45 degrees. It’s usually 43.5 or 46, and that small difference is why your miters open up by mid-July. Looking ahead, I suspect we’ll see more DIYers using LiDAR apps on their phones to map these foundations in real-time. It sounds futuristic, but why a digital designer is the best move for planning a complex backyard deck is already becoming the industry standard to avoid the ‘math-induced migraine’ that comes with bay windows.
How do I keep those mitered joints tight for decades?
The secret isn’t just the cut; it’s what happens to the material afterward. To prevent the inevitable ‘gap-crawl,’ I always use the best way to seal the cut ends of composite boards with a color-matched end-coat sealer. Without it, the core absorbs moisture and expands at a different rate than the surface. For the structure itself, Simpson Strong-Tie’s technical bulletins emphasize that lateral load connectors are non-negotiable on these projecting sections to prevent the deck from pulling away during heavy use. You should also be choosing the right composite decking for durable low-maintenance outdoor areas that has a high thermal stability rating to minimize the movement that ruins your hard work. If you really want to scale your skills, stop using standard hardware for these critical junctions. I’ve found that the reason we use structural screws instead of old-fashioned lag bolts is the only way to get the clamping force needed to keep those double-joisted sections from shifting. It’s also worth looking into how to protect your deck frame from rot for thirty years by applying butyl tape to the top of every joist, especially where they intersect the bay window. Before you call it a day, take a look at your stair transitions. If you’re building a multi-level space around the window, creating seamless transitions with stairs as key elements in outdoor living is what guests will notice first. My advanced tip: don’t just screw the boards down; use a biscuit joiner or hidden clips on the mitered corners to allow for the expansion we talked about. This small move will save you from a weekend of repairs three years from now. Ready to get started? Grab a digital angle finder and map out your house foundation today—it’s the one tool that will save you more lumber than any other.
Hard Lessons from My Most Complex Bay Window Builds
Building around a bump-out is rarely a “set it and forget it” situation. After years of trial and error, I’ve realized that the house is almost never square, and the window itself is rarely a perfect 45 degrees. One of the biggest lightbulb moments for me was realizing that the reason we use structural screws instead of old-fashioned lag bolts is because they allow for micro-adjustments and superior clamping in those tight corners where a ratchet won’t fit. I also learned that why we always use stainless steel hardware is crucial for preventing the rust streaks that often plague hard-to-reach framing areas under a window. Don’t be afraid to double up your framing where the boards meet; it gives you the necessary width for those delicate mitered cuts. Finally, always account for the seasons—your composite decking will move more than you think, and that tight winter miter can become a summer headache if you don’t leave a hair of breathing room.
Gear That Makes Complex Angles Feel Simple
If you’re going to tackle this, don’t rely on a plastic speed square from the bargain bin. My essential toolkit includes a digital protractor for finding the actual angle of your home’s foundation. I also swear by a 12-inch sliding miter saw with a dedicated fine-tooth blade to prevent the composite cap from chipping during those long miter cuts. For the planning phase, why a digital designer is the best move for planning a complex backyard deck is clearly to catch spatial conflicts before you waste a single 2×10. Lastly, always keep a bottle of the best way to seal the cut ends of composite boards on hand to protect those freshly cut miters from moisture absorption over time.
Bring Your Vision to Life One Angle at a Time
Framing around a bay window is one of the most rewarding challenges an expert deck builder can face. It transforms a standard flat platform into a custom architectural feature that truly anchors your home to the landscape. While it requires patience and a few extra measurements, the result is a stunning outdoor living space that looks intentionally designed rather than just added on. Take your time, measure from the long point of your miters, and soon you’ll have a deck that stands the test of time. Have you ever found a “mystery angle” in your home that wasn’t what the blueprints promised? Let me know your framing survival stories in the comments below!