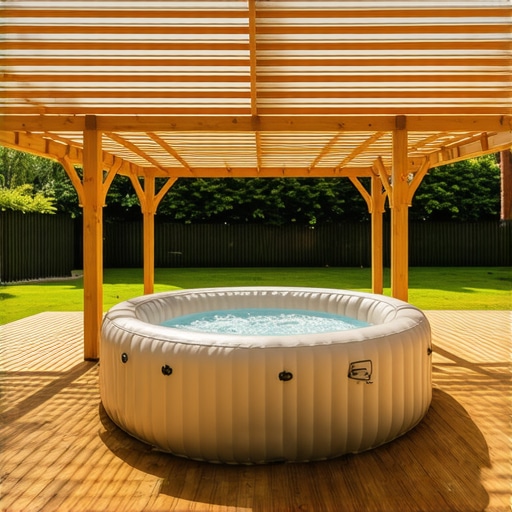
The first time I hauled that big blue box onto my back deck, I was thinking about bubbles and a cold beer. I wasn’t thinking about physics. I filled it up, hopped in with my wife, and about ten minutes later, I heard it—a slow, agonizing creak that traveled right through the soles of my feet. It was the sound of my 15-year-old pressure-treated joists begging for mercy. I realized right then that ‘portable’ does not mean ‘lightweight.’ If you’re like me, you probably thought an inflatable tub was the easy way out of a $10,000 spa installation. But here is the reality: once you add 250 gallons of water and four adults, you are looking at nearly 3,000 pounds sitting on a space no bigger than a dining table. That is a massive amount of ‘dead load’ for a standard structure to carry. Today, I am going to walk you through exactly how I reinforced my own space so you do not end up with a hot tub in your basement—or worse, a collapsed frame. We are going to talk about weight distribution, why you need to look at your footings, and how a few extra pieces of lumber can be the difference between a relaxing soak and a structural catastrophe. [image_placeholder_1]
Is an inflatable tub actually worth the structural headache?
I get it. You bought this thing because it was ‘plug and play.’ The idea of hiring a professional deck builder just to use a $500 tub feels like overkill. But let’s be real: fixing a snapped ledger board or a cracked joist is way more expensive than doing the prep work now. Trust me, I learned the hard way. Early on, I thought I could just slide a couple of 4x4s under the frame and call it a day. I didn’t account for the fact that the reason your deck feels bouncy is often due to poor load-pathing, not just the thickness of the boards.
Stop Guessing and Start Doing the Math
The biggest mistake I see neighbors make is ignoring the numbers. According to the structural experts at The Engineering Toolbox, water weighs about 8.34 pounds per gallon. Do the math: a 250-gallon tub is over 2,000 pounds of water alone. When you add the weight of the tub itself and the people inside, you are likely exceeding 100 pounds per square foot (psf). Most residential decks are only built to handle a ‘live load’ of 40 psf. You are essentially asking your deck to do two and a half times the work it was designed for. I had to go back and protect my deck frame from rot while I was under there, because adding that much weight to a compromised frame is a recipe for disaster. I eventually realized that doubling joists is not just for composite seams; it is a lifesaver for heavy concentrated loads. Have you ever stepped into your tub and felt the boards beneath you give just a tiny bit? It is a terrifying sensation, isn’t it? Let me know in the comments if you have noticed any weird sounds coming from your deck lately.
Think of your deck frame like a bucket brigade. Every piece of lumber has to pass the weight of that water down the line until it hits the dirt. If one person in that brigade trips, the whole system fails. When I first looked under my deck, I realized my ‘brigade’ was a bunch of tired 2x8s spaced 16 inches apart. To support a tub, you need a much tighter, stronger line. Here is exactly how you beef up that frame without tearing the whole thing down.
Beef Up Your Joists with Sistering
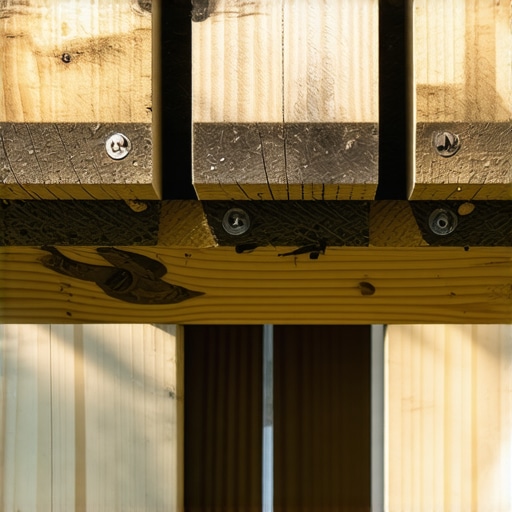
The simplest way to double your strength is a technique called sistering. This is where you take a new piece of lumber, identical in size to your existing joist, and sandwich it right next to the original. When I did this on my own deck, I didn’t just use nails. I learned that you should use structural screws instead of old-fashioned lag bolts or standard nails because they have incredible shear strength and won’t pull out over time as the wood dries. I remember wrestling a 12-foot 2×10 into a space that was exactly 11 feet and 11 inches; it was a mess of sawdust and frustration, but once I clamped it and drove those screws in, that board wasn’t going anywhere. For a hot tub, you want to sister every joist directly under the tub’s footprint, plus one on either side for good measure.
Keep Your Boards Level and Flat
While you are under there adding support, keep in mind that any dip in your joists will be magnified by the weight of the water. This is why pros use double joists under every composite seam and high-load areas to ensure a flat floor. If your joists are already slightly bowed, use a jack to gently lift them to level before sistering them. It is much easier to level a deck frame on uneven ground without using a laser when you have a solid reference point like a 4-foot bubble level and a straight 2×4.
Build a Mid-Span Support Beam
Even sistered joists have a limit on how far they can span before they start to bounce. To kill that bounce, you need to shorten the span by adding a new beam and posts directly under the tub area. I built a temporary ‘dead man’ support to hold the beam up while I dug my footings. It felt like overkill until I saw the structural reason your deck feels bouncy is often just a span that is eighteen inches too long for the weight it carries. By placing a beam right through the center of the tub’s footprint, you effectively cut the stress on your joists in half. Just make sure your posts are landing on solid concrete footings. If you just drop a 4×4 onto a patio stone, it will sink into the mud the first time you fill that tub, and you will find yourself wondering why your stairs feel like they are leaning as the whole deck tilts toward the soft spot.
Block Your Joists to Prevent Rolling
One thing people forget is lateral movement. Joists love to ‘roll’ or twist under heavy weight. To stop this, install solid blocking—short pieces of joist material—between your long runs every 4 feet. I once skipped this on a small landing, and every time someone walked on it, you could hear the wood groaning as it shifted. Adding blocking makes the entire frame act as one monolithic unit rather than a series of individual boards. It is the secret to a rock-solid feel that mimics a concrete pad.
Most people hear ‘composite’ and think ‘set it and forget it.’ I am here to tell you that is a dangerous assumption. While it will not rot like pressure-treated pine, it has its own set of physics-based quirks that can ruin your weekend if you are not careful. The biggest ‘oops’ factor I see isn’t the material failing; it is the installer failing the material. For instance, did you know composite boards can grow by nearly a quarter-inch on a hot July afternoon? If you do not account for that, they will expand right into your siding or buckle upward. Have you ever fallen into this trap? Let me know in the comments.
Why Maintenance-Free is a Total Lie
Everyone says composite is the ultimate fix, but the truth about maintenance-free decking claims is that you are trading sanding and staining for a different kind of vigilance. You need to know why your composite boards are expanding more than expected. If you gap them like traditional wood, you are asking for trouble. In my experience, using hidden clips for the main area is great, but why we use hidden clips for the field but screws for the perimeter is the real secret to keeping the deck from shifting as the temperature swings. Have you ever noticed your boards looking wavy on a hot day? That is often a gapping mistake, not a product defect.
How do you stop composite boards from buckling in the summer sun?
It comes down to thermal expansion coefficients. The American Society of Civil Engineers (ASCE) notes in their ASCE 7-22 guidelines that structures must be designed to accommodate movement without losing integrity. For a deck, this means using specialized fasteners and ensuring your joists are perfectly flat. I used to see people use cedar shingles to level things out, but why you should use block shims instead of shingle shims for joists is a nuance that separates the pros from the DIYers. Shingles compress under the 3,000-pound load of a hot tub; solid blocks do not. It is a tiny detail that prevents your boards from popping their fasteners.
The Silent Killer of Outdoor Staircases
If the hot tub weight does not get you, the stairs might. Most people focus on the decking, but the structural failure usually happens where you cannot see it. I have seen countless DIY decks where the deck stair stringers are cracking at the throat because the installer did not use a bracket that makes your deck stairs feel rock-solid. When you add the dynamic weight of people running up and down, that stress is magnified at the thinnest point of the wood. 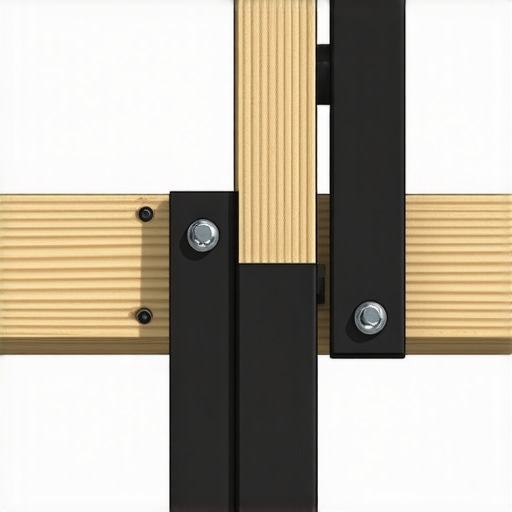 To fix this, I always double-block the middle of long runs. It is one of those ‘hidden’ moves that ensures your stairs do not feel like they are leaning after the first season. It is about building a foundation that respects the math, not just the aesthetic.
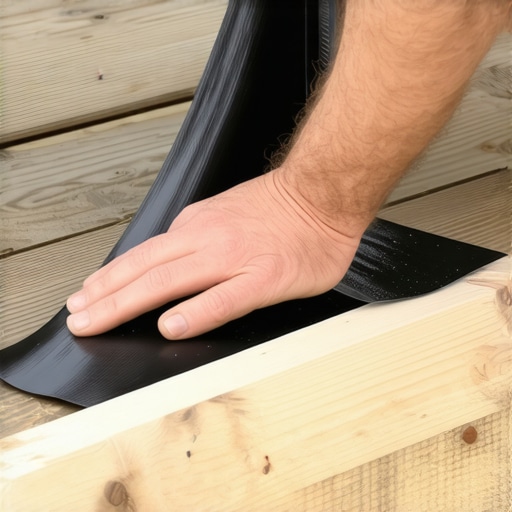
Don’t let the underside rot while you are soaking in that new tub. It is incredibly easy to focus on the pretty boards on top, but the real structural work happens where the sun does not shine. If you are spending thousands on a spa, spend fifty bucks on joist tape. It is the most effective way to keep your deck joists from rotting under the boards where water tends to trap. When I built my last project, I was obsessive about sealing the cut ends of composite boards because moisture wicks into the core like a straw if left exposed. If you skip this, those ‘maintenance-free’ boards will swell and flake at the edges within five years, regardless of the brand. I have seen it happen to neighbors who thought they could cut corners, only to have to replace the perimeter boards way too soon.
How do I maintain my reinforced deck over time?
The reality is that the truth about maintenance-free decking claims is more about shifting your focus than eliminating work entirely. Every spring, I crawl under there and check my sistered joists for any signs of compression or sagging. According to the American Wood Council’s DCA 6 – Prescriptive Residential Wood Deck Construction Guide, standard residential tables do not even account for the concentrated weight of a hot tub, which is why your maintenance routine must include checking for ‘creep’—that slow, permanent deformation of wood under a heavy constant load. If you notice a dip that was not there last season, it is a sign that your footings might be settling or your beams are overstressed. This is why choosing the right composite decking for durable low-maintenance outdoor areas involves looking at the structural integrity of the frame just as much as the beauty of the capping.
Grab These Tools Before You Start Your Next Big Build
I stopped using my old standard impact driver for everything once I realized why I use structural screws instead of lag bolts for ledgers. To do this right, you need a high-torque drill that will not burn out when driving 6-inch screws into triple-laminated beams. I also never swing a hammer without a digital plan anymore. In my professional opinion, the reason why I never start a complex deck project without a digital 3d walkthrough first is simply because it catches structural clashes—like a post landing right on a drainage pipe—before I waste a single dollar on lumber. Looking ahead, I expect to see more ‘smart’ sensors integrated into deck frames to monitor moisture and load stress in real-time, providing homeowners with a phone alert if the structure is failing. For now, stick to the heavy-duty basics: seal your cuts, use joist tape, and always over-build your frame. My challenge to you: grab a roll of joist tape this weekend and apply it to just your stairs or one high-traffic area; you will see the difference in how the wood sheds water immediately.
Hard Truths I Discovered in the Dust Under My Deck
Building a structure to support an inflatable spa taught me that ‘good enough’ is a dangerous lie. First, I realized that weight distribution is never perfectly even; water sloshes and people move, creating dynamic loads that a static design simply cannot handle without extra bracing. Second, I learned that the spacing secret for installing composite decking in winter is just as critical in the summer to prevent buckling under the localized heat of a tub base. Finally, I saw how why picture framing your deck is more than just a style choice—it provides the essential perimeter rigidity needed when anchoring heavy accessories near the edge of your frame. [image_placeholder_e]
The Gear That Makes Every Reinforcement Project Easier
If you are tackling this, do not use a standard screwdriver or a weak cordless drill. I rely exclusively on a high-torque impact driver because structural screws require serious force to seat properly into sistered lumber. I also swear by digital modeling; honestly, why a digital designer is the best move for planning a complex backyard deck becomes obvious the moment you see a potential structural clash on your screen before you cut a single expensive board. Lastly, keep a high-quality laser level and several rolls of butyl joist tape handy to ensure every new support beam is perfectly flat and protected from moisture for the long haul.
Your Next Step Toward a Safe Outdoor Oasis
You do not have to be a professional engineer to create a safe space, but you absolutely must respect the physics of outdoor living. Whether you are adding a heavy spa or just looking to transform your space with expert deck builder tips, the foundation is where your peace of mind lives. Take the time to crawl underneath, inspect your footings, and add the extra lumber now. It is much easier to reinforce a frame today than it is to replace a collapsed deck tomorrow. Have you ever noticed your deck boards making a strange popping sound when the sun hits them in the late afternoon? Let me know in the comments below!