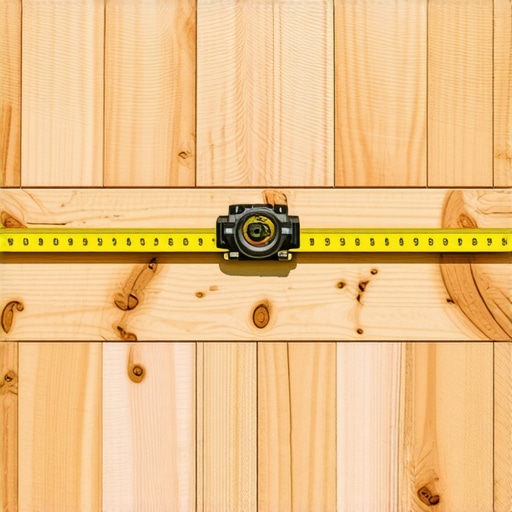
I remember the first time I tackled a ‘mega-deck.’ It was a sweltering July afternoon, and I was finally laying the last few rows of boards on a massive forty-foot-wide project. I stood back, cracked a cold water, and felt my stomach do a slow roll. From the far left to the far right, the boards weren’t just a little off—they looked like a topographical map of a winding river. I had a ‘wave’ that drifted nearly two inches over the span. It was an expensive, heartbreaking lesson in why you cannot simply ‘wing it’ when you are working with these kinds of distances. If you have ever stood back from a weekend project only to realize your ‘straight’ line has a mind of its own, you know exactly the frustration I am talking about. Today, I am going to show you how to avoid that sinking feeling and get lines so straight your neighbors will think you used a surgical laser.
Stop Chasing the Gap and Start Using a String Line
When you are working with a 40-foot span, the biggest mistake you can make is trusting the factory edge of your boards or your own eyesight. Even the most expensive composite decking can have slight crowns or bows that magnify over a long distance. On my first big fail, I didn’t realize that being off by just an eighth of an inch every five feet meant I’d be miles away by the end of the run. To fix this, you need to treat your deck like a precision instrument. This is where the best way to frame a picture frame border on a deck becomes a lifesaver, as it gives you a fixed perimeter to work toward. We are going to focus on ‘snapping’ control lines every few feet to ensure the middle of your deck stays as true as the edges.
Is Perfection Even Possible Over Such a Long Distance?
You might be thinking that a tiny wobble won’t be noticed once the patio furniture is out. Trust me, it will. A 40-foot run creates a visual ‘vanishing point’ that draws the eye right to any inconsistency. According to the Forest Products Laboratory, wood and even some composites can expand or contract significantly based on temperature and moisture content, making that long run even more temperamental than it looks on paper. This is precisely why picture framing your deck is more than just a style choice; it provides a structural boundary that helps hide the inevitable expansion gaps. Have you ever tried to eyeball a long run only to have it come back and haunt you? Let’s look at the specific framing moves that will keep your boards locked in place before you even drive the first screw.
Master the Layout Before the First Board Touches the Joist
To keep a 40-foot run straight, you have to stop thinking about individual boards and start thinking about the grid. On that sweltering July project I mentioned, I made the mistake of measuring from the house wall for every single board. The problem? House walls are almost never perfectly straight. Instead, I now establish a ‘master line’ using a high-tension string line or a laser level that runs parallel to the outer rim joist. If you are building a larger structure, why a digital designer is the best move for planning a complex backyard deck becomes clear because it helps you visualize these layout challenges before you’re standing in the sun and making guesses.
Snap Control Lines Every Four Feet
Don’t just trust the previous board’s edge to be your guide. Every 48 inches, I snap a chalk line across the joists. This acts as a ‘reset button.’ If I see that I’m drifting by 1/16th of an inch, I can subtly adjust the next few gaps to get back on track. This is especially critical when you consider why your composite boards are expanding more than expected due to thermal fluctuations throughout the day. If you don’t have these reference points, that 1/16th inch error grows into a two-inch nightmare by the time you reach the far end. 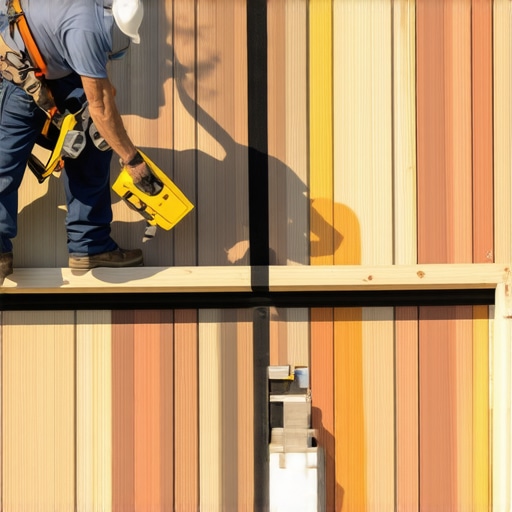
Why Joist Tape Improves Your Accuracy
It sounds counterintuitive, but why I always use joist tape on every single deck frame isn’t just about rot prevention; it is about visibility. The black surface of the tape makes your chalk lines pop, making it much easier to see exactly where your board edge needs to land compared to the muddy grain of pressure-treated lumber. On a project in Draper last year, I was working with a dark grey composite and couldn’t see my marks on the bare wood. The tape gave me a high-contrast guide that kept the lines surgical.
Manage the Mid-Span Bow Like a Pro
Composite boards are like wet noodles when they are 20 feet long. Even if your ends are perfectly aligned, the middle will inevitably want to wander or ‘crown.’ I use a ‘bo-wrench’ or a similar board-straightening tool to pull or push the mid-section into alignment with my snapped control lines before fastening. This is also where why we use hidden clips for the field but screws for the perimeter matters. Clips allow for some micro-movement, but they don’t have the sheer ‘grab’ of a screw to force a stubborn board into a perfectly straight line. For those perimeter runs, I always go with structural screws to lock that straightness in place forever.
Seal Your Ends to Prevent Future Warping
If you are cutting boards to meet in the middle of a 40-foot run, the best way to seal the cut ends of composite boards is a step you cannot skip. Moisture creeping into the core can cause the ends to swell at different rates, ruining that laser-straight line you worked so hard to achieve. I once worked on a deck where the homeowner called me back six months later because the butt-joints looked like shark teeth—all because the original installer didn’t seal the factory cuts. It’s a five-second step that saves a decade of visual frustration.
You followed the string line, you snapped your chalk marks, and you sealed every cut. Yet, six months later, you notice a slight dip in the middle of your stairs or a ‘spongy’ feel when you walk toward the grill. This is where most DIYers—and even some pros—hit a wall. There is a massive difference between a deck that passes inspection and a deck that stays rock-solid for twenty years. Let’s dig deeper into the nuances that the big-box store pamphlets usually leave out.
The Maintenance-Free Label is a Marketing Lie
Everyone tells you that once you switch to composite, you are done with work forever. In my experience, the truth about maintenance-free decking claims is that they are slightly exaggerated. While you won’t be sanding and staining every May, composite is a thermal plastic. It moves. It breathes. It expands. If you don’t account for the ‘creep’—the tendency of solid materials to move slowly or deform permanently under the influence of persistent mechanical stresses—your perfectly straight lines will eventually buckle. According to the North American Deck and Railing Association (NADRA), improper ventilation under a low-profile deck can trap heat, causing composite boards to expand beyond their design limits and pop fasteners right out of the joists.
Why 16-Inch Spacing Kills Your Composite Stairs
If you are building stairs, here is the ‘oops’ factor that ruins more projects than anything else: the 16-inch center rule. For standard wood, 16 inches is fine. For composite, it is a recipe for a sagging disaster. Because composite lacks the structural stiffness of natural timber, those treads will feel like diving boards within two seasons if they aren’t supported correctly. This is exactly why your deck stairs need a middle stringer for stability—and honestly, I usually recommend 12-inch spacing for stairs. When you are looking for innovative stairs solutions for safe outdoor deck access, the secret isn’t just the railing; it is the beefed-up skeleton underneath that prevents that unsettling flex every time you step down with a tray of burgers.
Why does my deck feel bouncy even though I followed the code?
This is the most common advanced question I get. The International Residential Code (IRC) provides minimum requirements for safety, but ‘minimum’ doesn’t mean ‘comfortable.’ A joist span might be legally safe but still suffer from high deflection. This is the structural reason your deck feels bouncy when you walk. To achieve that ‘concrete’ feel, I always ‘up-size’ my joists or ‘down-size’ my spans. If the span chart says a 2×10 can go 14 feet, I cap it at 12 feet. That extra stiffness makes the difference between a deck that feels like a platform and one that feels like a trampoline. Have you ever fallen into this trap of building strictly to code only to realize the ‘feel’ was all wrong? Let me know in the comments.
Building a 40-foot span is as much about managing physics as it is about swinging a hammer. By moving beyond the basics and addressing the structural nuances of thermal expansion and joist deflection, you ensure that your ‘surgical’ lines stay that way for the life of the home. If you want to dive even deeper into specific layouts, checking out deck builder insights designing your dream outdoor space can help you marry these structural requirements with the aesthetic you’re chasing.
Building a 40-foot deck is a test of patience, but the right equipment turns a grueling marathon into a victory lap. I stopped using standard bubble levels for anything over eight feet years ago; they simply aren’t precise enough for long-range grading. Instead, I rely on a rotary laser level to establish a constant elevation across the entire site. It creates a 360-degree plane of light that ensures every post is cut to the exact millimeter. If you’re tackling this on a budget, the trick to a perfectly level deck on a sloped yard often comes down to how well you can trust your reference points. Using a laser eliminates the cumulative error that happens when you move a spirit level from one joist to the next.
Hardware that won’t quit after five seasons
When we talk about the long-term staying power of a deck, the hardware is the unsung hero. I’ve completely transitioned away from traditional lag bolts for securing ledgers. The reason we use structural screws instead of old-fashioned lag bolts is simple: they offer equivalent strength with a thinner shank that reduces the risk of splitting your rim joist. According to the American Wood Council’s DCA6 (Prescriptive Residential Wood Deck Construction Guide), the connection at the ledger is the most frequent point of failure in older decks. By using structural screws, you’re creating a bond that won’t loosen as the wood naturally shrinks and expands over the first five years. This level of detail is exactly the benefits of working with a professional deck builder in your outdoor projects because we know which fasteners are actually rated for the weight of a massive forty-foot span.
How do I maintain my large composite deck over the years?
The biggest threat to a long-span deck isn’t actually the sun—it’s hidden debris. In a 40-foot run, you have a lot of linear feet of gaps where organic matter like wet leaves and pollen can settle. I always tell my clients that the best way to clean pine needles out of deck gaps is a simple leaf blower used once a week. If those gaps get plugged, moisture stays trapped against the top of the joists, leading to premature rot. And please, why you should never power wash your composite deck is a lesson you don’t want to learn the hard way. High pressure can etch the protective cap of the composite, creating permanent scars that hold onto dirt and ruin that surgical finish you worked so hard to achieve.
The digital shift in outdoor living
Looking toward composite decking trends 2025 the ultimate guide for outdoor enthusiasts, the industry is moving toward total digital integration. We are seeing more homeowners wanting a smart deck where everything from the heating elements to the integrated sound is managed via a single hub. This is why I never start a complex deck project without a digital 3d walkthrough first. It allows us to map out the wiring for things like the glare-free way to light your deck stairs for safety before a single board is fastened. In the future, I expect to see even more pre-fabricated steel framing systems that offer the kind of precision that wood simply can’t match. Try this advanced move on your next build: swap out your standard lag bolts for structural screws on the ledger board and see how much faster and tighter the connection feels during the installation process.
The Hardest Lessons I Learned Building Massive Composite Decks
After years of squinting down forty-foot runs, I have realized that the small stuff is actually the big stuff. First, never underestimate the power of the sun. Even choosing the right composite decking for durable low-maintenance outdoor areas won’t save you if you do not respect expansion gaps; that material has to go somewhere when it gets hot. Second, your ledger connection is the backbone of the entire project. Using the reason we use structural screws instead of old-fashioned lag bolts as your guide ensures the structure stays attached to the house through every season. Finally, always double-check your footings. A 40-foot span carries immense weight, and if the ground shifts, your surgical lines will become a memory.
The Gear That Saves My Sanity on Large Builds
You do not need a warehouse full of tools, but for a project this size, these are non-negotiable for me. A Rotary Laser Level is my first recommendation; it eliminates the human error that comes with moving a 4-foot bubble level across a 40-foot distance. I also swear by Joist Tape—it is the best way to protect your deck frame from rot for thirty years. For the boards themselves, a Bo-Wrench or board straightener is the only way to tackle the natural curves in composite. Lastly, check out maximizing outdoor space inspiring deck and stair ideas for every budget to see how to allocate your remaining funds toward high-impact finishing touches like integrated lighting.
Your Backyard Transformation Starts Here
There is nothing quite like the feeling of standing on a massive, rock-solid platform that you built with your own hands. Whether you are implementing innovative outdoor living ideas with composite decking in 2025 or sticking to a classic layout, the precision you put in now pays dividends for decades. Use these expert deck builder tips for stunning outdoor living to guide your final design choices, and do not be afraid to take that first measurement. Your dream outdoor space is just a string line away. Have you ever started a project only to realize the scale was much bigger than you initially expected? Let me know about your biggest building challenge in the comments below!