
I remember the exact moment I realized my beautiful composite deck was starting to feel like a trap. It was a sunny Saturday, and I was struggling to reach the fading paint stains on the upper stairs—arms aching, sweat dripping, and the frustration mounting. That twinge of annoyance turned into a lightbulb moment: I wanted a lush, green lawn right where my deck once loomed, but I had no idea how to transition smoothly without turning my yard into a muddy mess or spending a fortune on renovations.
Why Transitioning from Your Deck to a Green Lawn Is Trickier Than It Looks
Transforming a deck area into a vibrant, welcoming lawn isn’t just about removing boards and planting grass. It’s about carefully planning a seamless connection that preserves safety, aesthetics, and functionality. If you’ve ever faced the challenge of replacing an awkward, aging deck with a lush, inviting yard, you’re not alone. Many homeowners feel overwhelmed by the sheer complexity—thinking, “Will I have to tear everything out? Do I need a landscape architect?” Honestly, I made that mistake early on. I jumped into ripping apart my deck without understanding the structural implications and ended up with uneven ground and muddy patches that only worsened the problem.
Understanding the subtle intricacies can be the difference between a headache and a rewarding transformation. Over the years, I’ve learned there are practical, efficient ways to approach this process—ways that prevent common pitfalls and set your yard up for years of enjoyment.
If you’re nodding along, wondering how to turn your deck into a lush lawn without the chaos, my experience and research have shown that with strategic planning and proper execution, you can achieve a stunning transition. For instance, exploring innovative solutions such as carefully integrated stairs and seamless transitions can make all the difference. Want to see how professional insights can help? I recommend checking out [the benefits of working with a professional deck builder](https://deckdesignbuild.com/the-benefits-of-working-with-a-professional-deck-builder-in-your-outdoor-projects) to see how expert guidance elevates your project.
Before diving into the actual steps, let’s address one common concern many have: “Is tearing out my deck and replacing it with a lawn truly worth it?” The answer hinges on your goals—whether you want a backyard that feels open and natural, or a space perfect for family gatherings and outdoor activities. Achieving this transition successfully involves understanding the critical details—like foundation considerations, slope management, and safety features—that will ensure your lawn stays lush and your deck remains safe and attractive during and after the change.
So, are you ready to learn how to make this transformation smooth, safe, and stunning? Let’s explore the practical steps that will turn your outdoor space into a backyard oasis while avoiding costly mistakes.
Clear the Deck and Prepare the Site
Begin by removing all furniture, planters, and any decorative elements from your existing deck. Use a power washer to thoroughly clean the surface, revealing any structural issues that need attention. For example, last spring, I used a pressure washer and discovered rotting joists hidden beneath a layer of dirt, which I had to replace before proceeding.
Assess and Reinforce the Foundation
Inspect the deck’s support posts and footings to ensure they can handle new load requirements. If posts are compromised or uneven, reinforce or replace them to prevent future sagging. Think of this step as tuning a musical instrument—proper support ensures everything sounds (or in this case, looks) just right.
Design a Seamless Transition Between Deck and Lawn
Create a gentle slope where the deck meets the ground to allow for proper drainage and ease of access. Consider installing low-profile stairs using off-the-shelf kits or custom designs. For inspiration, check out seamless stair transitions. I once built a small set of stairs that curved naturally into the lawn, making the space feel more integrated and inviting.
Install Suitable Landscaping and Edging
Lay down landscape fabric to suppress weeds, then add gravel or crushed stone at the base of the transition for stability and drainage. Use edging materials like metal or composite curbs to define the lawn boundary sharply. I found that combining a metal edging with a slight outward flare made the transition look professional and kept the grass contained, even after heavy rainfall.
Lay Down Fresh Grass or Sod
Choose a grass type suited to your climate and sunlight exposure. For quick results, sod is preferable, but seed can be more economical. During my project, I opted for sod, laying it immediately after preparing the soil, which resulted in a lush green lawn within weeks. Water daily to establish roots and prevent the grass from drying out.
Incorporate Functional Landscape Features
Add features like a pathway, fire pit, or outdoor furniture to connect the lawn and deck areas naturally. Use materials that complement your existing deck, such as composite decking fragments or natural stone. I added a small stone pathway leading from my deck stairs to the lawn, which made the space feel well-planned and inviting.
Address Safety and Maintenance Early
Install proper lighting along stairs and pathways to prevent accidents at night. Regularly check the support structures and keep the lawn well-maintained to prevent erosion or uneven ground. I installed solar-powered lights to highlight the transition at night, significantly improving safety and ambiance.
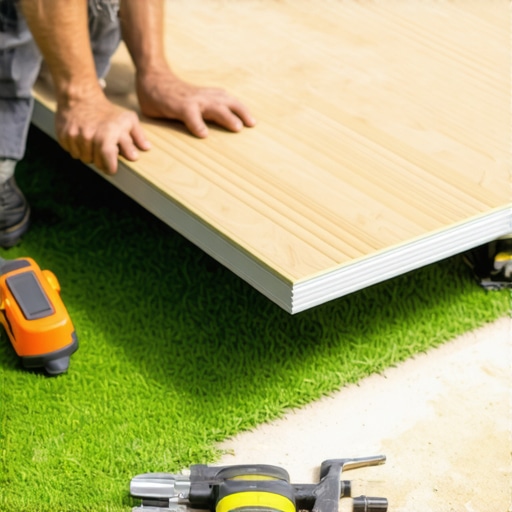 Many homeowners believe that choosing the latest composite decking or DIY stairs guarantees a flawless outdoor upgrade, but the reality is far more nuanced. Contrary to popular belief, not all composite decks are equal; the quality, installation methods, and material trends significantly influence long-term durability. For example, many assume that composite decking requires zero maintenance, yet improper cleaning routines or neglecting end-sealant can lead to warping and mold buildup, undoing all the supposed low-maintenance benefits. This is where expert guidance—such as consulting a seasoned deck builder—can make a huge difference.
One crucial but often overlooked point is the importance of seamless stairs design. Incorporating custom solutions that marry safety with aesthetic appeal is essential, yet many DIYers fall prey to common pitfalls, like improper stringer spacing or neglecting code-compliant riser heights. Interestingly, recent studies reveal that poorly designed stairs are among the top causes of outdoor accidents; planning carefully can help prevent serious injuries. Learn more about safe and stylish outdoor stairs to avoid this trap.
Another misconception revolves around professional involvement. Some believe that a DIY approach saves money, but underestimated labor, materials, or rework often results in higher costs and compromised safety. Engaging a professional ensures that structural elements like support posts and footings meet code, preventing future issues. For insight on building a resilient outdoor space, explore innovative stair solutions tailored for durability.
Even in trend-focused design, subtle details matter. For instance, underestimating the impact of climate-specific materials can lead to premature wear. Softwood stairs may look appealing but degrade quickly in moist environments, whereas treated or composite options last longer. Staying updated on composite decking trends helps in choosing the right materials.
Always remember, mastering outdoor upgrades requires attention to small details and avoiding common myths that can derail your project. For example, assuming that all composite materials age similarly can lead to disappointment; some formulations are designed to resist fading and staining better than others. Research and expert consultation are key. Have you ever fallen into this trap? Let me know in the comments. For additional tips on elevating your outdoor space, visit deck builder insights.Maintaining your outdoor deck and stairs requires more than just occasional cleaning; it involves using the right tools and implementing effective routines. I personally swear by a quality oscillating multi-tool to handle detailed cleaning and minor repairs—its versatility makes it invaluable for trimming and sanding tight corners and replacing broken fasteners. For larger surface cleaning, I prefer a high-pressure washer with adjustable nozzles, but I always ensure to keep the pressure moderate to avoid damaging composite decking. Regular inspections are crucial; I recommend creating a maintenance checklist that includes checking for loose fasteners, signs of wear, and possible wood rot in support posts. To keep your composite deck looking pristine, I use a dedicated cleaning solution specially formulated for composite material, which prevents mold buildup and maintains color fidelity—avoiding generic cleaners that can damage the finish. When applying sealants or end caps, I opt for the latest UV-resistant products that prolong the deck’s aesthetic and structural integrity, as highlighted in the latest composite decking trends for 2025. Predicting the future, I believe smart, IoT-enabled maintenance devices will soon automate inspections and alert homeowners to potential issues before they escalate, saving time and money.
### How do I maintain my outdoor deck over time?
Developing a systematic approach to your outdoor living area’s upkeep ensures longevity. Start by scheduling seasonal cleanings, using a soft-bristle brush and appropriate cleaner to remove debris without scratching surfaces. Incorporate structural inspections—pay special attention to support posts and joists, as they endure the most stress. Additionally, investing in a cordless magnetic inspection mirror enables you to easily identify hidden issues behind support beams—an often overlooked step that prevents costly repairs later. For stairs, ensure that all fastenings are tight and that tread surfaces are level, replacing any worn or cracked components promptly. Applying a penetrating sealant every few years, especially in high UV exposure areas, can significantly extend the lifespan of your composite decking, as emphasized in the comprehensive guide on composite deck longevity.
Expert insights reveal that using joist tape on every deck frame connection can double its lifespan by preventing moisture infiltration and rot. (See [how to tape your joists](https://deckdesignbuild.com/how-to-tape-your-joists-to-double-the-life-of-your-deck-frame) for detailed instructions.) Integrating these maintenance habits is simple yet profoundly effective, ensuring your outdoor space remains stunning and safe for years to come.
Ready to elevate your maintenance game? I highly recommend trying out a digital inspection mirror combined with a punch list app to schedule and document your routine checks. This small step can make routine maintenance much more manageable. Keep your outdoor living spaces in top shape by adopting these tools and practices today!
What I Overlooked When Ripping Out My Deck
One of the biggest lessons I learned was that removing an old deck isn’t just about discarding wood; it’s about understanding the underlying structure. Underestimating support support and foundation integrity led me to costly fixes later. Knowing the importance of inspecting support posts and footings can save you time and money, and prevent safety hazards down the line.
Why Seamless Transitions Are a Game Changer
My biggest breakthrough came when I realized that connecting my lawn to the deck requires more than just a few steps and grass. Proper slope grading, thoughtful edging, and integrated stairs create a natural flow that feels inviting rather than disjointed. Incorporating these details turned a DIY project into a professional-looking outdoor space that’s both beautiful and functional.
Stairs That Speak Safety and Style
I used to think stairs were just functional—until I discovered how poorly designed steps can pose safety risks. Custom, code-compliant stairs with gentle riser heights and slip-resistant treads not only improved safety but enhanced curb appeal. Learning to design stairs that blend safety and style prevented many future headaches.
Landscaping With an Eye for Details
What truly elevated my yard was integrating features like gravel bases, metal edging, and well-chosen grass types. These details weren’t flashy but made the transition durable and low maintenance. I found that paying attention to small but crucial elements like weed barriers and proper drainage makes all the difference in the long run.
Insider Wisdom from My Hard-Earned Experience
- Pre-inspect support structures. Never assume your deck’s support posts are sound; a quick check can prevent collapse or sagging later.
- Prioritize safety and code compliance. Custom stairs and railings may take extra effort but ensure safety and save you from liability issues.
- Don’t rush the foundation work. A sturdy base prevents future heaving, shifting, and uneven grounds that ruin aesthetic and safety.
- Invest in good edging and drainage solutions. Small upgrades here preserve your grass and prevent muddy patches.
My Essential Tools for Outdoor Living Success
From a reliable pressure washer to a digital level, I rely on tools that make prep work easier and more precise. A quality landscape fabric roll and metal edging kit are worth every penny—these simple additions ensure your transition lasts. For maintenance, I use a special composite cleaning solution that keeps my decking looking vibrant and mold-free. These choices empower me to maintain a beautiful yard without constant rework.
Keep Moving Forward: Your Outdoor Oasis Awaits
Transforming your backyard takes patience and attention to detail, but the payoff is undeniable—a lush, inviting space to enjoy for years. Remember, every well-planned detail—from stairs to edging—contributes to a seamless, safe, and stunning outdoor environment. Whether you’re starting fresh or refining a current layout, embracing these lessons will steer you clear of costly mistakes and inspire confidence in your project.
So, what feature in your outdoor space are you most eager to upgrade next? Share your thoughts below—I’d love to hear your plans and help you avoid common pitfalls!