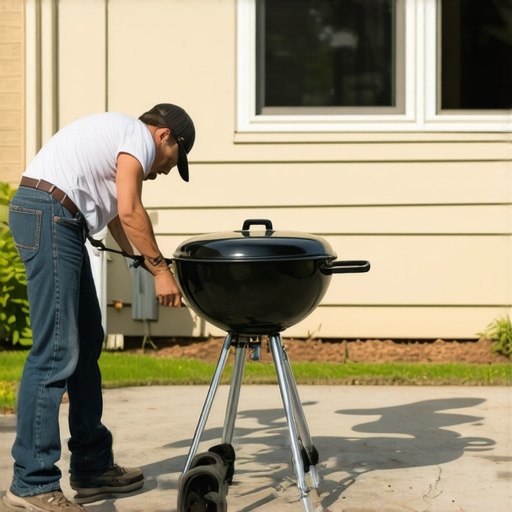
It was a sunny Saturday afternoon when I finally got around to setting up my outdoor grill. Eager to enjoy a backyard barbecue, I placed my grill snug against the house, right next to the vinyl siding. Moments later, I heard a faint sizzling sound—turns out, the bottom of the grill had been casting a mini heatwave onto the siding. My heart sank as I watched the vinyl start to warp and melt before my eyes. That lightbulb moment made me realize just how critical the placement of a grill is for homeowners like us.
Why Your Grill’s Position Might Be a Disaster Waiting to Happen
Positioning your grill seems straightforward, but overlooking a few simple principles can turn your outdoor oasis into a costly nightmare. Vinyl siding is designed to withstand weather and minor impacts, but direct exposure to high heat—even the kind generated during cooking—can cause irreversible damage. Believe me, I learned this the hard way early in my backyard remodeling. A small mistake, like placing the grill too close to the house, can lead to warping, bubbling, or even fires.
Luckily, understanding the basics can save your siding—and your sanity. Today, we’ll cover how to position your grill safely without sacrificing accessibility or style. By following these tips, you’ll turn your outdoor space into a beautiful, functional retreat, free from the worry of heat damage.
Could Your Grill Damage Be Preventable? Myth or Reality?
Many homeowners think that a little heat won’t cause trouble. I used to believe that, too. But I found out the hard way that even moderate temperatures from a grill’s underside—especially during long, hot cookouts—can melt vinyl siding. An early mistake of mine was not considering the heat radius. Now, I always check the manufacturer’s specifications on heat tolerance and adhere to recommended clearances. For expert insights, I recommend visiting [this resource](https://deckdesignbuild.com/transform-your-space-expert-deck-builder-tips-for-stunning-outdoor-living), which covers safe outdoor setups to protect your investments.
So, if you’re asking yourself whether placing the grill a few feet away from the house is enough, the answer is—probably not. Setting the right distance and creating barriers is essential to preserving your home’s exterior beauty and safety. Next, let’s get into practical steps to find the perfect spot for your grill, so you can enjoy your barbecues without unintended consequences.
Identify a Safe Distance from Your House
When I first set up my grill, I assumed placing it just a few inches away from the siding was fine. However, I quickly realized that vinyl siding can warp and melt within a 12-inch radius of high heat. To avoid this mistake, measure out at least a 3-foot clearance, as recommended by safety guidelines. Use a tape measure and mark the spot with chalk or tape for accuracy. During my trial, I found that this extra space prevented any heat damage, keeping my siding pristine and my mind at ease.
Create a Heat-Resistant Barrier
Next, I installed a non-combustible barrier—a concrete paver slab—beneath the grill. Think of it like a sturdy, heat-absorbing mat that isolates the grill’s heat from your siding. I chose a slab size slightly larger than the grill’s footprint, ensuring ample coverage. This barrier not only shields the siding but also stabilizes the grill, preventing wobbling during cooking. For a sleek look, consider using composite decking materials like those described in this guide.
Proper Ventilation and Airflow Management
To prevent heat buildup, I left gaps around the barrier for airflow, which helps dissipate heat efficiently. Avoid enclosing the grill in tight spaces; instead, ensure there is open space on all sides to allow heat escape. It’s like designing a chimney—chimneys need ventilation for safe operation, just like your grill area. During my setup, I kept a 2-foot perimeter clear of any flammable objects, which reduced heat accumulation and improved safety.
Choose the Right Location for Accessibility
While safety is paramount, accessibility is still important. I positioned my grill near the outdoor kitchen area but far enough from the house, similar to how a deck builder arranges a kitchen peninsula for easy reach without obstructing traffic flow. Remember, you’ll need to access fuel, utensils, and cleaning supplies easily. Use the proximity to your seating area to minimize walking distances during your cookouts. During my first weekend, I tested different spots and found that a location 4 feet from the house offered the best combination of safety and convenience.
Implement a Visual Guide for Consistency
To ensure I always maintained the safe distance, I painted a line around the designated area with heat-resistant paint. It’s like marking a designated yard line in sports—keeps everyone aware of boundaries. Each time I cook, I check that the grill remains within this zone. This simple step prevents accidental drift closer to the siding, especially when friends are over. During my initial setup, I learned that consistent boundaries save time and prevent costly repairs down the line.
Many homeowners believe that choosing composite decking and building stairs is straightforward, but in reality, there are subtle pitfalls that can compromise both safety and aesthetics. While the market markets easy, maintenance-free options, the truth is that not all composite materials perform equally under different conditions. For instance, some assume that all composites resist fading and staining equally, but recent studies reveal significant variations, especially in certain trends for 2025. It’s crucial to select products that have better UV resistance and low-maintenance properties, as explained in detailed guides like this resource. Additionally, many overlook the importance of proper stair design, which involves not just aesthetics but also safety. Advanced builders recommend integrating middle stringers and proper riser heights to prevent accidents, as detailed in this article. A common myth is that once the decking is installed, special treatments are unnecessary, but neglecting regular inspections for warped boards or loose fasteners can lead to costlier repairs later. Furthermore, well-designed outdoor living spaces go beyond the deck surface; they require strategic planning for lighting, privacy, and transitions. Skipping these nuanced details makes a significant difference in the durability and enjoyment of your space. Advanced homeowners even consider integrated drainage solutions beneath the deck to prevent moisture buildup, which can cause rot and degrade composite materials over time. According to experts, such as the professional insights, understanding these intricacies elevates your project from amateur to masterful. Don’t fall for the misconception that decking is just a DIY weekend project; it involves careful planning, material knowledge, and precision. Remember, the devil is in the details, and mastering them ensures your outdoor area remains beautiful, functional, and safe for years to come. Have you ever fallen into this trap? Let me know in the comments.
Keeping Your Outdoor Space in Top Shape: Tools and Maintenance Strategies
Maintaining a beautiful and durable deck requires the right tools and a proactive approach. Over time, even the best composite decking and stairs can suffer from wear, dirt buildup, and environmental stress. I recommend investing in a few specialized tools to keep your outdoor living area looking pristine and functioning safely. For example, a high-quality power washer with adjustable pressure settings is invaluable for routine cleaning. I personally use a model like the Karcher K4, which allows me to tackle stubborn grime without damaging the surface. Regularly cleaning your deck prevents mold, algae, and dirt from compromising the composite material, extending its lifespan significantly.
Another essential tool is a set of stainless steel deck screws and a cordless impact driver. I prefer impact drivers because they provide the torque needed to secure fasteners tightly without stripping the heads. This is especially important when replacing loose or damaged boards or installing new features like privacy screens. To ensure fasteners resist corrosion over years of outdoor exposure, I opt for weatherproof options designed specifically for decking projects. Remember, proper fastening not only enhances safety but also maintains the deck’s aesthetic appeal.
For ongoing maintenance, a good quality deck stain or sealant tailored for composite or wood materials is necessary. I recommend scheduling this every 2-3 years, depending on exposure. Using a sprayer like the Wagner Control Spray Max makes applying sealants quick and even, saving time and effort. Additionally, a pair of weather-resistant gloves and safety goggles are non-negotiable for protecting yourself during cleaning and sealing tasks. Staying on top of maintenance with these tools ensures your deck remains inviting and functional for years to come.
Looking ahead, technological advances such as smart deck monitoring systems are beginning to emerge. These systems can track moisture levels, temperature fluctuations, and even structural shifts—enabling homeowners to perform preventative maintenance before issues escalate. While currently a niche market, I predict that in the next few years, integrated sensors and IoT connectivity will become standard in high-end outdoor living setups. Incorporating such innovations now can give you a significant edge in maintaining your outdoor oasis efficiently.
How do I maintain my outdoor deck over time?
Consistency is key. Regularly inspect your deck for loose fasteners, warped boards, or signs of wear. Keep a schedule for cleaning, resealing, and replacing damaged components. Using the right tools, like impact drivers and pressure washers, makes these tasks easier and more effective. Don’t forget to consult experts or detailed guides—such as this resource—to refine your maintenance routines. By staying diligent and equipped with quality tools, you’ll preserve your deck’s beauty and safety for decades.
Ready to elevate your deck maintenance game? Try using an impact driver for quick fastener repairs or a professional-grade pressure washer for deep cleaning. These targeted techniques will streamline your upkeep and keep your outdoor haven looking its best.
Hidden Pitfalls: Lessons the Hard Way
One of the most valuable lessons I learned about deck building was the importance of proper footings. Initially, I underestimated how much deeper they needed to be, especially in my area with frost heaves. This oversight led to gradual shifting and uneven surfaces, reminding me that planning for climate conditions saves headaches down the line. Also, I once thought that choosing cheaper composite decking was a smart cost-saving move—until I realized how quickly it faded and stained under direct sunlight. This taught me that investing in higher-quality materials pays off in durability and appearance. Lastly, I overlooked the significance of adequate ventilation beneath the deck, which caused moisture buildup and slower drying times, illustrating that good airflow is essential for longevity. These