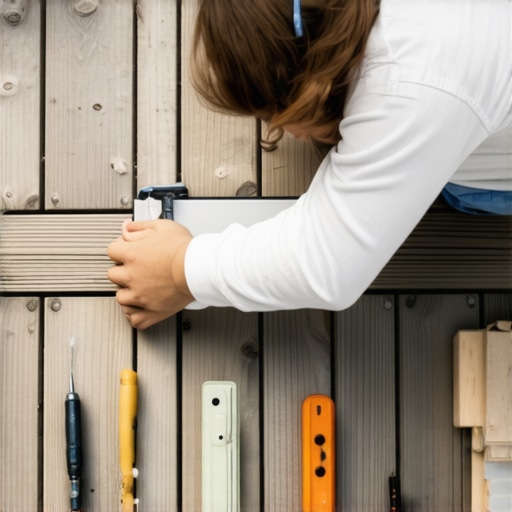
I remember the first time I tried to add a picture-frame border around my deck. I thought it would be a quick touch-up—just a few boards, right? Well, I quickly learned that rushing through the framing process often leads to uneven edges and noticeable gaps that can spoil the entire look. That lightbulb moment taught me a crucial lesson: taking the time to properly plan and execute your deck’s border makes all the difference.
Why Your Deck’s Border Can Make or Break the Space
A well-framed border isn’t just a finishing touch; it’s the visual foundation that pulls your entire outdoor living area together. When done right, it creates a seamless transition between the deck surface and the yard, enhancing curb appeal and even increasing your home’s value.
But here’s the reality: many homeowners overlook this step or rush it, leading to crooked lines, uneven spacing, and unsightly gaps. Early in my projects, I made the mistake of not double-checking my measurements before cutting. This oversight resulted in boards that didn’t fit perfectly—something you really notice when you step back to admire your work.
Thankfully, I found that taking a methodical approach, like carefully measuring and aligning the boards, makes a significant difference. If you’re tired of seeing uneven borders or feel overwhelmed by the process, don’t worry—you’re not alone. I’ll walk you through the best way to frame your deck border for a crisp, professional look.
Interested in transforming your outdoor space? Start by exploring some innovative deck design ideas [here](https://deckdesignbuild.com/transform-your-outdoor-living-with-custom-composite-decking-ideas), and then let’s tackle that border with confidence.
What’s Holding You Back from Perfecting Your Deck Border?
Many homeowners worry about whether framing a border is truly worth the effort, especially if their first attempt didn’t turn out as planned. Trust me, I’ve been there. Early on, I thought that a simple cut-and-nail approach would suffice—but I soon realized that precision is key.
In fact, a common mistake I made early was not accounting for the natural expansion and contraction of the wood, which can cause gaps over time. It’s crucial to choose the right materials and fasteners, and to follow proper installation techniques. For more insights on choosing durable materials, check out this guide on [composite decking trends](https://deckdesignbuild.com/composite-decking-trends-2025-the-ultimate-guide-for-outdoor-enthusiasts).
So, if you’ve faced frustrations with uneven borders or are simply unsure where to start, don’t worry. In the next sections, I’ll share proven tips and tricks to help you frame your deck border as beautifully as a professional.Start by measuring the perimeter of your deck accurately using a tape measure, double-checking each corner to account for any irregularities. Imagine you’re sizing a custom picture frame—you want every measurement precision to avoid gaps or overlaps. Use a chalk line to mark your cut lines, ensuring straight, visible guides for your saw. Once marked, set your saw to the correct depth, typically equal to the thickness of your decking material, and cut along the chalk lines with a steady hand, mimicking a builder’s focus on clean cuts. Now, lay out your border boards on the ground, aligning them to your measurements, and preview your layout. When satisfied, fasten the border boards to the deck framing using stainless steel screws—these resist rust and ensure longevity. During installation, stagger your joints for visual appeal, like a brick pattern, to prevent weak spots. Regularly check your work with a level; imagine it as your project’s heartbeat—keeping everything in harmony. To bridge uneven surfaces or gaps, use shims behind boards, pressing them firmly as you screw in to prevent movement over time. For corners or irregular edges, cut your boards at 45-degree angles to create seamless miter joints that look professional. Remember, precision now saves hours of correction later; take your time measuring, marking, and fitting each piece. In my previous project, I realized that rushing these steps led to crooked borders, so I slowed down, verified each measurement multiple times, and used a square to check corners—resulting in a crisp, attractive border that amplified my deck’s appeal. This careful, deliberate approach transforms a simple border into a striking feature of your outdoor space.While many homeowners believe that building stairs or framing a deck is a straightforward task, the real mastery lies in understanding the subtle nuances that can make or break your outdoor project. One common myth is that choosing materials with the lowest initial cost guarantees longevity—however, experts emphasize that quality and proper installation are far more critical, especially when working with composite decking [here](https://deckdesignbuild.com/choosing-the-right-composite-decking-for-durable-low-maintenance-outdoor-areas). Another overlooked detail is the importance of precise stringer calculations for stairs; missteps here can lead to uneven rise and run, creating tripping hazards and an unprofessional look. The ‘oops’ factor becomes especially evident when inconsistent stringer spacing causes stair treads to wobble over time, causing safety concerns that could have been avoided with meticulous planning. Did you know that many builders neglect the importance of proper flashing techniques around ledger boards? This oversight can lead to water infiltration, rot, and costly repairs—something a seasoned deck builder would never overlook [see insights on deck ledger flashings](https://deckdesignbuild.com/the-flashing-secret-that-prevents-ledger-board-rot). For advanced outdoor living designs, understanding the impact of stair winders and how they can maximize space without sacrificing safety is essential. Incorporating angled cuts at 45 degrees for mitered joints enhances aesthetics and structural tightness—common in high-end projects. But beware: improper cuts or not accounting for material expansion can cause gaps or misalignments down the line. In my experience, dedicating extra time to measure, re-measure, and double-check each component often results in a more durable, attractive outcome. Remember, the devil is in the details, and overlooking these nuances can turn an impressive deck into a safety hazard or eyesore. For those looking to elevate their outdoor spaces, exploring inspiring deck and stair ideas can spark creativity and push beyond basic layouts—check out [here](https://deckdesignbuild.com/maximizing-outdoor-space-inspiring-deck-and-stair-ideas-for-every-budget). Have you ever fallen into this trap? Let me know in the comments. Mastering these fine points distinguishes amateur projects from professional craftsmanship and ensures your outdoor living space is not only beautiful but also safe and long-lasting.
Maintaining a beautiful, durable outdoor deck isn’t just about picking the right materials; having the right tools and knowing proper maintenance routines are equally crucial. Over the years, I’ve refined my toolkit to ensure every project stands the test of time, especially when working with composite decking and designing staircases that are both safe and stylish.
Investing in the Right Equipment Makes All the Difference
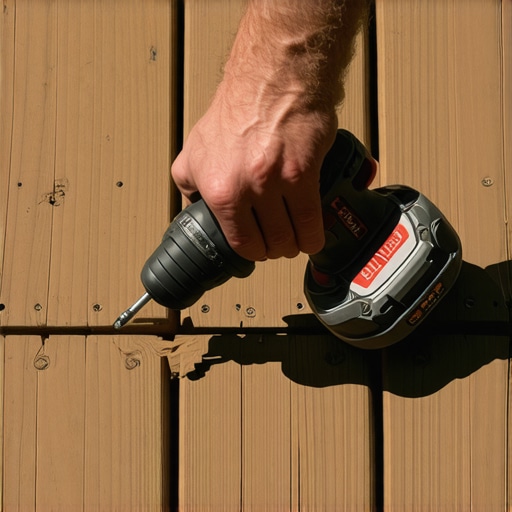
One tool I swear by is my cordless impact driver. It provides the torque needed to drive large screws quickly and efficiently, reducing fatigue during extensive framing or fastening tasks. I prefer models with brushless motors, like the Makita XDT14Z, because they offer longer run times and greater durability, which is essential when tackling multiple projects or large installations.
For precise cuts, I rely on a compound miter saw with a sliding feature. Accurate mitering is vital for seamless border framing or creating mitered joints in stairs or decorative touches. My choice? The DeWalt DWS780, which I’ve found to deliver consistently straight, clean cuts without splintering. Investing in quality blades compatible with your saw ensures cuts remain precise, saving you time and rework.
Power washers can be your best friend or your worst enemy—used improperly, they damage composite surfaces. I prefer a low-pressure setting combined with a wide-angle nozzle, which gently cleans without eroding material or forcing water into seams. For stubborn grime, a soft-bristled brush attachment speeds up cleaning while protecting the finish. Remember, regular cleaning prevents buildup that can cause staining or deterioration over time.
Software and Planning Tools Streamline Your Projects
Beyond physical tools, digital planning apps like SketchUp or Decks.com’s Free Deck Designer streamline layout planning and help visualize final results. These platforms enable me to experiment with different layouts, identify potential issues early, and communicate ideas clearly with clients or team members. Modern design tools are particularly useful when integrating composite decking ideas or experimenting with space maximization—key to creating outdoor areas that look expansive and inviting.
Maintaining long-term results also involves periodic inspections. I recommend annual checks for fasteners and sealants, especially around stair stringers and ledger boards. Applying high-quality, UV-resistant sealants like the ones from DAP can prevent water ingress and mold growth, prolonging your deck’s lifespan. For composite decks, I always use manufacturer-recommended cleaners to avoid voiding warranties, such as those suggested in this guide.
How do I keep my outdoor space functioning seamlessly over time?
Developing a routine is key. Regularly sweep debris, check for loose fasteners, and reapply protective finishes or sealants every couple of years. Incorporating smart solutions, like LED deck lighting with timers or motion sensors, enhances safety and usability without much ongoing effort. Remember, a well-maintained deck combines thoughtful planning, quality tools, and consistent upkeep—turning your outdoor living space into a lasting sanctuary that continues to impress and function effectively.
If you’re ready to elevate your maintenance game, try calibrating your impact driver to the perfect torque setting for your fasteners. This simple adjustment can make securing deck boards or stairs more efficient and reduce the risk of damaging your composite materials.
For more tips on designing long-lasting outdoor spaces, explore innovative outdoor living ideas and let your creativity guide your improvements.
Over the years, I’ve realized that the journey to creating a stunning and durable outdoor space is paved with unexpected lessons. One of the most valuable insights I’ve gained is the importance of anticipating the subtle ways materials expand, contract, and age—factors often overlooked by DIY enthusiasts. For example, I once installed a deck border without accounting for seasonal wood movement, and the resulting gaps kept me awake at night. Now, I always double-check measurements and leave room for natural shifts, ensuring my borders stay crisp year-round. Additionally, I learned that investing in quality tools like a cordless impact driver or a sliding miter saw saves time and boosts precision, directly impacting the lifespan of my work. These tools might seem like extras at first, but they’re game-changers when shaping flawless borders or intricate staircases. Beyond physical equipment, embracing digital planning tools such as SketchUp or the deck designer at Decks.com helps me visualize complex layouts before breaking ground, preventing costly mistakes. These resources empower me to experiment with different border styles, stair placements, or lighting ideas—from the comfort of my home—saving frustration during construction. The real secret, however, lies in applying these lessons consistently. Regular maintenance routines, like sealing joints and checking fasteners every season, keep my decks looking professional and performing safely. What I’ve learned is clear: thoughtful planning, reliable tools, and continuous upkeep form a sturdy foundation for outdoor living projects that last. For those eager to elevate their space further, exploring inspiring ideas on transforming outdoor areas or maximizing space can spark your creativity—start by browsing innovative deck and stair designs tailored for every budget. Remember, the key to a successful project isn’t just the vision but also the knowledge and habits you develop along the way. Trust me, the effort pays off in a space that feels inviting, safe, and uniquely yours.
Illuminating the Hidden Lessons That Transform Your Deck
- Patience Over Speed: Rushing border installation leads to uneven lines and gaps. Take time to measure, mark, and double-check every cut—your future self will thank you.
- Seasonal Movement Matters: Wood expands and contracts. Leaving marginal gaps and using flexible fasteners accommodate these changes, preserving your border’s appearance over time.
- Invest in Quality Tools: A reliable impact driver or miter saw isn’t just a splurge; it’s an investment that ensures precision, reduces fatigue, and extends the life of your work.
- Visualization Saves Hassle: Digital planning tools like SketchUp allow you to test ideas and catch potential issues before construction—saving time and money.
- Routine Maintenance Pays Off: Regular inspections and sealing ensure your outdoor living space remains beautiful and safe, preventing minor issues from becoming costly repairs.
Tools That Make Outdoor Living Easier and Smarter
- Impact Drivers: Opt for cordless, brushless models like Makita XDT14Z for powerful, efficient fastening during border and stair framing.
- Sliding Miter Saws: A dependable saw, such as the DeWalt DWS780, helps achieve precise miter cuts essential for seamless border corners or decorative touches.
- Power Washers with Care: Low-pressure settings and wide-angle nozzles protect composite surfaces while keeping your deck clean from grime and mold.
- Planning Software: Use intuitive apps to design layouts, experiment with features, and communicate ideas clearly—turning concept into reality with confidence.
Your Next Step Toward a Long-Lasting Outdoor Sanctuary
Creating a durable, beautiful deck isn’t just about materials or aesthetics—it’s about the habits, tools, and knowledge you build along the way. The insights gained from experience and continuous learning empower you to craft spaces that stand out and stand the test of time. Now, it’s your turn to take that next step. Whether it’s measuring more carefully or exploring new design ideas, every small improvement brings you closer to the outdoor oasis you’ve imagined. Remember, every project is an opportunity to learn, adapt, and create something truly special. What’s one lesson you’ve learned that transformed your approach to outdoor building? Share below—your story might inspire someone else to elevate their outdoor living game.