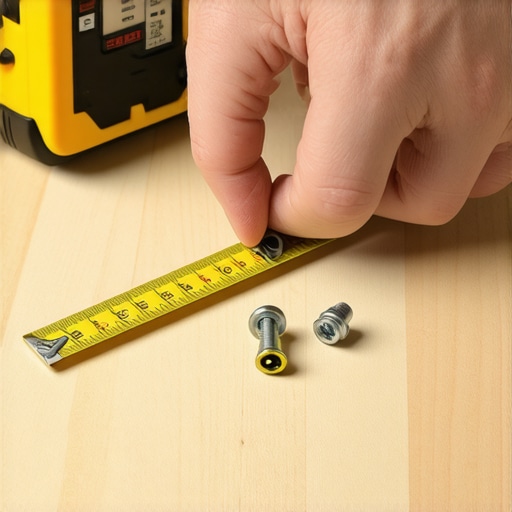
I still remember the moment I realized my deck wasn’t just a beautiful space, but a safety concern. I had spent hours installing composite boards, proud of my work—until I noticed loose boards wobbling underfoot and some screws sticking out oddly. That annoying little issue could have been avoided with just the right screw length. At that point, I understood: choosing the correct screw length isn’t just a detail—it’s the foundation of a durable, safe, and visually appealing deck.
Many DIY enthusiasts and even some professionals overlook this crucial step, often assuming a standard screw will do the job. But as I learned through my own missteps, the right screw length can mean the difference between a deck that lasts for years and one that develops costly problems quickly.
Today, I want to connect with you on that exact struggle. If you’ve ever wondered whether your screws are too short causing loose boards, or too long risking damage to the underlying structure, then you’re in the right place. I’ll share my personal experience and guide you through how to make this crucial choice confidently.
Why Selecting the Right Screw Length Matters More Than You Think
Choosing the appropriate screw length is essential for a few key reasons. First, the screw must penetrate deeply enough to secure the composite board firmly to the joist underneath. An insufficient length might leave the board loose, increasing wobbliness and potential safety hazards. Conversely, going too long can punch through the other side of the board or damage the joist, risking structural integrity and aesthetic appeal.
The ideal screw length depends on the thickness of your composite boards and the type of framing used. Typically, composite decking boards are around 1 inch thick, but this can vary. To keep your deck secure without risking damage, aim for screws that penetrate at least 1.25 inches into the framing—sometimes slightly more if the material allows.
In my early days, I made a costly mistake by using screws that were too long—thinking that more penetration meant better hold. However, I ended up cracking a few composite boards because I didn’t account for the material’s ability to handle that extra length. It’s a common mistake that can be easily avoided. According to expert recommendations, using screws that are approximately 1.5 times the thickness of the decking is a good rule of thumb. For example, if your boards are 1 inch thick, screws around 1.5 inches long will usually do the trick.
If you’re feeling unsure, don’t hesitate to reach out—consider consulting with a professional or visiting resources like [this comprehensive guide](https://deckdesignbuild.com/choosing-the-right-composite-decking-for-durable-low-maintenance-outdoor-areas) to ensure your choices support longevity and safety.
Now that we’ve covered why crucial this decision is, let’s look at how to pick the right screw length for your specific project with confidence. Ready to build a deck that lasts and looks fantastic? Let’s dive in.
Measure Twice, Choose Once: Accurately Determine Deck Material Thickness
Before grabbing your screws, lay your deck boards on the ground or stack them alongside your framing. Use a caliper or a ruler to measure the exact thickness of your composite boards, including any added surface textures. For most standard decks, expect around 1 inch thickness, but always verify to avoid guesswork. I once misjudged a batch of warped boards with uneven surfaces, leading to frustration during installation. Accurate measurement ensures your screws will anchor properly, preventing loose boards or damaging your material.
Select the Correct Screw Length for Firm Hold
Once you’ve determined your deck board’s thickness, aim for a screw that penetrates at least 1.25 inches into the framing beneath. If your framing is 2×8 lumber, which is about 1.5 inches thick, choose screws around 2 inches long to ensure a solid grip. Think of it like setting a tent peg deep enough into the ground to withstand winds—your screws need to secure the board firmly without poking through the other side. I recommend using corrosion-resistant screws, such as stainless steel or coated galvanized, especially for outdoor conditions. I learned this the hard way when a neighbor’s deck deteriorated prematurely because of inappropriate, shorter screws.
Use a Drill with a Depth Stop for Consistent Results
To prevent over-penetration, attach a depth stop or a piece of tape to your drill bit, marking the desired screw length, say 1.5 inches for a 1-inch deck board. This simple trick ensures each screw is driven to the exact depth, avoiding cracking or punching through the composite surface. During my last project, I overlooked this step, and a few screws punctured the underside of the boards, requiring me to replace damaged pieces. Consistency matters for safe, professional-looking results.
Space Screws Evenly Using a Pilot Hole or a Guide
Maintaining uniform spacing between screws—ideally 16 inches apart along joists—ensures even load distribution. Use a carpenter’s square or a chalk line as a guide to mark your screw locations. For smaller boards or tight spaces, pre-drilling pilot holes helps prevent splitting and guides your screws in straight lines. I once tried to eyeball screw placement, which caused uneven spacing and wobbly boards. Adopting a simple guide improved both the look and safety of my deck.
Practice Precision with a Cordless Impact Driver
An impact driver delivers the torque needed to drive screws quickly and securely, reducing installation time. For best results, set it to a moderate torque level to avoid over-driving or stripping the screw heads. During a recent deck build, I used an impact driver with a bit adapter, which made aligning screws effortless. The result: a tight, professional finish and fewer adjustments later. Mastering this tool streamlines your workflow and ensures your fasteners hold strong over years of outdoor exposure.
Confirm Your Screws Are Secure and Flush
After installation, check each screw to ensure it’s flush with or slightly below the surface of your composite boards. Use a screwdriver or your impact driver to gently tighten any that feel loose. Avoid over-tightening, which can damage the composite material. During my last project, I noticed a few screws sticking up slightly, creating tripping hazards and looking unsightly. Taking a moment to verify and adjust screws guarantees safety and a seamless appearance.
Many people assume that creating an outdoor space is simply about choosing pretty materials and following basic construction steps, but the real nuances often go unnoticed. A frequent myth is that composite decking is completely maintenance-free; in reality, neglecting regular cleaning and inspections can reduce its lifespan significantly. Additionally, some believe that larger stairs are always better for safety, yet overly broad stairs can look awkward and may require more structural support, increasing costs and complexity.
One of the most overlooked pitfalls is overlooking drainage when designing stairs adjacent to decks. Poorly planned drainage can lead to water pooling, which accelerates wood rot and compromises stability. Take, for example, a homeowner who installed beautiful stairs without considering runoff pathways — eventually, water seeped into the supports, causing costly repairs. To avoid this, consult with experienced deck builders or review guides on [seamless transitions in stairs](https://deckdesignbuild.com/creating-seamless-transitions-stairs-as-key-elements-in-outdoor-living).
Interestingly, there’s a misconception that the tallest deck railing always offers the best privacy. In reality, overly high rails can diminish the view and feel oppressive. Finding that sweet spot—not too tall to block air and sightlines but high enough for safety—requires nuanced planning. An advanced design approach involves using transparent materials like tempered glass, which balances safety with openness. Experts recommend consulting professionals for [innovative outdoor living ideas](https://deckdesignbuild.com/innovative-outdoor-living-ideas-with-composite-decking-in-2025) to elevate your space.
Another subtle error is assuming that all composite decking products are equally resistant to staining. Some lower-quality materials absorb colors from spills or dirt, leading to uneven appearance over time. Recognizing this, I advise always choosing high-quality, stain-resistant composites and maintaining proper sealing routines, as outlined in [trends for 2025](https://deckdesignbuild.com/composite-decking-trends-2025-the-ultimate-guide-for-outdoor-enthusiasts).
And here’s a critical insight—mind the hidden gaps in your planning. Invisible issues like improper joist spacing or neglecting support posts can cause bouncy decks or dangerous wobbling. It’s tempting for DIYers to overlook these details, but even small errors can lead to unsafe decks. Visit [deck framing insights](https://deckdesignbuild.com/deck-builder-insights-designing-your-dream-outdoor-space) to understand the importance of precision in structural planning.
Have you ever fallen into this trap? Let me know in the comments. Mastering the nuances of outdoor living ensures your space remains safe, durable, and truly enjoyable over the years.
Keeping It Working: The Tools That Make Deck Maintenance Easier
Maintaining a durable and beautiful outdoor deck requires more than just periodic cleaning; it demands the right tools to ensure longevity and safety. I personally swear by a high-quality cordless impact driver, like the DeWalt DCF887. Its adjustable torque settings and compact design make installing or replacing fasteners effortless, especially when working on stairs or railings where precision is key. The impact feature minimizes stripping screws and provides consistent drive depth, which is critical when working with composite decking. Using a dedicated impact driver saves me hours during large projects and ensures each screw is driven with the same torque, reducing wear and tear on the materials.
Another invaluable tool is a joist tape applicator. Applying tape to joists before installing the deck surface creates a moisture barrier that prolongs your deck’s lifespan, especially in high-moisture environments. I prefer the DeckWise Joist Tape Applicator because it allows for fast, uniform application without bubbles or wrinkles. Such attention to detail helps prevent rot and pest infestation over time, making maintenance that much easier.
What Makes a Good Maintenance Routine
Consistency is vital in deck upkeep. Schedule bi-annual inspections to look for loose screws, rotting wood, or damaged boards. For those hard-to-reach spots under the deck or on stairs, a telescoping mirror comes in handy, allowing you to see areas that are difficult to access while standing safely on the ground. Combine this with a moisture meter—like the Moisture Meter pin-style—to assess wood health, as moisture levels above 20% can accelerate decay. I’ve learned that catching issues early prevents costly repairs later, which is why regular checks are worth the time.
When cleaning, avoid power washing, as it can damage composite surfaces. Instead, use a soft-bristled scrub brush and a cleaner formulated for composites, like the Simple Green All-Purpose Cleaner. For stubborn stains, gentle sanding with a fine-grit sandpaper can restore surface appearance without harming the material. Consider investing in a stain applicator brush for sealants or stain treatments—the precision allows for even coverage, extending your deck’s resistance to weather and wear.
Preparing for the Long Haul
In the coming years, I predict smart maintenance solutions will become more accessible. Technologies like IoT sensors that monitor moisture and structural movement could be integrated into decks, providing real-time data and alerts for preventative care. Currently, only a few manufacturers are exploring this, but early adoption could save homeowners thousands in repairs. For now, make it a habit to regularly inspect your deck and follow best practices like protective sealing, proper drainage management, and timely repairs.
To streamline your routine, try setting up a dedicated toolkit that includes these impact drivers, joist tape, moisture meters, and cleaning supplies. Keeping all essential tools in one place makes regular maintenance less of a chore and more of a habit. Want personalized advice? Feel free to reach out for expert assistance in customizing your outdoor maintenance plan.
Remember, a well-maintained deck isn’t just about appearance—it’s about safety and longevity. Implementing these tools and routines today will ensure your outdoor living space remains a beautiful retreat for years to come. Don’t forget to try applying a proper joist tape or using your impact driver with a depth stop for perfect fastener control—small actions with big results.
Lessons That Changed My Approach to Outdoor Living
One of the most eye-opening lessons I learned was that even small details like screw length dramatically impact the safety and longevity of a deck. I once thought that using standard screws was enough, but I quickly realized that selecting the correct length was essential to prevent wobbly boards and structural issues. Another revelation was that neglecting proper drainage design, especially around stairs, can lead to water pooling and rot, which isn’t immediately obvious but causes long-term damage. Finally, I discovered that consistent maintenance routines, such as checking screw tightness and protecting against pests with joist tape, save both time and money, extending the life of my deck beyond expectations.