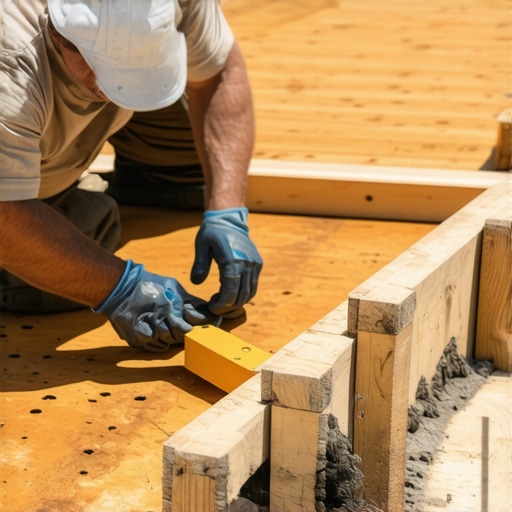
It was a scorching summer afternoon when I first realized my deck’s support beams were rotting faster than I had anticipated. A small, seemingly insignificant drip from a sprinkler had gone unnoticed, seeping into the wooden support under my new outdoor living space. Before I knew it, those joists, which I had trusted to hold up years of family gatherings, showed signs of deterioration. That lightbulb moment made me re-evaluate my deck-building practices—specifically, my decision to skip the protective layers. Since then, I’ve been a staunch believer in covering every single deck frame with joist tape.
Protect Your Investment: Why I Always Use Joist Tape on Every Frame
Decks are more than just outdoor furniture—they’re an extension of your home, a haven for relaxation, and a significant investment. Yet, many DIYers and even some pros overlook the importance of safeguarding the frame before installing the decking. Early in my career, I made a costly mistake by neglecting to use joist tape, thinking it was an unnecessary extra step. Over time, exposure to moisture and temperature fluctuations led to premature rot and costly repairs.
The good news is, addressing this early mistake was simple. Applying high-quality joist tape creates a moisture barrier, preventing water from seeping into critical joints. This small step drastically extends the lifespan of your support structure and keeps your outdoor oasis safe and sturdy.
Skeptical? Is Joist Tape Actually Worth the Hype?
A common concern I hear from fellow builders is whether the added step justifies the effort and cost. Honestly, I used to think it was overkill—until I saw the long-term consequences firsthand. Without proper moisture protection, even treated lumber can succumb to decay over time. Moreover, joist tape isn’t just about moisture; it also protects against insects and debris that can compromise wood integrity.
Research from the University of Florida highlights that properly sealed structures can last twice as long, saving you money and headaches in the long run. So, if you’ve ever wondered whether this small upgrade is worth it, I can assure you—it’s a game-changer.
Next, I’ll walk you through the practical steps to correctly apply joist tape, so you can secure your deck’s future. Trust me, a little effort now can save you a lot of trouble later. Have you faced issues with rot or decay in your deck frames? If so, stick around—what’s coming next will transform the way you build.
Lay the Foundation with Double Joist Tape
My first time applying joist tape was a messy process—liquid adhesive seeped onto my hands as I lined up the tape carefully along each joist. To start, cut the tape to match the length of each support beam, then peel off the backing gradually, pressing firmly as you lay it down. Use a stiff bristle brush or a roller to smooth out air bubbles, ensuring full contact with the wood surface. This creates an airtight moisture barrier, much like wrapping a gift tightly in plastic to prevent water infiltration.
Choose the Right Tape and Prepare Your Surfaces
Before applying, inspect your joists for debris, dust, or splinters—clean with a brush or compressed air to improve adhesion. Opt for a high-quality, UV-resistant tape designed specifically for outdoor use, which resists cracking and peeling over time. Avoid stretching the tape excessively, as this can cause it to weaken or lift over edges. Think of it as wrapping a delicate gift: gentle pressure and proper surface prep make all the difference.
Properly Seal All Critical Areas
Focus on sealing the ends of each joist, where water tends to accumulate, and around cuts or beveled edges. For joints where beams meet, consider overlapping the tape slightly—about half an inch—to ensure continuous coverage. On my project, I wrapped the tape around the ends of the joists and overlapped seams meticulously. This attention to detail acts like sealing the seams of a tent, preventing water from seeping through vulnerable spots.
Secure the Tape During Installation
As you install the deck, periodically check the tape’s position, pressing down any edges that lift and smoothing out wrinkles. Use a rubber mallet or your fingers to embed the tape into the wood’s surface—this prevents water ingress and extends the lifespan of your structure. I learned this tip the hard way when a lifted corner led to moisture seeping in, causing early rot. Remember, consistent pressure is key, like finally securing a stubborn lid on a jar.
Inspect and Maintain Your Sealing Strategy
Once the deck is built, regularly inspect the joist tape during routine maintenance, especially after harsh weather. If you notice tears or peeling, remove the damaged sections and reapply fresh tape to maintain the moisture barrier. In my experience, a quick check and touch-up every couple of years can double the lifespan of your support beams. Think of it as giving your home a health check—small adjustments pay off in the long run.
Integrate with Overall Deck Design
For seamless aesthetics, choose tape colors that blend with your joist paint or stain. Some brands offer translucent or color-matched options, making the application discreet yet effective. During my project, using a gray tape that mimicked the stain ensured the deck retained its sleek look while offering excellent protection. This detail adds a professional finish, elevating your DIY skills and protecting your investment—just like a custom-built staircase that complements your overall outdoor design. For creative inspiration and design ideas, check out the seamless transition guides.While many outdoor enthusiasts stick to the surface-level advice when it comes to composite decking and outdoor living, the real mastery lies in understanding the subtle complexities that can make or break your project. A frequent misconception is that all composite decking is created equal; in reality, not all materials perform the same under varying conditions. For example, many assume that darker colors always look sleek, but without proper maintenance, they tend to absorb more heat and show dirt quicker, leading to quicker wear and tear. This is supported by recent studies indicating that darker hues can increase surface temperatures by as much as 25%, affecting comfort and longevity.
Why Do Some Decks Fail Despite Using Premium Materials?
In my experience, one overlooked factor is the importance of installation techniques—especially around stairs and transitions. Proper framing and attention to detail such as correct joist spacing, flashing, and drainage are often underestimated, leading to premature deck failure. For instance, inadequate slope for drainage can trap water, accelerating deterioration, regardless of the material quality. As an experienced deck builder, I’ve seen projects with high-end composite boards fail in just a few years because the supporting structure wasn’t designed to manage moisture effectively. To avoid this, I recommend reviewing your deck layout with a focus on slope, ventilation, and sealing strategies, such as integrating seamless stair transitions that prevent water pooling.
Another common trap is neglecting the surrounding landscape. Soil grading and landscaping play a crucial role in protecting your deck’s supports from water ingress. Elevating the framing and incorporating features like buried gutters can extend the lifespan of your outdoor structure significantly.
Thinking ahead is vital for outdoor spaces to stay functional and beautiful for years. Advanced homeowners often ask, “How can I ensure the safety and durability of my stairs over time?” An excellent question, which I’ll address by emphasizing strong, code-compliant framing combined with non-slip, visually appealing treads. Moreover, integrating lighting into stairs enhances safety and ambiance—something many overlook until it’s too late.
Avoid simply copying popular trends without understanding their long-term implications. For example, while open-riser stairs look modern, they can pose safety issues and require precise design and build expertise. Check out professionals’ insights on designing safe and stylish stairs for outdoor decks, which emphasizes proper riser height, tread depth, and handrail placement.
Embracing the intricate details of outdoor living and deck construction—like moisture management, proper support framing, and safety features—can dramatically elevate your project. Remember, excellence isn’t just about choosing the right composite boards; it’s about mastering the nuances that ensure your outdoor space remains a haven for years to come. Have you ever fallen into this trap? Let me know in the comments.
Maintaining a beautiful, functional outdoor living space requires the right tools and methods. Over the years, I’ve refined my toolkit to include equipment that ensures precision, efficiency, and durability. One staple is a high-quality cordless impact driver. I swear by models like the Milwaukee M18 Fuel, which offers the power to drive fasteners securely without stripping or overdriving. Its lightweight design reduces fatigue during lengthy projects and its brushless motor maintains consistent performance. Additionally, a good digital moisture meter, such as the Protimeter MMS2, helps me detect hidden moisture in framing and substructures, preventing premature rot and decay. This proactive approach allows me to identify issues early, saving time and money in the long run.
For surface preparation, I rely on a variable-speed orbital sander equipped with dust collection. It ensures my decking surfaces are smooth and ready for sealing or staining, resulting in a professional finish. When it comes to cutting composite materials, I prefer a fine-toothed carbide blade on my circular saw. This minimizes chipping and provides cleaner cuts, which are critical when fitting pieces around stairs or custom transitions. A blade with a negative rake angle, such as the Freud Diablo U-Mill, works exceptionally well and extends the tool’s lifespan.
In terms of software, I now incorporate 3D design tools like SketchUp or the more advanced Revit. These allow me to visualize complex multi-level decks or seamless transitions, such as those detailed in my guide on creating seamless transitions. Planning with 3D models reduces errors during framing and helps communicate ideas clearly with clients. This predictive approach is invaluable, especially when designing intricate staircases or custom railing solutions.
For long-term results, I have adopted a maintenance routine utilizing specialized cleaning tools. A power washer with adjustable pressure settings helps remove dirt, algae, and moss without damaging the composite surface. I ensure I use the lowest effective pressure—usually around 1,200 PSI—and a wide-angle nozzle to avoid surface etching. After cleaning, I apply a protective sealant compatible with composite materials, which helps resist staining and UV degradation over time. Regular inspections using a bright flashlight or a smartphone’s macro mode allow me to spot early signs of wear or damage, keeping the deck in top shape for years.
How do I keep my outdoor spaces reliable and lasting?
Adopting a systematic approach with the right tools ensures your investment endures. Whether it’s sealing your joists with tape to prevent rot or fine-tuning your transitions for aesthetic appeal, the effort pays off. The future of outdoor construction moves toward smarter maintenance—think IoT sensors for moisture detection or automated cleaning systems. Until then, mastering your current toolkit remains the best defense against deterioration. Don’t hesitate to try a tip like using a moisture meter before installing new support beams; it’s a small step that can prevent significant headaches. Ready to elevate your deck maintenance? Visit the contact page for expert advice or to schedule a consultation.
What the Toughest Challenges Taught Me About Composite Decking and Outdoor Living
- One of the most valuable lessons I encountered was understanding that overlooking the details—like proper moisture barriers or support framing—can lead to costly repairs down the line. Small mistakes, such as neglecting to seal joist ends, often manifest as significant rot issues years later.
- My experience has shown me that no matter how high-quality your materials are, poor installation techniques—like incorrect spacing or inadequate drainage—will ultimately undermine your project’s longevity. Paying attention to these nuances is what differentiates a temporary fix from a lasting structure.
- I realized that embracing continuous learning—whether through industry publications or hands-on experimentation—is key. Staying updated with trends like composite decking trends for 2025 keeps my work innovative and resilient.
Tools and References That Elevate My Outdoor Projects
- My impact driver, like the Milwaukee M18 Fuel, has revolutionized my fastening process, providing both power and precision—crucial for securing deck boards and framing with confidence.
- A good digital moisture meter, such as the Protimeter MMS2, helps me detect hidden water issues early, preventing rot before it becomes a major concern.
- The book “Decks: The Complete Guide to Building and Designing” has been instrumental in refining my understanding of structural integrity and aesthetic balance, ensuring each project stands the test of time.
- Finally, utilizing 3D design tools like SketchUp allows me to visualize complex transitions and custom elements, minimizing errors and enhancing client satisfaction.
Keep Your Passion Alive. The Future Is Bright
p>Building durable composite decks and outdoor living spaces isn’t just a craft—it’s a commitment to creating personal retreats that last for generations. Keep experimenting, stay informed, and remember that even the smallest detail can dramatically impact your project’s longevity. Whether you’re sealing joists or designing seamless stairs, every step you take today builds a safer, more beautiful tomorrow. Are you ready to tackle your next outdoor project with renewed confidence? Let me know your biggest challenge in the comments below.