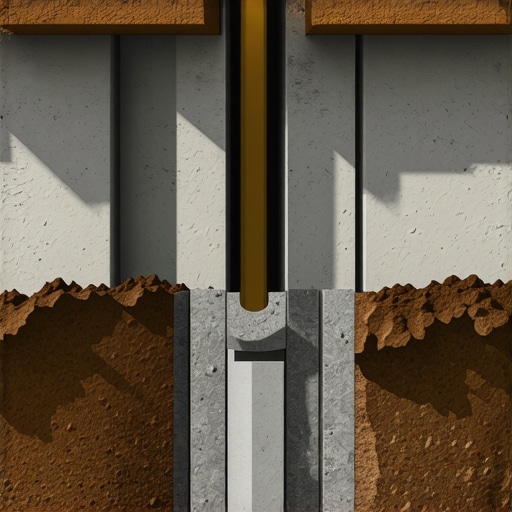
I remember the first time I built a deck, excited to finally enjoy the outdoor space I had been dreaming of. But after our first heavy rain, I noticed a subtle wobble in the structure. It wasn’t immediately obvious, but it whispered a warning that I’d overlooked something crucial: the depth of the footings. That lightbulb moment changed everything for me. I learned that many deck builders, including myself initially, underestimate how deep footings should go — and that mistake can lead to costly repairs down the line.
The Hidden Strength of Deep Footings
Building a durable, safe deck isn’t just about choosing the right wood or layout. It starts beneath the surface — literally. Footings that are too shallow can settle, shift, or even fail under the weight of your deck and outdoor furniture. I personally experienced this early on when a small shift caused a deck board to loosen. That simple mistake could have been avoided if I had dug deeper from the start. Today, I’ll share the essential reasons why deeper footings make all the difference and how to get it right the first time.
Is It Really Necessary to Go Deeper?
Many homeowners and DIYers think, “Well, the code says a certain depth, so I’ll just stick to that.” But the code is just the minimum requirement — and trust me, it’s often not enough. Weather conditions, soil type, and load capacity can all influence how deep your footings should be. An early mistake I made was relying solely on code without considering my specific soil conditions, which led to minor shifts over time. According to experts, adequate footing depth can prevent structural damage and extend the lifespan of your deck for decades to come. For more ideas on maximizing your outdoor space, check out this guide on inspiring outdoor solutions.
Now that I’ll have your attention, let’s dive into how to determine the right footing depth for your project — because a sturdy foundation is the secret to lasting outdoors.
.
Start with Soil Assessment
Before digging, inspect your soil type. Hard clay soils require deeper footings to prevent settling, while sandy soils might need wider bases for stability. I used a soil test kit and quickly realized my garden’s loamy mix would support shallower footings, saving me time and effort. Understanding your soil is like knowing the foundation of a house — without it, everything risks shifting.
Follow Local Building Codes But Think Bigger
Codes provide the minimum, but circumstances differ. For example, my area experiences heavy rainfall, making extra depth essential. Check with your municipal building department and look into standards like the [deck-building codes](https://deckdesignbuild.com/creating-seamless-transitions-stairs-as-key-elements-in-outdoor-living). Upgrading beyond code ensures longevity and safety, especially in variable weather.
Calculate Load and Spacing
Estimate the weight your deck will carry — including furniture, people, and snow. Multiply the area by the live load factor and consult a structural table. I over-anticipated loads for my garden lounge, which meant digging a few extra inches. Think of your footing like the roots of a tree: they must anchor the entire structure firmly, especially when multiple levels or heavier materials like composite decking are involved.
Identify Key Factors
Consider slope, proximity to water, and existing structures. For sloped yards, deeper footings keep the deck level and safe. I had a slight incline, so I extended some footings 6 inches deeper on one side — a trick that kept my deck perfectly level despite the irregular terrain.
Accurately Measure and Mark
Use a string line or laser level to outline footing locations. Precise measurement prevents uneven settling later. I once mismeasured and had to re-dig after discovering a post was misaligned, illustrating why careful planning upfront saves headaches.
Dig Deep Enough
The general rule is at least 12 inches below frost line. In colder climates, go even deeper — sometimes as much as 48 inches. Excavate with a post-hole digger or power auger, ensuring each hole is straight and uniform. My initial attempts were messy, but I learned to double-check distances, which improved stability and ease of framing.
Use Proper Forms and Reinforcements
Pour sturdy forms that won’t shift during curing. Incorporate rebar for added strength, especially in heavy load zones. My first footing crackled because I skipped reinforcing; subsequent projects taught me that investing a little extra material saves big repairs later.
Fill with Quality Concrete
Choose mix suited for outdoor use, and add water gradually. Consider using quick-set or high-strength concrete for larger footings. I used a fast-setting mix, which sped up my timeline but required quick work — a reminder to prepare all tools beforehand.
Allow Proper Curing Time
Wait at least 48 hours before finishing or building on them. Rushing can compromise strength. During my first pour, I impatiently moved ahead, only to find small cracks once I started framing — highlighting patience as a key ingredient in durable construction.
Regularly Inspect and Adjust
Check for settling or cracks over time. If you notice any movement, reinforce or deepen as needed. I observed a minor shift after heavy rains, which I corrected by adding gravel beneath the footing, illustrating ongoing maintenance is part of a lasting outdoor space.
Many DIY enthusiasts and even seasoned builders fall prey to misconceptions that hinder the longevity and safety of their outdoor spaces. One prevalent myth is that choosing a popular composite decking brand guarantees durability without additional considerations. While reputable products like those discussed in this guide offer excellent warranties, neglecting the importance of proper installation and ventilation can lead to premature degradation. The nuance here is understanding that material selection is only part of the equation—installation angles, spacing, and climate factors critically influence the lifespan.
Is All Composite Decking Truly Low-Maintenance?
A common oversight involves assuming all composite decking materials require zero upkeep. In reality, some darker composite boards, especially in south-facing yards, can absorb heat and exhibit faster fading or warping if not properly selected and maintained, as explored in this article. Additionally, debris and dirt can trap moisture, fostering mildew or mold growth. Regular cleaning with gentle, non-toxic solutions preserves appearance and function—this is a nuanced maintenance aspect novice builders often overlook.
Beyond the materials, many underestimate the complexity involved in building stairs for outdoor decks. Assuming standard rise and run measurements suffice ignores the importance of precise framing and code compliance. For example, ensuring stair risers are exactly the same height across all steps not only meets safety standards but also prevents tripping hazards and uneven wear. To create stairs that are both safe and stylish, consulting resources like this expert guide is invaluable. Remember, a tiny miscalculation here can make the difference between a beautiful, functional staircase and a hazard waiting to happen.
Another nuanced error is underestimating the importance of proper support for complex outdoor living layouts. Incorporating features like multi-level decks or integrated seating requires careful load calculations and reinforcement strategies, as detailed in this post. Without understanding the advanced structural requirements, even the most aesthetically pleasing design can suffer from sagging or structural failure over time.
Finally, overlooking the significance of correct drainage and moisture management can be a silent killer. Simple mistakes like improper flashing or inadequate slope can lead to water infiltration, rot, and mold, ultimately shortening the deck’s lifespan. Insights from experts emphasize that integrating adequate drainage solutions from the outset is crucial, as highlighted in this detailed explanation. Doing so requires understanding subtle construction nuances that are often glossed over by DIYers rushing through preliminary planning.
In summary, the secret to robust outdoor living spaces lies in appreciating both standard practices and the nuanced details that often go unnoticed. Whether it’s selecting the right composite material, building safe stairs, or implementing effective drainage, each step demands an expert eye. Recognizing these advanced pitfalls helps you avoid costly mistakes and creates spaces that truly stand the test of time. Have you ever fallen into this trap? Let me know in the comments and share your experiences.
Keep It Running: Tools and Tricks for Outdoor Spaces
Maintaining a beautiful and functional outdoor deck or staircase requires the right toolkit and a disciplined approach. Over the years, I’ve tested numerous equipment and methods to keep my backyard oasis in top shape. Today, I’ll share the specific tools I swear by, why they matter, and how to implement regular upkeep for lasting enjoyment.
Power Tools That Make Maintenance a Breeze
One of the most valuable investments I made was a **cordless drill with a right-angle attachment**. This combo allows me to tighten deck screws and bolts in tight corners without hassle. I prefer models with high torque ratings and brushless motors—specifically, the **Makita XDT16Z**—because they provide steady power and longer runtime. For cleaning deck surfaces, I rely on a **stiff-bristled brush attachment** for my power washer, which effectively removes dirt, mildew, and moss without damaging composite materials. Regular pressure washing with these tools can greatly extend the vibrant appearance of your decking, as explained in this guide.
Mastering Inspection and Repairs
Routine inspections save time and money. I keep a **digital moisture meter** close at hand—like the **Protimeter Surveymaster**—to detect hidden water ingress or rot beneath the surface. It helps me identify potential issues early, especially in areas prone to excess moisture or poor drainage. For repairs, I rely on a **multi-tool with a HAKO blade** to carefully remove damaged caulking or worn sealants between boards and stairs. Addressing these small problems promptly prevents larger structural failures, ensuring your outdoor space remains safe and inviting.
Tools I Recommend for Consistent Results
To maintain your outdoor living areas properly, consider investing in a **laser level**—such as the **Bosch Cross-P412**—to ensure your decking and stairs stay perfectly aligned over time. Accurate leveling prevents uneven wear and trip hazards. Additionally, a **stainless steel wire brush** is perfect for scrubbing irregularities on metal fixtures or handrails, keeping them rust-free and visually appealing. Finally, having a **high-quality outdoor sealant applicator** facilitates even, neat application of protective coatings, as outlined in this post.
Optimizing Long-Term Results
Consistent maintenance not only preserves aesthetics but strengthens structural health. I recommend scheduling biannual inspections—spring and fall—and maintaining a maintenance log. During these checkups, I look for cracks, loose fasteners, and signs of water intrusion. Applying protective sealants or stains after a thorough cleaning enhances longevity. With technologies evolving, I foresee smart outdoor sensors becoming commonplace for real-time moisture or rot detection, enabling proactive responses that save time and money.
How do I keep outdoor structures working seamlessly?
One of my best practices is to **develop a routine maintenance schedule** with specific checklists for each component—deck surface, stairs, railings, and support posts. Use a combination of manual inspections and technological aids like moisture meters. Establishing a habit of proactive upkeep ensures your outdoor living space remains safe and stunning for years. If you want to explore advanced restoration techniques, I suggest trying **power scrubbers combined with eco-friendly cleaners** for quick, effective results. Remember, taking care of your investment today means fewer surprises and repairs tomorrow. Find more tips and guidelines in this dedicated guide.
The Hidden Lessons My Deck Taught Me About Building Durability
One of the most valuable insights I gained was the importance of thinking beyond the basic code requirements. The first deck I built was compliant on paper but lacked considerations for my soil type and local weather patterns, which led to avoidable issues down the line. Real-world experience revealed that paying attention to these nuanced factors transforms a project from adequate to exceptional. Additionally, I learned that patience during curing and inspection phases significantly extends the lifespan of your outdoor structures, saving time and money in the long run. And perhaps most surprisingly, I discovered that thoughtful integration of drainage solutions can prevent silent rot and structural compromise, even in the most carefully planned decks.
Tools and Resources That Elevate My Deck-Making Process
Over years of hands-on work, I’ve come to rely on a few key tools that make a significant difference. My trusted cordless drill with a right-angle attachment simplifies screw placement in tight spots, while a high-capacity pressure washer keeps composite surfaces looking vibrant and clean. A moisture meter isn’t just handy; it’s essential for early detection of hidden issues behind the boards. For planning, a laser level is invaluable to ensure perfectly aligned framing and stairs. For further insights, I recommend consulting detailed guides such as this resource on custom decking options — it’s helped me approach each project with confidence and precision.
Step Into Building Your Dream Outdoors
Embarking on a deck or outdoor stair project is both exciting and rewarding. Remember, the secret to a long-lasting, beautiful space is a blend of proper planning, attention to detail, and patience. Your outdoor space can become an oasis that boosts your home’s value and your daily enjoyment, but it starts with making informed decisions today. Don’t be discouraged by setbacks—instead, see them as opportunities to learn and refine your craft. We all begin somewhere, and with each project, you’re building not just a deck but confidence and expertise that will serve you for years to come.
What’s the most challenging part of your outdoor project so far? Share your experiences and questions below—let’s build together!