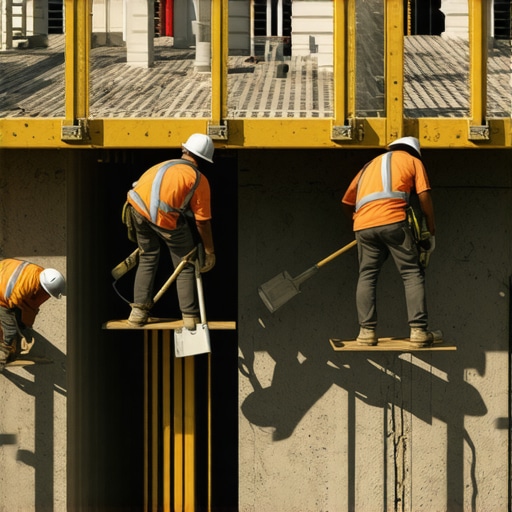
It was a warm summer afternoon when I stepped onto my deck, only to feel that unsettling wobble beneath my feet. The boards, once solid and reliable, now felt uneven—like a ship listing in calm waters. That sinking sensation hit hard because I knew, deep down, that my outdoor oasis was in trouble. But tearing down the entire structure? That seemed overwhelming and unnecessary. I realized there had to be a smarter way.
Why a Sinking Deck Footing Can Be More Than Just a Nuisance
Many homeowners overlook the importance of properly supported deck footings until they start to shift or sink. A compromised footing doesn’t just mean uneven boards; it can pose serious safety hazards. Over time, soil erosion, poor drainage, or even inadequate initial construction can cause the foundation to settle. According to professional deck builders, neglecting these signs can lead to costly repairs—or worse, safety issues.
If you’ve noticed your deck becoming unstable or uneven, you’re not alone. I’ve been there, and I can tell you from personal experience that jumping straight to ripping everything apart isn’t the only solution. Instead, understanding how to address sinking footings without a full teardown can save you time, money, and a lot of frustration.
Is Fixing a Sinking Deck Worth the Effort?
You might wonder whether attempting to fix the problem is even practical or if it’s just a temporary patch. Early on, I made that mistake—I thought reinforcement would only be a band-aid. But with careful assessment, I discovered that many sinking issues can be remedied with strategic adjustments.
In this guide, I’ll walk you through proven methods to stabilize and lift your deck’s footing, so you can enjoy peace of mind and a safe outdoor space. For inspiring ideas on maximizing your outdoor area, feel free to explore some innovative deck and stair ideas. Together, we’ll make sure your deck stands tall and steady for years to come.
Assess the Damage and Prepare for Action
Begin by evaluating which areas of your deck are sinking or uneven. Use a level or a laser device for precision. Mark the affected posts with chalk to keep track. Next, clear the space around the affected footing, removing nearby plants or debris. This creates easy access and prevents potential accidents during the repair process. I started with my backyard deck, noticing that one corner had sunk about two inches. Clearing the area exposed the concrete footing, confirming the need for stabilization. This initial step is crucial for planning your fix effectively.
Excavate and Access the Footing
Carefully dig around the footing using a shovel or power auger, removing soil and loose debris. Be cautious not to damage the existing concrete or surrounding framing. Once exposed, inspect for cracks, loose supports, or erosion signs. If the footing is made of concrete and shows significant cracks, you’ll need to consider whether stabilization alone suffices or if replacement is necessary. For my deck, the soil around the footing was compacted and eroded, causing the settlement. Excavating provided a clear view of the problem area and prepared it for the next step.
Install or Reinforce for Stability
In many cases, adding a concrete pier or adjusting the current footing can stabilize the post. For small sinking, shimming the post with adjustable post supports or adding gravel underneath can lift and level the deck temporarily. For a long-term fix, you might pour a new concrete pad or replace the footing with a higher-quality material. When I attempted to lift my uneven section, I used adjustable steel supports to gradually raise the post, which stabilized the deck surface immediately. Remember, the goal is to distribute weight evenly and prevent further settlement.
Use Proper Materials for Reinforcement
Choose high-strength concrete or deck-compatible piers. For quick stabilization, composite pads can be inserted to elevate the post. However, for durability, permanent solutions like concrete footings are recommended. It’s vital that your materials resist soil movement and moisture to prevent future sinking. I opted for a precast concrete pier, which I placed beneath the post after leveling. This ensured the support was solid and designed to last.
Fill, Compact, and Restore the Site
After installing the reinforcement, backfill the excavated space with gravel or crushed stone, tamping it down firmly to eliminate air pockets. This enhances drainage and prevents soil erosion around the footing. Replace any removed soil carefully, ensuring it is compacted to avoid future settling. In my case, compacted gravel around the new pier minimized future movement and provided a stable base.
Verify and Finalize the Leveling
Use a level or laser to check the deck surface and ensure it’s even. Adjust the supports as needed before tightening all fasteners and supports. This step is essential for safety and aesthetics. I spent extra time fine-tuning the supports, which resulted in a perfectly level deck surface, restoring both safety and visual appeal.
Prevent Future Sinking by Maintaining the Site
Regularly inspect your deck and footings, especially after heavy rains or soil movement. Ensure proper drainage away from the foundation, and consider installing drainage solutions if necessary. Periodic checks allow early detection of potential issues, saving you from costly repairs later. Remember, addressing the root cause—soil erosion, drainage issues, or poor construction—will prolong the effectiveness of your repairs.Many homeowners assume that installing a deck or outdoor space is an straightforward project, but in reality, there’s a lot of nuance often overlooked. One widespread misconception is that composite decking is entirely maintenance-free; however, despite its low-maintenance reputation, it still requires proper cleaning and occasional inspection to prevent mold or staining, a detail often missed by DIYers. Additionally, many believe that building a deck is just about choosing the right materials, but the true skill lies in the detailed planning of support structures and drainage—something an experienced deck builder understands profoundly. The common myth that stairs are just aesthetic features ignores their critical safety importance; proper riser height, tread depth, and lighting are essential for safe access, especially in multi-level designs. A hidden nuance many neglect is the importance of aligning stair stringers and flanking surfaces to prevent bounce or wobble, which can be a safety hazard. Advanced mistakes often stem from DIY attempts without considering soil conditions or proper fastening techniques, leading to long-term instability. For example, choosing cheap fasteners or improper joist spacing can result in premature deck failure—something professional stair solutions can help prevent. What’s crucial is understanding that every component, from composite boards to support posts, plays a part in durability. Studies show that overlooking drainage details increases risk of rot and decay, particularly when installing composite decking over uneven or poorly drained ground. Ultimately, making informed decisions backed by expert knowledge saves money and enhances safety, transforming your outdoor space into a true extension of your home.
Make sure you’re not falling for these misconceptions—your outdoor oasis depends on it! Have you ever fallen into this trap? Let me know in the comments.Maintaining a beautiful and durable outdoor deck requires the right tools and a strategic approach. Personally, I rely heavily on a cordless oscillating multi-tool for precise sanding and cleaning tight corners—it’s indispensable for restoring slight imperfections over time. When it comes to cleaning composite decking, I prefer using a deck-specific pressure washer on low pressure to avoid damaging the surface, while a soft-bristle brush helps in tackling stubborn stains. For sealing and protective coatings, I recommend a high-quality sprayer like the Wagner Control Pro 170 to ensure an even application without overspray.
Keeping your deck in top shape over the years means scheduling periodic inspections. I set reminders every spring and fall to assess for signs of wear, such as loose fasteners or early signs of rot. A reliable magnetic screwdriver and a deck repair kit with color-matched fillers can address minor issues before they escalate. Additionally, installing a drainage upgrade—like a quality drip-edge—can prevent water pooling and soil erosion beneath the structure, extending its lifespan.
Looking ahead, I believe automation and smart sensors will become integral in outdoor maintenance. Wireless moisture sensors can alert homeowners to drainage problems before visible damage occurs, making proactive care more feasible. These innovations will simplify long-term upkeep and help preserve the investment you’ve put into your outdoor oasis.
How do I maintain my deck over time for the best results?
Regular maintenance involves cleaning, sealing, and inspecting your deck. Use a deck-safe cleaner and a soft brush to remove debris and prevent mold growth. Applying a UV-resistant sealant every few years keeps the color vibrant and protects against weathering. Remember, consistent upkeep not only extends the life of your materials but also maintains safety standards. For example, applying a protective coating on composite decking can prevent staining and fading, as discussed in the latest composite deck trend. I highly recommend trying the advanced sealing techniques I mentioned—power spraying with a high-quality sprayer followed by a quick brush touch-up for hard-to-reach areas. It’s an efficient method to keep your deck looking as good as new for years to come.
Hidden Pitfalls That Almost Cost Me My Outdoor Sanctuary
One of the most valuable lessons I learned was that proactive inspection saves a lot of headache. Catching a minor sinking post early meant I could reinforce it before it jeopardized the entire deck structure. Delaying repairs often leads to more extensive damage, which is far more costly and time-consuming. Always walk your deck with a critical eye—your future self will thank you.
Misjudgments That Led Me Astray (And How to Avoid Them)
I once underestimated the importance of proper drainage around footings. Assuming soil would hold without proper grading caused erosion beneath my deck, leading to unexpected sinking. Now I implement targeted drainage solutions, and I recommend others do the same. Don’t skip this crucial step; good drainage is the backbone of long-lasting stability.
Investing in Quality Materials—A Decision That Paid Off
Initially, I opted for inexpensive supports, thinking I was saving money. The reality was quite different—the supports deteriorated faster, forcing me into repeated repairs. Choosing durable, high-quality reinforcement like precast concrete piers proved to be a game-changer, saving me both money and stress. When it comes to essential components, investing upfront is a smart move.
How Small Adjustments Make Big Differences
Fine-tuning support heights with adjustable posts allowed me to achieve a perfectly level surface. These small tweaks enhanced safety and made my deck look professional. Never underestimate the power of incremental adjustments—they can transform a wobbly structure into a stable haven.
Curated Tools and Resources That Guided My Repairs
For precise leveling, a laser distance meter became indispensable—I trust it for accuracy in my projects. My go-to guide, Deck Builder Insights, provided detailed step-by-step strategies that I adapted to my needs. Additionally, Inspiring Deck Ideas helped me envision future upgrades, making my space not just stable but also beautiful.
Embrace the Challenges—Transformation Begins with Action
Taking charge of your deck’s health can be intimidating, but remember, every small effort accumulates into a safer, more inviting outdoor space. Whether it’s repairing a sinking post or redesigning your stairs, your proactive approach will yield rewarding results. Don’t wait for problems to escalate—your dream deck is within reach if you start today.