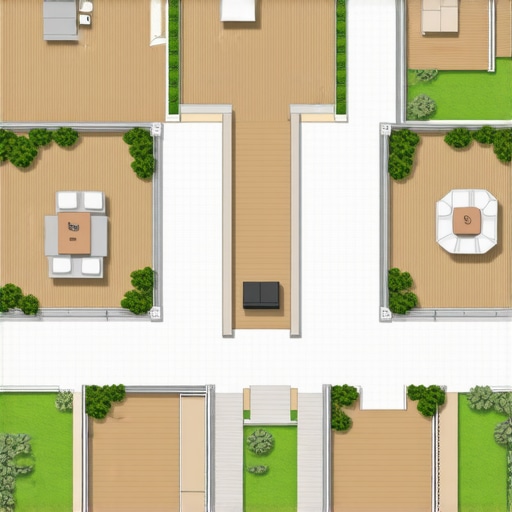
When I first tackled building my own multi-level deck, I thought I had it all figured out. I was eager, ideas flowing, plans detailed. But during construction, something didn’t sit right. The deck felt crowded, confusing, almost like wandering through a maze. Turning corners became awkward, and I realized I had created a confusing labyrinth instead of a welcoming outdoor retreat. That frustrating moment—when I looked at my nearly finished project and knew something was off—became my turning point.
I learned that the secret to a stunning multi-level deck isn’t just about stacking levels or adding fancy stairs. It’s about designing transitions and pathways that feel natural, intuitive, and inviting. The last thing you want is for your beautiful outdoor space to turn into a confusing maze that discourages use or makes guests feel lost.
Today, I promise to share with you what I wish I knew from the start: how to craft a multi-level deck that flows seamlessly from one area to another—without sacrificing style or functionality. Whether you’re dreaming of a cozy nook, an expansive entertaining area, or a space that connects smoothly with your garden, this guide will help you avoid common pitfalls.
Why Some Multi-Level Decks Break Your Flow (And How to Fix It)
Let’s face it—designing multiple levels can easily turn into unintended chaos. If you’re like me, you might have fallen into the trap of leveling each section without considering how they connect visually and spatially. I once thought that simply stacking platforms would create a captivating layered look. Instead, it resulted in disjointed spaces that felt more like compartments than a cohesive whole.
Early on, I made the mistake of neglecting the importance of creating smooth transitions. As a result, moving from one level to another felt awkward, and I often had to navigate steps that jutted out unexpectedly. I also underestimated how critical consistent materials and colors are to unify different areas.
One of the most valuable lessons I learned was the power of properly designed stairs and pathways. They are the critical links that knit your deck together, guiding visitors naturally from one space to another. For instance, incorporating gentle slopes and well-placed stairs can make your deck feel more like a continuous extension of your home, rather than a series of disconnected platforms. If you want professional insights into achieving these seamless transitions, I recommend checking out tips from seasoned deck builders [here](https://deckdesignbuild.com/creating-seamless-transitions-stairs-as-key-elements-in-outdoor-living).
Choosing the right layout, paying attention to sight lines, and using consistent materials ensure your deck flows effortlessly. Remember, the goal is for your outdoor space to encourage lingering, exploration, and enjoyment—not confusion.
Now that we’ve identified the common pitfalls, let’s move into practical strategies that will transform your multi-level deck from a maze into a masterpiece of design. Ready to get started? Let’s dive into the first steps that will set the foundation for a beautiful, functional, and inviting outdoor living space.
Plan Your Layout Before Cutting any Boards
Start by sketching your deck on graph paper or using design software. Break down the space into levels, paying attention to how each will connect visually and functionally. I once rushed into cutting, only to realize during assembly that my levels were misaligned. Precise planning prevented that mistake, saving time and material. Check your design from multiple angles to anticipate sight lines and foot traffic paths, ensuring natural flow between levels. For detailed tips on designing your deck’s layout, visit this resource.
Choose the Right Materials for Visual Consistency
Select materials and colors that complement each other to create a cohesive look. Opt for matching composite decking boards that resist fading and staining, ensuring your deck maintains its appeal over time. I once tried mixing different brands of composite boards, which resulted in uneven color and texture. Using consistent materials helps transitions feel deliberate rather than patchwork. Consider textures and grain patterns; smoother finishes can unify varied levels seamlessly. For trend insights, see this guide.
Design Gentle Slopes and Gradual Steps for Smooth Transitions
Instead of abrupt stairs, incorporate gentle slopes where possible, especially across sloped terrain. When I built my own deck, I used a slight incline coupled with low-profile steps to navigate the yard naturally. This approach feels more inviting and less imposing. Use riser heights between 4 and 7 inches for steps; consistent riser heights prevent tripping hazards. For wider transitions, consider floating stairs with open treads, which visually lighten the space. To ensure safety and style, explore stairs as key elements.
Install Steps and Railings with Precision
Proper framing and support are vital for sturdy stairs. Use galvanized or stainless steel hardware to resist corrosion, especially in wetter climates. I once failed to secure the stringers properly, resulting in wobbly steps; reinforcing with metal brackets solved that issue immediately. When building stairs, ensure each stringer is cut accurately to maintain even rise and run. Railing posts should be anchored securely and aligned perfectly for safety and visual harmony. For expert tips, see this detailed guide.
Harmonize Levels with Consistent Design Elements
Use uniform lighting, furniture, and decorative elements across all levels. This unifies your space and guides the eye smoothly from one area to another. In my project, I added string lighting along all railings and installed matching furniture on every level, which created a cohesive ambiance. Incorporate pathways or border materials to visually connect different zones. For creative ideas on making your deck inviting, visit this article.
Focus on Practical Details to Enhance Flow
Consider functional features like built-in benches, planters, and integrated lighting to facilitate movement and comfort. I embedded step lights into risers and added built-in seating, which made transitions practical and inviting. Make sure pathways are wide enough—at least 36 inches—to allow easy passage between levels. Use non-slip finishes for safety, particularly on stairs and slopes. Combining these elements ensures your multi-level deck is both beautiful and user-friendly. For additional safety tips, see this resource.
When it comes to designing and building outdoor living spaces, many enthusiasts and DIYers fall into common traps that compromise not just aesthetics but safety and durability. One widespread misconception is that choosing the most popular composite decking or following the basic design principles guarantees a flawless result. In reality, the intricacies of deck construction demand a nuanced understanding that often gets overlooked. For instance, many assume that simply installing higher-rated fasteners or thicker joists will prevent issues like sagging or squeaking. However, the real key lies in precise installation techniques and understanding material behavior over time, especially in varying climates.
Are Popular Materials Always the Best Choice for Long-Term Durability?
It’s tempting to gravitate towards trendy materials or the cheapest options, but neglecting this nuance can result in costly repairs. For example, composite decking trends in 2025 emphasize mineral core boards due to their enhanced resistance to moisture and temperature changes, yet many overlook proper framing and ventilation that significantly influence performance. Studies show that incorrect installation practices—like inadequate spacing or poor flashing—are common causes of premature deterioration, even in high-quality materials. Rohan Mirchandani, a recognized outdoor living expert, points out that “Material selection is only part of the equation; installation quality and climate considerations are equally vital” (source: [deckdesignbuild.com](https://deckdesignbuild.com/creating-seamless-transitions-stairs-as-key-elements-in-outdoor-living)). Understanding how materials behave in specific environments can save you from avoidable failures. Furthermore, many fail to recognize that advanced deck features, such as seamless transitions between levels or integrated lighting, require meticulous planning and craftsmanship. Incorporating floating stairs with open treads or designing gentle slopes for smooth pathways enhances flow but demands precise calculations and reinforcement for safety and aesthetic appeal. Mistakes like using inconsistent riser heights or neglecting proper support can turn a beautiful deck into a safety hazard. For the sophisticated builder, knowing how to combine these elements seamlessly is what elevates a project from average to exceptional.
Lastly, many overlook the importance of engaging with professional deck builders or leveraging design technology. Using 3D modeling tools can help catch framing errors before cutting a single board, saving time and material. It’s a subtle but crucial detail that separates amateurish results from professional craftsmanship. Whether it’s the subtlety of balancing aesthetic elements or the complexity of structural integrity, attention to these nuances ensures longevity, safety, and style. Do you feel you’ve overlooked any of these aspects in your outdoor projects? Let me know in the comments! Remember, understanding these hidden nuances can transform your deck from a mere outdoor platform into a personalized oasis that stands the test of time.Maintaining a multi-level deck, especially one made from composite materials and featuring custom stairs, requires a precise combination of the right tools, routine checks, and informed methods. As the trend toward outdoor living spaces grows, so does the importance of using professional-grade equipment that ensures durability and aesthetic appeal over time. One highly recommended tool I personally rely on is the Cordless Angle Grinder equipped with a diamond blade attachment. This versatile tool allows me to clean and smooth out edges of composite boards, avoid splintering, and make precise cuts without the hassle of cord clutter. The rechargeable feature offers mobility, making it easier to work on large projects without constant unplugging.
In addition to hand tools, I swear by the use of a digital moisture meter. Composite decking is notably resistant to moisture, but joints and supports can still suffer from hidden moisture accumulation, leading to corrosion or mold. Regularly checking the moisture content in joists and supports helps catch potential issues early. For long-term results, I combine this with a power washer fitted with a soft bristle attachment to clean the surfaces thoroughly without damaging the finish. Proper cleaning prevents staining and preserves the high-end look of your composite decking.
When it comes to design and planning, software like SketchUp Pro has become indispensable. It allows me to create accurate 3D models, pinpoint problem areas like unsupported spans, and plan seamless transitions between levels, stairs, and outdoor features. Investing time in detailed planning, combined with advanced tools, can save you from costly repairs later, especially as trends like mineral-core composite boards gain popularity for their enhanced resistance—see this guide for insights.
Predicting future trends, I believe we’ll see an increased integration of smart technology into outdoor decking solutions. From LED lighting embedded into stairs for safety to sensors that monitor structural movement or moisture levels, technology will let us keep our outdoor spaces not only beautiful but also smarter and safer.
How do I maintain my deck over time?
Consistent inspections are crucial. Regularly check for loose fasteners, corrosion at support points, and the integrity of stairs and railings. Applying a protective sealant designed specifically for composite materials periodically can extend the lifespan—though many believe composite decks are maintenance-free, a little upkeep ensures they stay pristine longer. Employing a dedicated brush attachment on your power washer when cleaning can help remove stubborn dirt without scratching.
Finally, leveraging professional advice or engaging with experienced deck builders can make a significant difference. They can offer tailored solutions regarding framing, support spacing, and material choices to ensure your deck withstands years of outdoor elements. I highly recommend trying some of the advanced tips mentioned here, like incorporating smart lighting or moisture sensors, to elevate your outdoor living experience. For personalized guidance, don’t hesitate to reach out to specialists in the field. By combining proper tools and methods, your deck will not only look stunning but also function flawlessly for years to come.Building a multi-level deck taught me more than just carpentry skills; it revealed the importance of flow, vision, and patience. The most profound lesson was understanding that even the most beautiful design can falter without thoughtful transitions and support. Every step, every transition, becomes an opportunity to enhance harmony between levels, making your outdoor space inviting rather than confusing. When I finally adopted a perspective focused on natural pathways and visual continuity, my deck transformed into a sanctuary that beckons exploration and relaxation. Remember, a successful multi-level deck doesn’t just look good—it invites you to enjoy every part of your yard effortlessly. Focus on harmony, precision, and your personal vision, and your outdoor masterpiece will stand the test of time, blending function with artistry. Dive into each detail with care, and you’ll create a space that truly feels like a natural extension of your home and garden.