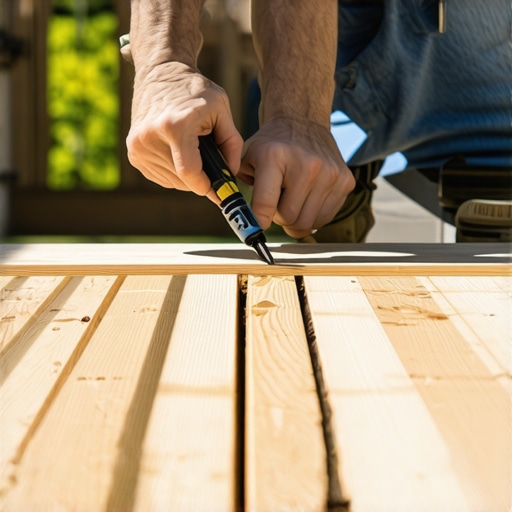
I vividly remember the moment I stepped back after installing a fresh row of deck boards—only to realize that most of the screws were crooked, wobbly, and glaringly uneven. It was as if I had taken a shortcut, and suddenly, the entire deck looked sloppy. That lightbulb moment made me realize how something as seemingly simple as screw alignment can make or break the overall appearance of your outdoor living space.
Why Straight Screws Matter More Than You Think
Installing deck boards is one of those tasks that might seem straightforward at first glance, but I can tell you from experience, it’s the little details that separate a professional-looking deck from a DIY disaster. Straight screws not only ensure your deck looks polished—they also contribute to the long-term durability of the structure. Crooked screws can cause uneven pressure, leading to board warping or even loose fasteners over time.
Your outdoor space deserves the same attention to detail as a high-end patio or a luxury balcony. When the screws are perfectly aligned, your deck will look inviting and well-crafted, without those distracting imperfections. Plus, if you’re considering composite decking, an investment that lasts for decades, you want to make sure every screw is driven with precision.
If you’ve faced the frustration of uneven screw placement or worried about the professional finish of your deck, don’t worry—you’re not alone. Many DIYers and even seasoned pros have stumbled here. The good news is, with a few simple techniques and a bit of patience, you can master the art of perfectly straight screw installation.
Thinking about creating a seamless transition from your indoor space to your outdoor deck? Check out [how to create a seamless transition from your kitchen to the deck](https://deckdesignbuild.com/creating-a-cohesive-transition-from-kitchen-to-deck) for design tips that complement your flawless installation skills.
Now, let’s dive into the practical steps that will help you achieve precision and confidence every time you drive screws into your deck boards.
Align Each Screw Like a Pro
Begin by setting a reference point. Before drilling, mark the deck board with a pencil or painter’s tape at the desired screw position, ensuring consistency across all boards. When you start, use a cordless drill with a clutch set to prevent overdriving, which can cause crooked screws. Think of it like steering a bicycle—steady and deliberate movements keep you on course. I recall a time when I used a jig to align my first row of screws perfectly, which became my cheat sheet for the rest of the project, resulting in a uniform look without much extra effort.
Use Guides and Tools for Precision
Employ a speed square or a dedicated screw guide attachment to keep screws at a uniform angle and depth. These tools act like a railroad track for your drill, guiding your bit straight and true. I personally clamped a simple guide made from scrap wood to my decking as a makeshift guide, which helped me maintain straight lines across dozens of boards. This method eliminates guesswork and produces a sleek, professional finish that elevates your outdoor space.
Maintain Consistent Fastening Pressure
Apply steady pressure when driving screws, avoiding sudden pushes or pulls. Consistency here prevents screws from angling due to uneven force. Imagine tightening a thumbtack—pushing too hard can cause it to bend, just like uneven screw insertion. During my last deck build, I kept a light but firm grip on the drill, periodically checking the screw’s position. The result was a deck surface where every screw sat flush and straight, significantly improving the deck’s appearance and longevity.
Control the Torque and Depth
Pay attention to your drill’s clutch setting and stop once the screw is slightly below the surface, but not sunk too deep. Overdriving can strip the hole or embed the screw too deep, making the surface uneven. Think of it as setting a proper nail—too shallow and it’s loose; too deep and it splits the material. I set my drill to a low torque setting and gently reversed the drill after feeling resistance, preventing the screw from going too deep. This careful control ensures each screw is perfectly flush, enhancing both look and hold.
Double-Check with a Level or String Line
Once a few screws are in place, verify alignment with a straightedge or string line stretched parallel to the boards. This visual check acts like a painter’s ruler, catching any deviations early. During one project, I caught a slight misalignment halfway through by pulling a string tight along my boards, allowing me to adjust before further screws were driven. This extra step guarantees your entire deck remains level and straight, saving time on corrections later.
Maintain Cleanliness for Better Results
Clear the decking surface of debris or sawdust before drilling. Obstructions can cause the drill to wobble, leading to crooked screws. Think of it as trying to write on a smudged glass—clean surface yields better results. I remember one afternoon where I paused to sweep the deck before resuming, and it made a noticeable difference in screw alignment. Keeping your work area tidy simplifies the process and results in a cleaner, more uniform finish.
Practice for Perfection
If you’re new to decking, practice on scrap pieces first. This helps develop a steady hand and feel for the drill’s feedback. Like learning to ride a bike, initial wobbles are normal but will smooth out over time. I spent a few minutes practicing screw driving on an old piece of decking, which boosted my confidence and improved my technique for the real project. The payoff was a flawless deck surface that looked professionally built, with every screw sitting perfectly straight and flush.
Many homeowners and even seasoned builders fall prey to misconceptions when it comes to stairs, deck design, and composite decking. One of the most overlooked nuances is the assumption that standard guidelines are foolproof, but in reality, even minor overlooked details can lead to major issues later. For example, a common myth is that decking materials are entirely maintenance-free; however, advanced users know that proper installation and ongoing care significantly impact longevity. Failing to consider the nuances of stair stringer placement can result in wobble or alignment issues, which compromise both safety and aesthetics.
How can advanced design considerations prevent costly mistakes in outdoor projects?
Expert insights suggest that integrating seamless transitions between stairs and decks, for instance, enhances both functionality and visual appeal, reducing the risk of tripping hazards or structural failure. As discussed in this resource, precise measurements and considering drainage are vital to prevent water damage and rot. Moreover, many underestimate the importance of choosing the right fasteners and materials; using galvanized or stainless-steel fasteners prevents corrosion, especially in coastal or humid environments, as emphasized in this authoritative guide.
Another advanced mistake is ignoring the subtle load considerations when designing composite decks. Not all composites are created equal—some may sag or warp if not supported properly. According to a recent study, proper joist spacing and framing techniques are essential to maintain deck integrity over decades. Remember, the devil is in the details; a well-planned structure that accounts for climate, usage frequency, and material specifics will save you significant time and money in the long run.
For professionals and serious DIYers, pushing beyond the basics involves understanding how different materials react to environmental stressors, detailed framing calculations, and precise level installation. It’s this nuanced knowledge that differentiates a temporary setup from a lasting outdoor masterpiece. Want to elevate your backyard with expert guidance? Check out these ideas to get started.
Have you ever fallen into this trap? Let me know in the comments.Maintaining your outdoor living structures requires precision, the right equipment, and informed methods. Over the years, I’ve refined my toolkit to include essentials that guarantee long-term performance and safety, especially when working with composite decking and custom stairs. One game-changing tool I swear by is the **Cordless Drill with Variable Speed and Clutch Control**. This allows me to drive screws at just the right torque, preventing over-tightening that can cause warped boards or stripped fasteners. I prefer the **DeWalt DCD991** for its durability and ergonomic design, which reduces fatigue during extended projects. Additionally, **high-quality screw guides** like the **Milescraft Screw Guide** help ensure every fastener is perfectly aligned—saving time and minimizing errors. To maintain all fasteners and prevent corrosion, especially in humid or coastal zones, I always use **stainless steel or galvanized fasteners**, which resist rust and maintain structural integrity over decades. For measuring, I relied heavily on a **digital laser level**, such as the **Bosch GLL 3-80**, which ensures your stairs and deck surfaces stay level, even on uneven ground.
Looking ahead, the trend is moving toward **smart tools with integrated digital calibration** and **remote monitoring capabilities**. These innovations promise to make deck maintenance even more precise and less time-consuming. Regular inspections, combined with the right equipment, will keep your outdoor spaces safe and beautiful for years to come.
How do I maintain my outdoor deck and stairs over time? Key practices include periodic cleaning with non-abrasive solutions, inspecting for loose fasteners or wood rot, and applying protective sealants suitable for composite or pressure-treated wood. Incorporating maintenance routines into your yearly schedule, along with the right tools, prolongs the lifespan of your structures and prevents costly repairs down the line.
If you’re ready to elevate your expertise, I recommend trying the **drill clutch setting adjustment** technique I highlighted earlier. It’s simple, but it profoundly improves the quality of your installation — leading to a safer, more attractive outdoor space. For detailed guidance on integrating seamless transitions or high-end stair designs, be sure to check out this resource.
Lessons I Wish I Learned Sooner About Outdoor Decks
- One of my biggest lightbulb moments was realizing that the smallest detail—like screw alignment—can make or break the entire look of your outdoor space. Over time, I discovered that patience and meticulousness in screw placement not only improved aesthetics but also prolonged the deck’s lifespan.
- I underestimated the power of investing in quality tools early on. Using a reliable cordless drill with variable speed and a good screw guide transformed my deck-building experience, making every screw sit perfectly and saving me hours of future adjustments.
- Seeing imperfections from crooked screws was discouraging, but experimenting with simple guides and visual checks, like string lines or levels, turned my DIY projects into professional-looking results. This taught me that sometimes, it’s the little things that elevate your work from decent to stunning.