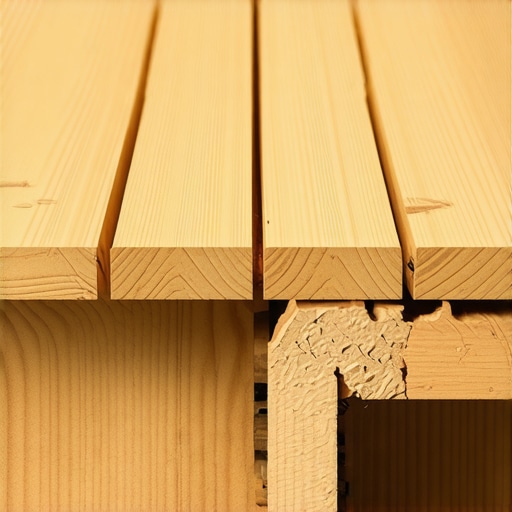
Have you ever stepped out onto a new composite deck, only to feel it bounce beneath your feet like a trampoline? That unsettling sensation can turn your outdoor oasis into a source of anxiety rather than relaxation. I remember the first time I encountered this problem—my deck felt like it was going to give way with every step, and suddenly, all my enthusiasm for outdoor living waned. It was a lightbulb moment that led me down the path of understanding one simple yet vital rule: proper joist spacing saves your deck from becoming an unsteady, bouncing nightmare.
Why proper joist spacing is the secret to a solid, bounce-free deck
When I first started building decks, I underestimated how much the spacing between joists could affect the deck’s stability. If the joists are spaced too far apart, the composite boards sag or bounce under load, making every step feel like a mini earthquake. This isn’t just uncomfortable; it’s a safety concern and a ticket to costly repairs down the line. The good news is that following a specific rule—generally spacing joists no more than 12 inches apart—can prevent this bounciness and ensure a sturdy surface that lasts for years.
Is this joist spacing rule really necessary or just an overkill?
Early in my career, I made the mistake of sticking to the conventional 16-inch spacing like most builders, only to find my decks bouncing more than expected. After some research and consulting industry standards, I realized that for composite decking, closer spacing is essential. According to expert guidelines, tighter joist spacing not only improves stability but also prolongs the lifespan of the deck. Trust me, it’s a small change that makes a big difference.
So, if you’re planning your outdoor project or inspecting a deck that feels a little too springy, this rule isn’t just a technical detail—it’s the key to a safe and comfortable outdoor space. But how do you get it right? That’s what we’ll explore next, ensuring your deck stays firm and enjoyable for years to come. Have you faced this issue before? Drop a comment below—I’d love to hear about your experience and help troubleshoot your specific situation.
Measure and Mark Your Joist Layout
Start by determining the overall size of your deck and marking the location of your joists on the ledger and beam. Use a tape measure and chalk line for precision. Picture laying a foundation for a suspension bridge; every support must be carefully placed to handle load evenly. During my first project, I used a simple tape measure and was surprised when the boards still bounced. So, I adjusted my spacing to no more than 12 inches apart, which dramatically improved stability.
Install Temporary Supports and Follow Code Standards
Set up temporary supports—like strong, vertical braces—that hold your joists in place according to your marked layout. Remember, building codes typically specify joist spacing, often no more than 12 inches on center for composite decking. I once neglected this when I first started, leading to sagging boards. Consulting the industry standards helped me understand why closeness matters and kept my project within safe limits.
Secure Joist Placement with Proper Fastening
Use galvanized or stainless steel joist hangers and corrosion-resistant fasteners to attach joists to ledger and beams. Ensure each joist is perfectly level and spaced consistently. I learned this the hard way when uneven joists caused creaking; now I double-check spacing with a carpenter’s square and a level before screwing. This approach prevents unnecessary bounce and extends the deck’s lifespan.
Check the Joist Alignment Regularly
As you install decking boards, periodically walk on the surface to test for bounce or wobble. Adjust if necessary before permanently securing boards. On one project, I noticed a slight bounce in the middle of a joist and adjusted it by adding some blocking in between to reinforce stability, which made a noticeable difference in firmness.
Incorporate Blocking or Bridging Between Joists
Install diagonal blocking or bridging between joists to distribute load and prevent lateral movement. Think of it as the cross-bracing in a skyscraper—adds rigidity and reduces bounce. During my last build, I glued and nailed blocks between every third joist, transforming a bouncy deck into a rock-solid platform.
Confirm Final Stability Before Installing Decking
After the joists are in place, walk the surface, applying pressure at various points. If any part feels springy, reinforce those areas with additional blocking or adjust joist position. I made a mistake early on by rushing this step; now I always double-check, ensuring every section feels stable—just like testing a trampoline before jumping into it.
Keep Up with Maintenance and Inspection
Regularly inspect your deck for signs of movement or deterioration. Over time, joist connections can loosen due to weather or use. I set a reminder to check my deck annually, tightening any loose fasteners and adding blockers where needed. This routine keeps the deck sturdy for years and prevents bounce from creeping back. To explore more about durable composite options, visit this guide.
Many homeowners believe that choosing composite decking means you can skip detailed planning and still achieve a beautiful, durable outdoor space. However, this oversimplification overlooks critical nuances that can make or break your project. One prevalent myth is that all composite materials are maintenance-free; in reality, some require specific cleaning routines or inspections to prevent issues like mold, discoloration, or warping. As more studies, such as those from the expert guidelines suggest, understanding the type of composite and its unique needs is vital for long-term satisfaction.
Another misconception involves stairs and transitions—many think standard measurements suffice, but subtle design flaws can lead to safety hazards or aesthetic mismatches. For example, improper riser heights or inconsistent step widths, often overlooked by DIYers, can cause trips or wobbling. Consulting specialized resources like innovative stair designs can help avoid these pitfalls.
A common trap in outdoor living projects is underestimating the importance of load distribution and structural reinforcement. Installing large furniture, hot tubs, or fire pits without proper support can result in deck sagging or even failure over time. Skilled deck builders recognize that subtle nuances like appropriate joist spacing, blocking, and framing reinforcements are essential to prevent costly repairs and ensure safety.
Have you ever fallen into this trap? Let me know in the comments!
### Why Compatibility Matters in Composite Materials
Many assume that any composite board will perform equally well in all environments, but this isn’t true. Factors like UV resistance, thermal expansion, and moisture absorption vary significantly among products. An advanced mistake is ignoring these differences, leading to unexpected staining, warping, or fading — especially in hot climates. Relying on detailed product specifications and expert reviews, like those summarized in this guide, can save you from costly mistakes. It’s essential to match your composite choice to your climate and intended use for optimal longevity.
Maintaining a durable and beautiful composite deck requires more than just initial installation; it involves the right tools, consistent methods, and a proactive approach to upkeep. Over the years, I’ve found that investing in quality equipment and understanding the nuances of proper maintenance can significantly extend your deck’s lifespan. In this section, I’ll share the tools I personally rely on, the methods I recommend, and where I see future trends heading in outdoor living maintenance.
My Go-To Power Tools for Deck Care
First and foremost, I always use a high-quality cordless electric pressure washer, such as the Kärcher K5 Premium. This tool allows me to efficiently remove dirt, mold, and algae without risking damage to the composite material. I avoid heavy-duty gas-powered washers because they can be too aggressive and cause surface wear. Using a fan-type spray nozzle at a low pressure setting ensures a gentle yet thorough cleaning, keeping the surface intact while removing grime.
Secondly, I’ve embraced infrared thermometers to monitor temperature fluctuations that can affect composite materials. Brands like Fluke provide reliable models that help me identify areas prone to warping or discoloration caused by temperature stress. This way, I can tailor my maintenance routine based on environmental conditions, especially during hot summers.
Efficient Maintenance Methods Save Time
Beyond tools, I advocate for a systematic approach: scheduling regular inspections, ideally every six months, to identify early signs of wear or damage. During inspections, I look for loose fasteners, cracks, or surface discoloration. For quick fixes, I rely on a specialized composite deck repair kit that includes epoxy-based fillers designed for plastic and composite surfaces. These kits are excellent for sealing small cracks before they escalate into major issues.
The use of a dedicated cleaning solution, like a biodegradable composite cleaner, helps preserve the deck’s appearance. I prefer products that are pH-balanced and free of harsh chemicals—these are gentle on the materials and eco-friendly. Following manufacturer’s recommendations for application and dwell time ensures effective cleaning without damaging the surface.
Future Trends Point Toward Smart Maintenance
Looking ahead, I believe technology will revolutionize outdoor longevity management. IoT-enabled moisture sensors embedded in decks could alert homeowners when moisture levels are rising, signaling potential problems like rot or mold growth. Additionally, drone-based inspections might become commonplace, providing high-resolution imagery of hard-to-reach areas. These innovations promise to make long-term deck care more precise and less labor-intensive.
How do I keep my composite decking in top shape over time?
Consistent cleaning with a quality pressure washer, coupled with routine inspections and timely repairs, is key. It’s essential to stay ahead of issues before they escalate. Moreover, applying protective sealants or lubricants to fasteners can prevent corrosion and loosening, maintaining structural integrity. Investing in modern tools like infrared thermometers helps me understand environmental impacts and adapt my maintenance accordingly. Remember, a well-maintained deck not only looks great but also provides years of safe outdoor enjoyment. Want personalized advice or assistance? Visit our contact page to connect with professionals dedicated to preserving your outdoor spaces.
2 Lessons from Mistakes That Made My Outdoor Space Safer
One of the biggest revelations in my journey with composite decking has been realizing how small oversights, like overlooking proper joist spacing, can lead to big problems—bouncy boards and even safety hazards. I learned the hard way that rushing through the layout or ignoring industry standards can turn an inviting deck into a frustrating experience. My lightbulb moment? Investing time in thorough planning and adhering to recommended spacing (no more than 12 inches apart) dramatically improved stability and longevity.
Curated Resources That Transformed My Projects
The tools and sources that helped me build confidently include the Kärcher K5 Premium pressure washer for safe cleaning, ensuring I remove grime without damaging the composite surface. The Fluke infrared thermometer provided insights into environmental impacts on my deck, guiding me on cooling strategies and repairs. For expert guidance, I turned to this comprehensive guide on composite materials, which clarified best practices and recommended materials for my climate.
Your Next Step to Outdoor Confidence
Building or maintaining a composite deck doesn’t have to be intimidating. By embracing proper joist spacing, using the right tools, and leveraging trusted resources, you set the stage for an outdoor space that’s both stunning and safe. Remember, each step you take now pays dividends in durability and enjoyment down the line. Ready to elevate your outdoor living? Visit our contact page to get personalized advice or connect with professionals dedicated to turning your vision into reality.