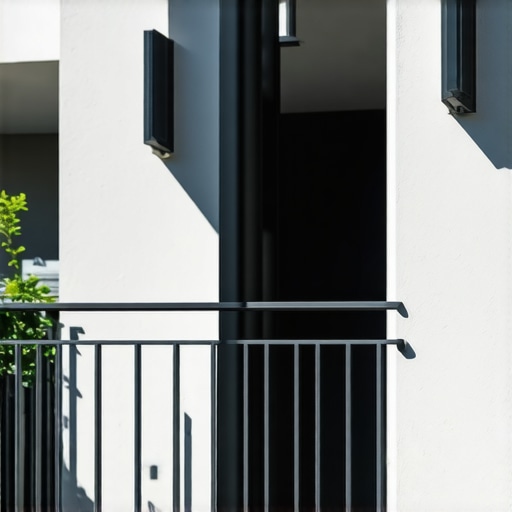
It was a warm Saturday afternoon when I finally looked up from my phone and realized something was off with my balcony railing—again. The posts, which I had installed just a year earlier, wobbled every time someone leaned on them. I felt that familiar prick of frustration, thinking, “Did I cut corners?” That moment marked a turning point in my outdoor project journey. I knew then that I needed a better solution, one that wouldn’t just look good but also stand the test of time.
Transform Your Narrow Balcony with a Smarter Railing Choice
Narrow balconies often present a unique challenge—they feel cramped, and every inch counts. I learned that choosing the right type of railing posts can make all the difference, especially for tight spaces. Conventional top-mounted posts tend to eat into precious space, making your outdoor area feel even more confined. Meanwhile, side-mount railing posts offer a sleek, space-efficient alternative that keeps your balcony feeling open and unobstructed.
Is Side-Mount Railing Posts Really Worth the Hype?
Early in my project, I made a classic mistake: focusing solely on aesthetics rather than durability. I installed traditional posts without considering how they would affect space and stability. The result? Frequent wobbling and the need for constant adjustments. Realistic expectations are crucial—what seems like a minor detail can significantly impact safety and longevity. From my experience, side-mount posts distribute weight better, reduce clutter, and simplify maintenance, making them a smarter option.
If you’ve faced similar issues—wobbly rails, cramped spaces, or ongoing repairs—you’re not alone. Many homeowners discover that a simple change in design, like opting for side-mounted posts, can revolutionize their outdoor living experience. For more insights on creating seamless transitions and optimizing outdoor spaces, check out this helpful guide on transforming your outdoor space.
Stay tuned as we explore practical tips on selecting, installing, and maintaining these efficient railing systems. Ultimately, the right posts can turn your narrow balcony from a tight squeeze into a stylish, functional oasis.
Secure Your Balcony with Proper Installation of Side-Mount Railing Posts
When replacing your old, wobbly posts, my first step was to clear the area and lay out all necessary tools—drill, concrete anchors, and the posts themselves. Think of this as preparing ingredients before cooking; having everything at hand ensures a smoother process. Start by measuring the exact positions where the posts will attach to the balcony floor, ensuring they are evenly spaced to support the railing securely. Use a tape measure and chalk line for accurate alignment, much like a builder aligning wall studs. Mark the spots precisely to avoid crooked posts later on.
Drill Pilot Holes and Attach Anchors
Next, drill pilot holes into the concrete deck at your marked spots. Use a hammer drill with a masonry bit to penetrate the deck, creating clean holes for the anchors. Think of this as punching a hole for a nail, but on a much sturdier level—accuracy is key here. Insert the masonry anchors into the holes and gently tap them in with a hammer. Don’t overtighten, as this might crack the concrete or misalign the posts. Wrapping this step with a level, double-check that the posts are perfectly vertical—imagine dangling a plumb line from a construction project to ensure true verticality.
Attach the Posts and Reinforce Support
Secure the posts to the anchors using stainless steel fasteners. Tighten them incrementally, alternating between screws to ensure the post doesn’t wobble. At this stage, I used a spirit level across the posts to confirm they’re plumb; a crooked railing defeats both safety and aesthetics. For added stability, consider adding a horizontal support between posts—like braces in a tent structure—to distribute the load evenly, especially on narrow balconies vulnerable to movement. This reinforcement prevents future wobbling and enhances durability, crucial for preserving safety over time.
Test and Finalize Your Work
Once all posts are anchored and leveled, give the railing a firm shake to test stability—think of it as a quality check before the final curtain. If anything feels loose, tighten the fasteners further. Avoid overtightening, which can induce stress points and damage the concrete or posts. To keep your railing looking pristine, apply a protective sealant around the anchors—think of it as skincare for your outdoor fixtures—to prevent corrosion from weather exposure. Regular inspections every season will help catch any looseness early, keeping your balcony safe and stylish for years to come.
Many homeowners believe they understand the basics of composite decking and outdoor living, but in reality, there are nuanced pitfalls that can sabotage long-term enjoyment and safety. One common myth is that all composite materials are equally maintenance-free; however, variations in quality and composition significantly influence durability, especially in high-moisture or coastal environments. For example, I often see clients opt for cheaper composite boards expecting years of flawless performance, only to face issues like dark spots or warping, which are actually preventable by choosing mineral core decking, as highlighted in [this ultimate guide](https://deckdesignbuild.com/composite-decking-trends-2025-the-ultimate-guide-for-outdoor-enthusiasts). A frequent oversight is underestimating the importance of proper spacing during installation. Inadequate gaps for expansion can lead to buckling and cupping — problems that not only detract from aesthetics but also compromise safety. Even among seasoned deck builders, a common advanced mistake is neglecting the subtle differences in fastener types; stainless steel screws are crucial near saltwater exposure to prevent corrosion, a detail many overlook in the initial planning stages.
Why Do Some Composite Decks Age So Poorly Despite Good Materials?
In my experience, the key lies in understanding the environmental factors and installation nuances. For example, inconsistent sealing around fasteners can let water seep in, accelerating deterioration, as confirmed by expert studies on deck longevity. Moreover, not incorporating proper drainage solutions or skimping on edge detailing can trap moisture, leading to mold and decay over time. When designing outdoor stairs, many forget that riser height and tread depth affect safety and code compliance; a misjudged step can cause accidents, especially for children or the elderly. To avoid such pitfalls, collaborating with a professional deck builder can ensure all these details are meticulously addressed, offering you peace of mind for years to come. Dive into [this article](https://deckdesignbuild.com/creating-seamless-transitions-stairs-as-key-elements-in-outdoor-living) for expert tips on integrating stairs seamlessly with your deck. Remember, understanding these subtle yet critical factors helps elevate your project from average to exceptional. Have you ever fallen into this trap? Let me know in the comments.Achieving a durable, low-maintenance outdoor living space hinges on the right tools and consistent upkeep. I swear by a few specific pieces of equipment that have saved me time and headaches over the years. First, a high-quality cordless impact driver is indispensable; it allows me to install fasteners swiftly without stripping screw heads, especially when working in tight spaces or awkward angles. I use the Milwaukee M18 Fuel impact driver because of its power and battery longevity—it’s a game-changer when assembling large deck frames or replacing worn-out fasteners. Next, a moisture meter, like the Protimeter Surveymaster, helps me assess substrate dryness before sealing or staining. Ensuring surfaces are dry prevents issues like mold, warping, or peeling, which can compromise your long-term results. For ongoing maintenance, a power washer with adjustable settings is crucial. I prefer a unit with a turbo nozzle, like the Simpson Cleaning MegaShot, to clean composite decking without damaging the surface. Regularly cleaning your deck not only keeps it looking fresh but also extends the lifespan of materials, especially in high-moisture environments. Additionally, I recommend a set of quality wood fillers and sealants for spot repairs—quick fixes that prevent minor issues from escalating. To maintain your stairs and railings, a sturdy caulking gun for weatherproof sealants ensures that joints stay watertight and structurally sound over time. As for software, I find that CAD programs like SketchUp are invaluable for designing custom features or assessing space utilization before physical work begins. Advanced planning with these tools helps anticipate potential problems, saving both money and effort. Looking ahead, I predict that automation and smart maintenance solutions will become more integrated into outdoor building—think app-controlled cleaning systems or sensor-based inspections—that will further simplify long-term upkeep. To maximize your deck’s durability, try implementing a routine of seasonal inspections and cleaning with these tools, and you’ll enjoy a safer, more inviting outdoor space for years to come. Want to ensure your outdoor project stands the test of time? Visit our contact page to get personalized recommendations tailored to your environment and goals.
Lessons That Changed How I Approach Outdoor Spaces
One of my most profound realizations is that aesthetics alone won’t guarantee durability. Investing in quality materials and understanding environmental impact saved me from future headaches and costly repairs. For instance, opting for mineral core composite decking significantly reduced warping and staining issues, proving that prioritizing quality over price truly pays off.
Another lightbulb moment was learning the importance of precise installation techniques. Taking the time to measure accurately, drill proper pilot holes, and use the right fasteners ensured my railing posts remained stable for years. It reminded me that small details in installation can make or break the safety and longevity of an outdoor project.
I’ve also come to appreciate the power of a well-crafted plan. Thinking through drainage solutions, expansion gaps, and access points during the design phase prevented many common issues. Collaborating with experienced deck builders and using detailed 3D modeling helped me visualize and avoid costly missteps, proving that preparation is everything.
My Favorite Tools and Resources for Outdoor Projects
Over the years, I’ve trusted the Milwaukee M18 Fuel impact driver for its power and reliability, especially when working in tight spaces. It speeds up installation and minimizes frustration. A moisture meter like the Protimeter Surveymaster became essential for assessing deck and substrate health before sealing, ensuring long-term protection. For cleaning, the Simpson Cleaning MegaShot power washer provides gentle yet effective maintenance for composite surfaces, extending their lifespan. Finally, insightful guides such as this ultimate guide to composite decking trends have helped me stay ahead with current best practices and innovations.
Your Next Step in Creating Outdoor Oases
Remember, every outdoor project is a chance to turn your vision into reality with patience and the right knowledge. Whether you’re replacing railing posts or designing a whole new deck, the right approach can transform your space into a low-maintenance, durable retreat. Don’t hesitate to explore available resources and connect with professionals when needed—doing so can make all the difference in achieving lasting beauty and safety. Embrace the process, and soon you’ll enjoy an outdoor living area that truly reflects your style and stands the test of time.