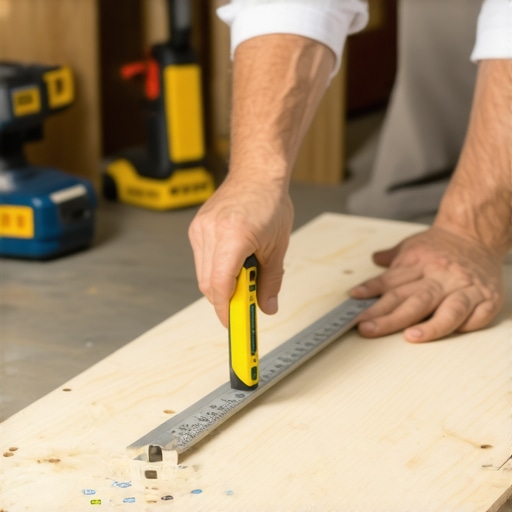
I remember the first time I attempted to build a wrap-around step for my deck. I was eager, armed with a saw, some screws, and a handful of YouTube tutorials. Unfortunately, despite my enthusiasm, the step was anything but level. Every time I stepped on it, it felt more like a gentle roller coaster ride than a stable entrance. That realization hit me hard—building a wrap-around step that truly stays level isn’t just about cutting the boards and hoping for the best. It’s an art rooted in understanding the nuances of outdoor construction.
The Hidden Challenge of Level Steps
Most folks like me overlook the intricate details involved in ensuring that outdoor stairs stay perfectly level over time. The problem isn’t just about accuracy in measurements but also about accounting for the natural shifts in the ground, thermal expansion of materials, and the way wood or composite decking reacts to weather. When I first built my stairs, I underestimated how much ground movement could affect levelness. I learned that a simple miscalculation or neglect of proper support can turn a beautiful entryway into a wobbly, uneven hazard.
Are Your Steps Worth Fixing Over Time?
This leads to a common question I hear among DIY enthusiasts and seasoned deck builders alike: “Is it really possible to create a wrap-around step that stays level without ongoing maintenance?” Honestly, at first, I thought it was just wishful thinking—until I made some crucial mistakes early on. My biggest blunder was assuming uniform ground conditions across the entire build site, ignoring the fact that foundations settle differently depending on soil type. That’s a mistake I see many make, and it’s why some steps seem perfect at first but wobble with time. For more insights on advanced outdoor solutions, you might want to check out this guide to outdoor living.
But don’t worry! With the right approach, tools, and some insider tips, you can achieve a level, durable wrap-around step that stands the test of time. In the following sections, I’ll walk you through the key steps I wish I knew from the start—no more guessing, no more wobbles. Just solid, level steps that enhance your outdoor space and give you peace of mind.
Set a Solid Foundation for Your Stairs
Start by evaluating the ground where your stairs will sit. Use a laser level or a long carpenter’s level to assess whether the ground is sloped or uneven. Once identified, excavate or build up soil as needed to create a flat, stable base. Pour a gravel bed—about 4 to 6 inches thick—and compact it thoroughly to ensure drainage and prevent settling. This mimics the foundation of a skyscraper; without a sturdy base, your stairs will wobble over time. Remember, a level start prevents future headaches.
Frame with Precision and Strength
Cut your stringers to the correct length using a framing square and a jig or a measuring tape. For a standard stair rise (about 7.5 inches) and run (about 10 inches), calculate the total number of steps needed and mark the stringers accordingly. Use a saw to make notches or cuts at each tread and riser point, ensuring each cut is accurate. Think of this as laying the backbone of a skeleton—every cut impacts the overall stability. Level the stringers on the ground first to verify measurements before installation.
Use This Technique for Consistency
Apply a quick test by placing a level across the top of the stringers; they should be perfectly parallel and plumb. If they aren’t, adjust the cuts slightly. When setting the stringers in place, attach joist hangers or ledger brackets firmly to your footing or framing, ensuring each is aligned vertically. Secure with galvanized or stainless-steel fasteners to prevent rust and loosening, especially if your deck is near the coast. Remember, properly fastened and aligned stringers form the critical support that keeps your stairs level and safe.
Install Treads with Care
Measure the width and depth of your composite decking boards beforehand. When laying the treads, leave a small gap (about 1/16 inch) between boards to accommodate expansion and prevent buckling. Secure each board with stainless-steel screws to avoid rust streaks. To keep the treads perfectly level across the entire span, use a carpenter’s level along the length and width as you tighten screws. This step is crucial—think of it as ensuring your steps are as flat as a calm lake, even if the ground beneath shifts over years.
Check and Adjust Frequently
After installing a few treads, step back and verify their alignment. Use a straight edge or level to confirm they are flush and even. If there’s any wobble, loosen and reposition fasteners slightly to correct. Incorporate shims or leveling pads if necessary, particularly when working on rocky or uneven ground. These small details stabilize the entire structure and prolong its lifespan.
Final Touches for Longevity
Apply a high-quality sealant designed for outdoor use on all cut edges and exposed surfaces of your composite boards. This prevents moisture ingress and helps resist warping or splitting — vital given the weather fluctuations outdoor structures endure. Periodically inspect your stairs for signs of movement or loose fasteners, especially after harsh storms. Being vigilant ensures your craftsmanship remains level and safe for years to come.
Remember, precise measurement, solid foundation, and meticulous fastening are key to building stairs that stay level and look professional. By following these concrete steps, you’ll avoid the wobble and wobble-related hazards that can turn a beautiful deck into an unsafe ordeal. For advanced tips, explore how stairs integrate seamlessly into outdoor spaces and ensure your projects stand the test of time.
Many outdoor enthusiasts and DIYers fall into the trap of oversimplifying what it takes to create a stunning and durable outdoor space. A common misconception is that selecting standard materials and following basic tutorials guarantees success, but the reality is far more nuanced. For example, while composite decking is marketed as low-maintenance, overlooking the specific climate and ground conditions can lead to premature warping or buckling, contradicting the promises of longevity. To truly excel, understanding these intricacies is essential.
Why Do So Many Decks Fail Over Time Despite Using Premium Materials?
In advanced outdoor design, the myth that premium materials alone ensure durability is widespread. However, experts emphasize that proper installation techniques, grounding strategies, and attention to local environmental factors are equally critical. For instance, a seasoned deck builder knows that thermal expansion in composite boards can cause gaps or buckles if not properly accounted for—something that many beginners overlook. According to a study published in the Journal of Building Engineering, neglecting expansion and contraction can reduce deck lifespan by up to 30%, underscoring the importance of detailed planning. One trap to avoid is relying solely on the manufacturer’s specifications without considering site-specific factors such as soil type, drainage, and exposure to harsh weather. An incorrect foundation setup can lead to uneven settling, causing steps and decking to become uneven over time. I recommend consulting comprehensive guides like this expert advice on outdoor transformation to sidestep these pitfalls. Moreover, understanding advanced nuances equips you to implement better reinforcement techniques, such as proper joist spacing and flange anchoring, which are vital for long-term stability. For those interested in pushing their outdoor projects further, exploring recent trends in composite decking innovations for 2025 can provide valuable insights. Ultimately, mastering these subtle yet crucial details makes the difference between a deck that looks good initially and one that endures the test of time. Have you ever fallen into this trap? Let me know in the comments.
Investing in the Right Tools for Long-Term Success
When it comes to maintaining your outdoor living spaces, leveraging the proper tools can make all the difference. Personally, I swear by a quality cordless impact driver, like the Makita XDT16, which offers the power and precision to tighten fasteners securely without stripping. It’s especially handy for replacing loose railings or securing composite deck boards — tasks that require consistent torque and control.
For inspecting levelness and ensuring your stairs stay uniform over the years, I rely on a digital laser level such as the Bosch GLL3-330C. This device provides laser lines with ±1/8-inch accuracy over a 30-foot range, making it invaluable for verifying structural alignments during mid-term inspections. It’s a game-changer compared to traditional bubble levels, which can be less reliable over larger spans or under varying weather conditions.
Consistent Maintenance With Smart Software Tools
Beyond physical tools, I’ve incorporated software like DeckDesign Studio to visualize future modifications or repairs. This CAD-based program allows you to simulate structural changes before making cuts, saving time and avoiding costly errors. As outdoor design trends evolve with composite decking innovations, staying ahead with advanced planning tools ensures your projects remain both beautiful and durable.
Looking ahead, I believe that integrating drone inspections with high-resolution cameras will become standard for assessing hard-to-reach areas, like the underside of elevated decks or intricate staircases. This approach minimizes safety risks and ensures no detail goes unnoticed — especially as decks grow more complex and customizable.
How do I maintain my deck over time?
Regular inspections are key to catching issues early. I recommend setting a seasonal schedule to check for loose fasteners, signs of wood rot, or shifting support posts. Using a telescoping inspection mirror can help you examine hidden areas without tearing your deck apart prematurely. Also, applying a quality sealant annually, like Behr Premium DeckOver, guards against moisture intrusion and UV damage, prolonging the lifespan of your composite or wood components.
For detailed guidance on maintaining composite decking, exploring this resource can be incredibly helpful. The trend towards high-performance materials continues to grow as technological advances enhance durability and aesthetic appeal. By staying proactive with the right tools and methods, you’ll ensure your outdoor spaces remain inviting and safe for years to come.
Don’t hesitate to experiment with techniques like using a precise laser level for stair stringers or scheduling regular inspections with a digital app. Taking these steps today can save you significant hassle and expense down the line — remember, great outdoor spaces aren’t just built once; they require ongoing care and the right equipment.
Lessons I Didn’t Expect to Learn About Outdoor Stairs
One crucial realization was that even meticulous measurements can’t prevent ground shifts over years. It taught me that flexibility in support and ongoing adjustments are key to lasting levelness. The second lesson involved climate: understanding how temperature fluctuations cause materials to expand and contract kept my stairs looking perfect longer. Lastly, I discovered that investing in quality foundational materials pays dividends—cheap supports often lead to wobble and safety issues sooner than expected. These insights transformed my approach from DIY guesswork to a strategic craft.
Gear Up with My Go-To Tools for Deck Excellence
The impact driver I trust most is the Makita XDT16—its power and precision make fast work of securing fasteners without stripping. For checking levelness on large spans, the Bosch GLL3-330C laser level offers unmatched accuracy, saving me from frustrating re-works and ensuring every step stays true. I also swear by CAD programs like DeckDesign Studio—visualizing plans reduces errors and helps anticipate site-specific challenges. Finally, high-quality fasteners like stainless-steel screws guard against rust, especially near the coast, ensuring the integrity of my outdoor stairs for years to come. Combining these tools streamlines the process and elevates craftsmanship.
Embrace the Future: Turn Your Outdoor Vision into Reality
Building durable, level wrap-around steps isn’t just a skill—it’s a commitment to quality that transforms your outdoor space into a safe, inviting oasis. With patience, proper planning, and the right tools, you can achieve results that last through seasons of weather and time. Don’t shy away from experimenting with new materials or techniques; your outdoor legacy depends on it. Every project is a step toward turning your backyard into the perfect retreat—so start today, and enjoy the satisfaction of creating something truly enduring.
What’s been your biggest challenge when designing or building outdoor stairs? Share your experiences below—I’d love to hear your story!
,