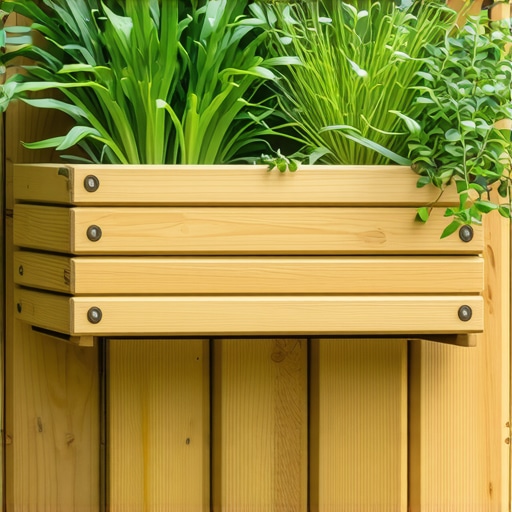
It was a hot summer afternoon when I finally realized my deck’s hidden enemy: rot. I was spending more time fixing squeaky, sagging boards than enjoying the outdoors. One day, I leaned over to plant some flowers in what I thought was a charming built-in planter, only to find soggy, decayed wood hiding beneath. That lightbulb moment made me question everything about my deck designs.
Why Your Deck Planter Should Be Built to Last
Constructing a built-in deck planter isn’t just about aesthetics; it’s about durability and safety. The moment I overlooked proper planning, I faced the consequence—my beautiful outdoor space was compromised by rot. These issues can lead to costly repairs and safety hazards, and nobody wants that. Today, I’ll share what I learned and how to create a built-in planter that withstands the elements, especially in humid or salty environments.
Is a Built-In Planter Easier to Maintain Than Free-Standing?
Many skeptics ask if integrated planters are more hassle than they’re worth. Honestly, with the right materials and techniques, a built-in planter can be low-maintenance and even enhance your deck’s durability. My early mistake was opting for regular pressure-treated wood, which, despite being popular, can rot quickly if not sealed properly. Instead, exploring options like composite decking provides long-term benefits. Check out [composite decking trends for 2025](https://deckdesignbuild.com/composite-decking-trends-2025-the-ultimate-guide-for-outdoor-enthusiasts) to see the latest innovations.
As I navigated these challenges, I realized that many of my fellow outdoor enthusiasts are hesitant because of the perceived extra effort or cost. But I promise you, the upfront planning pays off in resilience and beauty. Next, let’s look at common pitfalls and how to avoid them—starting with understanding how to choose the right materials to stop rot in its tracks.
Selecting the Right Materials for Longevity
Start by choosing materials resistant to rot and moisture. I recommend composite decking due to its low maintenance and durability; it won’t warp or decay like wood. I once ordered sample boards from this guide to compare finishes, and the difference was clear. Before purchasing, measure your space precisely, considering drainage and plant placement.
Preparing the Foundation Properly
Ensure a solid base by leveling the ground or installing concrete footings. I use a laser level to mark the exact height, especially on uneven terrains, preventing future sagging. Think of this step as laying a foundation for a house—without stability here, rot, and damage become unavoidable. Place a moisture barrier under the footing to keep wood away from damp soil.
Assembling the Frame with Care and Precision
Use galvanized or stainless steel fasteners to prevent rusting. When framing, I like to leave a 1-inch gap between the boards for ventilation and drainage. A mistake often made is tight-fitting boards that trap moisture, accelerating rot. As I built mine, I left a small space to mimic the techniques in this resource, which proved critical for longevity.
Implementing Proper Fastening Techniques
Pre-drill holes to avoid splitting and use clips or hidden fasteners for a sleek appearance. I once tried to nail boards directly—big mistake, as the boards warped within a season. Using a pneumatic gun with the right fasteners dampened the movement and kept everything tight.
Adding Drainage and Sealants
Incorporate drainage gaps and apply waterproof sealants on all cuts and edges. I applied a silicone-based sealant around bolts and joints, which prevented water from seeping into vulnerable areas. Regularly inspecting and reapplying sealant as needed extends your planter’s life exponentially. Consider integrating a small slope into the design so water runs away from critical joints.
Finishing with Protective Coatings
Finish your built-in planter with a weather-resistant stain or paint designed for outdoor composites. During my project, I used a tinted sealer, which enhanced the appearance and added an extra layer of protection. This final step shields the material from UV damage and minimizes the risk of surface degradation, especially if your deck is exposed to harsh sun or salty air—check out this article for color choice insights.
Many DIY enthusiasts and even seasoned builders fall into common traps when planning or constructing decks, stairs, or choosing materials like composite decking. Contrary to popular belief, selecting the most expensive or trendy options isn’t always the best move. For instance, the myth that all composite decking is maintenance-free is misleading; some grades require periodic cleaning to prevent mold or fading.
A subtle nuance often overlooked is the importance of understanding the environmental factors affecting your outdoor space. Coastal areas, for example, demand corrosion-resistant hardware like stainless steel fasteners, which many beginners dismiss. Installing inferior fasteners leads to early rust and costly repairs.
Another advanced mistake involves stair design. While folks focus on aesthetics, they often neglect load calculations and code compliance, risking safety and liability. Curious about how to ensure your stairs are both stylish and safe? Check out this resource.
But here’s a common misconception—many believe that composite decking’s thermal properties prevent heat absorption, making it cool underfoot. Reality shows darker colors can become extremely hot, especially in direct sunlight, which can cause discomfort or even burns. To mitigate this, consider selecting lighter shades or adopting innovative composite decking trends that incorporate heat-reflective technologies.
Let’s talk about the importance of professional guidance. While DIY is rewarding, complex projects like integrating stairs with multi-level decks or ensuring proper drainage demand expertise. Collaborating with a professional deck builder can save time and protect your investment long-term.
Have you ever fallen into this trap? Let me know in the comments, and share your experiences or questions regarding advanced nuances in outdoor living projects.Maintaining a durable outdoor deck requires more than just careful initial construction; it hinges on the right tools, ongoing maintenance routines, and strategic upgrades. I rely heavily on a high-quality cordless impact driver for fastening composite decking, as its torque and precision make fastener installation seamless and reduce damage to delicate materials. For measuring and leveling, a laser level is indispensable, ensuring every joist and board aligns perfectly, which is critical for preventing issues like warping or uneven surfaces over time. To keep the deck in peak condition, I recommend using a power washer with a soft brush attachment—gentle enough to prevent damage but effective at removing mold and grime, preserving the finish of your composite decking. Regular inspections with a sturdy flashlight help identify early signs of wear, such as loose fasteners or surface cracks, allowing timely repairs before more significant problems develop. As trends evolve, I foresee advancements in smart coatings that can self-heal minor scratches and resist UV damage, extending the lifespan of decking surfaces. How do I maintain my outdoor living spaces to ensure they stand the test of time? Consistent cleaning, using the right tools, and proactive repairs form the backbone of long-term resilience. For example, applying a specialized composite deck cleaner and sealant annually can significantly prolong the life of your investment, especially in aggressive environments like coastal areas, where stainless-steel fasteners and corrosion-resistant hardware are vital. If you’re ready to elevate your deck’s durability, try incorporating a laser level for your next project—precision here makes all the difference in long-term performance. Explore more about additive technologies in this guide to composite decking trends for 2025.
Lessons Nobody Tells You About Building Decks
One of the most eye-opening lessons I learned was that overlooking the importance of airflow and moisture movement can turn a beautiful deck into a rot-pronged nightmare. I once sealed every joint tightly, thinking it would prevent water intrusion, only to find trapped moisture causing rot within a season. Now, I understand that intentional ventilation gaps are essential for longevity. Another lightbulb moment was realizing that choosing high-quality fasteners isn’t just about rust resistance—it affects the overall stability and appearance of your deck over the years. Cutting corners on hardware costs often leads to costly repairs down the line. Finally, I discovered that collaborating with experienced professionals can significantly improve the project’s outcome; DIY is rewarding, but knowing when to call in the pros makes all the difference, especially for complex stairs or multi-level designs. Learning these insider tips transformed my approach from reactive repairs to proactive durability building, and I want you to experience that same confidence.