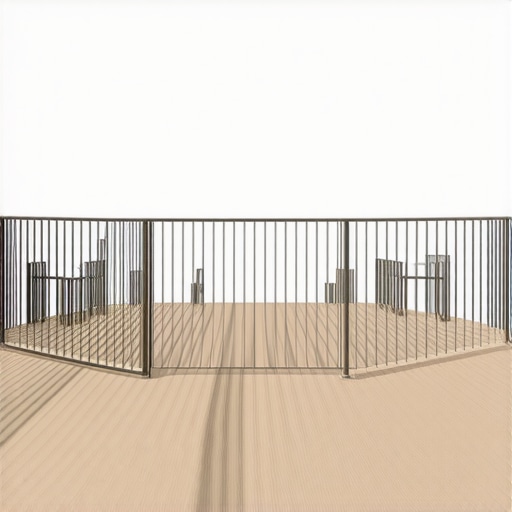
Ever tried to squeeze a barbecue, a seating area, and a flower bed onto a tiny deck, only to realize there’s just no room left? I’ve been there. One summer, I was all set for outdoor dinners, but the lack of space made everything feel cramped—until I discovered the magic of side-mounted railings. Suddenly, I had more room to breathe, entertain, and enjoy my outdoor oasis.
That lightbulb moment changed everything. It reminded me how important thoughtful design is, especially when every inch counts on small decks. Today, I want to share how opting for side-mounted railings can free up precious space, making your outdoor area more inviting and functional. Whether you’re a DIY enthusiast or working with a deck builder, understanding this approach can transform your small backyard into a true extension of your home.
Why Side-Mounted Railings Are a Game Changer for Small Decks
Traditional deck railings often eat into usable space. Their posts can create visual clutter and physical barriers that make a small deck feel even tighter. But when you switch to side-mounted railings, the entire deck opens up. No bulky posts blocking your view or limiting your layout. Instead, the railing supports are attached on the side, allowing for more open sightlines and a more spacious feel.
In my own experience, this simple change gave my deck an instant upgrade. It’s not just about aesthetics; it’s about function. More room means you can add a larger dining table, a lounge area, or even leave space for a mobility scooter or wheelchair—an essential consideration for accessible outdoor living. Plus, modern side-mounted systems are durable and low-maintenance, perfect for long-term enjoyment.
Research shows that open deck designs can enhance your outdoor experience and increase your property’s value. According to a recent trend report on composite decking, sleek, space-saving railing options are increasingly popular among homeowners looking to maximize small outdoor spaces.
Now, if you’ve ever worried that such a creative design might compromise safety or stability, you’re not alone. Let’s address some common concerns, and I’ll share the lessons I’ve learned along the way. Ready to see how a simple shift can revolutionize your deck? Keep reading—your perfect outdoor retreat is within reach.
Choose the Right Railing System and Prepare Your Deck
Start by researching modern side-mounted railing options that suit your deck’s size and style. For small decks,maximizing space with sleek designs is crucial. Measure your deck’s dimensions accurately, noting the locations where posts will be attached. Remove any existing railings or obstructions to ensure a clean workspace.
Gather Materials and Tools Needed
You’ll require adjustable brackets designed for side-mount installation, stainless steel fasteners for durability, a drill, level, measuring tape, and safety gear. Selecting high-quality brackets compatible with your decking material will prevent wobbling and ensure safety. For composite decking, choose fasteners that won’t damage the material or cause staining, aligning with tips from composite deck selection.
Mark the Attachment Points and Attach Brackets
Using your measurements, mark where the brackets will secure to the deck’s rim joist or framing. Use a level to ensure horizontal alignment. Pre-drill pilot holes to prevent splitting, especially when working with composite or hardwood materials. I once faced a messy start when I accidentally drilled into a joist without measuring—leading to misaligned brackets. Careful marking and pre-drilling saved that project.
Secure the Brackets and Mount the Support Posts
Attach the brackets firmly to the deck using stainless steel screws, tightening them with a drill. Verify the levelness after each attachment. Mount the support posts onto the brackets, ensuring they are plumb and square. Use shims or temporary braces if needed. Remember, proper support is vital; a wobbling railing can compromise safety and violates building codes. Check local regulations orbuilding standards for reference.
Install the Railing Panels or Balusters
Attach horizontal panels or vertical balusters to the support posts according to the manufacturer’s instructions. For a clean look, ensure the panels are tight and evenly spaced. This method not only enhances safety but also creates a more open view, making the deck feel larger. In my recent installation, using spacer blocks helped achieve consistent spacing—saving time and avoiding uneven gaps.
Final Inspection and Adjustments
Once installed, double-check all fasteners for tightness. Verify that support posts are stable and the railing feels secure. Test the system by gently pushing on different sections. Small adjustments, like tightening screws or shimmying a post, can prevent future issues. Properly installed side-mounted railings will retain their stability and charm for years, especially if you apply protective sealant to exposed metal parts.
Many homeowners assume that choosing popular materials or following basic guidelines guarantees a perfect outdoor setup, but the truth is, there are nuanced pitfalls that even experienced builders often overlook. One pervasive myth is that all composite decking is maintenance-free. While newer capped composites boast lower upkeep, they are not entirely effortless; incorrect cleaning methods or shading issues can accelerate wear, as highlighted in expert advice.
Another misconception involves stairs: some believe that standard stringer sizing suffices for all applications. However, ignoring specific load requirements or local building codes can lead to unsafe, bouncy stairs. Advanced builders know that proper stringer spacing and support are critical, especially when accommodating heavy hot tubs or high-traffic areas. For insights, check out this guide.
The biggest trap for DIYers and pros alike is underestimating drainage challenges beneath decks. Subtle grading errors or overlooked waterproofing details can cause moisture buildup and rot, leading to costly repairs. For example, ensuring proper ventilation and a clearance of at least one inch between ledger boards and siding can be the difference between a durable deck and a sagging one. Don’t make the mistake of neglecting these nuances—resources like this article provide comprehensive tips.
What are the advanced considerations for making your outdoor space more resilient long-term?
Smart homeowners and professional builders focus on details such as material compatibility, thermal expansion, and the effects of climate on deck components. For instance, selecting stainless steel fasteners near the coast prevents corrosion, extending the lifespan of your deck hardware. Also, incorporating hidden drainage systems or custom-designed stairs can protect your investment from future moisture issues. As discussed in this resource, small improvements here pay off with longevity and safety.
Have you ever fallen into this trap? Let me know in the comments how you’re addressing these overlooked details. Remember, mastering these nuanced aspects sets your outdoor living space apart from the ordinary and ensures it remains a beautiful, functional retreat for years to come.
Keeping your outdoor decks, stairs, and composite surfaces in top shape requires the right tools and a strategic maintenance approach. Over time, exposure to weather, foot traffic, and the natural aging process can lead to wear, but knowing which equipment to use and how to employ it ensures durability and safety. Personally, I rely on a handful of specialized tools that have revolutionized my outdoor projects and kept them looking pristine year after year.
First and foremost, a high-quality cordless drill, like the DEWALT DCD796D2, is indispensable. Its lightweight design and powerful motor make installing support brackets, replacing fasteners, or making adjustments effortless. I prefer models with brushless motors because they generate less heat and last longer—saving time and money in the long run. Coupling this with a set of precision drill bits, including spade bits and masonry bits, ensures that I can handle various materials encountered in deck repairs or installations.
For measuring and alignment, a laser level such as the Bosch GLL 55 significantly outperforms traditional spirit levels, especially when assessing the levelness of support posts or railing attachments. Its accuracy within 1/8 inch over 30 feet guarantees that your railings are perfectly aligned, preventing wobbling or safety hazards. I consistently use laser levels for every project, from installing support brackets to measuring stair riser heights, ensuring precision that DIY spirit levels can’t match.

Maintaining your composite decking specifically involves tools that address its unique properties. A soft-bristle brush paired with composite-specific cleaners like PTM® Detergent prevents scratching while removing dirt and stains. I steer clear of metal brushes, which can mar the surface; instead, I rely on a long-handled, synthetic-bristle brush to reach all areas without damage. For stubborn stains, a gentle spray with a pressure washer set to low (around 500 psi) effectively removes debris without risking gouges or warping.
Regular inspections are vital. Carrying a moisture meter can help detect hidden moisture lurking inside wood supports or beneath stairs, which could lead to rot. I favor models like the Extech MO265 because of its digital display and quick readings, enabling me to identify trouble spots before they become costly repairs.
Looking ahead, the trend is shifting toward integrated smart maintenance systems. The use of IoT sensors to monitor moisture levels or structural shifts in real time will become more accessible. Imagine receiving an app notification when your deck’s support structure needs attention, preventing issues from escalating.
One actionable tip I recommend: regularly cleaning your composite decking with a soft brush and eco-friendly cleaner minimizes dirt accumulation and extends its lifespan. Try this simple routine after heavy storms or season changes to keep your outdoor space looking its best.
How do I maintain my stairs and deck support systems over time?
Utilizing precise tools like laser levels and moisture meters ensures that your outdoor structures remain safe and sturdy for years. Implementing routine inspections and gentle cleaning with appropriate equipment will save you significant repair costs and preserve the beauty of your outdoor sanctuary. Interested in elevating your maintenance game? Dive deeper into advanced techniques and recommended tools at this resource.
Reflecting on my journey with outdoor spaces, I realize that many of my most valuable lessons stemmed from unexpected challenges. One standout revelation was understanding that embracing unconventional railing designs not only enhances aesthetics but profoundly impacts functionality. For instance, opting for side-mounted railings transformed my cramped deck into a spacious haven, teaching me that sometimes, thinking outside the traditional framework yields the most rewarding results.
Another lesson I learned the hard way was the importance of not underestimating the intricacies of material compatibility. Using the right stainless steel fasteners near coastal areas prevented corrosion and prolonged my deck’s lifespan, which I previously thought was a minor detail. This insight underscored that attention to detail, especially in harsh environments, is crucial for long-term outdoor success.
Finally, I’ve discovered that prioritizing safety doesn’t mean sacrificing style. Carefully balancing support stability with an open view made my small deck more inviting without compromising security. It’s this blend of foresight and creativity that truly elevates outdoor living, reminding us all that meticulous planning and willingness to learn are key to creating enduring outdoor spaces.