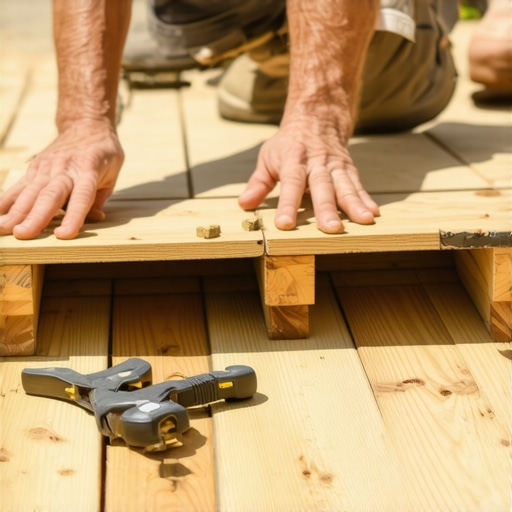
I remember the frustrating moment when I stepped onto my deck stairs, only to feel that uncomfortable wobble that made me second-guess every step. It was late afternoon, the sun casting long shadows, and my outdoor space was finally ready for summer gatherings. Yet, those uneven stairs kept distracting me, ruining an otherwise perfect evening. That lightbulb moment hit me—what if there was a simple, cost-effective way to level those steps without tearing everything apart?
Getting to the Heart of the Problem
Most deck builders and DIY enthusiasts face this issue at some point: how to achieve perfectly level, stable stairs without spending a fortune or resorting to complex renovations. The irony? The solution is often right under our noses, involving just a few shims and some basic carpentry skills.
This trick isn’t just about aesthetics; it’s crucial for safety and durability. Studies show that uneven stairs significantly increase the risk of trips and falls—leading to injuries that could often be prevented with proper leveling (source: CDC). Plus, well-leveled stairs improve the overall appearance of your deck, boosting curb appeal and even resale value.
If you’ve ever struggled with uneven steps or wondered how pros manage to get their stairs so flawlessly level, you’re not alone. I made a costly mistake early on—assuming that all stairs are created equal—only to realize that small misalignments can snowball into major safety hazards. Learning from that, I set out to find a straightforward solution that anyone can implement.
Ready to transform your outdoor space? In the next sections, I’ll walk you through the simple steps to master the shim trick, ensuring your deck stairs are both safe and stylish. Trust me, once you get the hang of this, you’ll wonder why you didn’t start sooner.
Prepare Your Tools and Materials
Before diving into the leveling process, gather essential tools: a carpenter’s level, a hammer, a pry bar, a circular saw, and measures to adjust the height, like shims or spacers. For this project, I used plastic shims, which are affordable and versatile. Make sure to inspect your stairs for loose or damaged parts and replace or tighten as needed to ensure a stable foundation.
Identify the Uneven Areas Precisely
Stand at the foot of your stairs with the level in hand. Place the level on each step’s surface and observe the bubble’s position. Notice which parts are higher or lower. For example, on my deck, I found the front-left corner of the bottom step was sitting 1/2 inch too low, causing a bouncy feel when walked upon. Mark these spots clearly so you can focus on adjusting those areas specifically.
Loosen and Adjust the Step Attachments
Using your pry bar and hammer, carefully loosen the nails or screws attaching the affected step to the stringers. Be cautious to avoid damaging the wood. Slide a shim or spacers under the low side of the step to raise it. In my case, I inserted plastic shims between the stringer and the step, stacking them gradually until the bubble centered. Tighten the fasteners securely to lock the position. Think of it as sandwiching the shim between two layers—firm but not overly tight to prevent future warping.
Level Multiple Steps Simultaneously
When adjusting a staircase, it’s crucial that each step aligns with the one below it. Place the level across the edge of adjacent steps to verify consistent height and angle. I used a long spirit level across three steps to ensure a smooth incline, avoiding any trip hazards. Remember, small inconsistencies add up, making the staircase feel bouncy or unsafe.
Secure and Double-Check Everything
Once you’re satisfied with the leveling, fully tighten all fasteners and nails. Double-check each step with your level from multiple angles. Walk up and down the stairs to feel for any bounces or wobbling. For extra security, consider adding construction adhesive under the shims or on the connection points to prevent shifting over time. This process is akin to tuning a guitar string—you want perfect tension for optimal performance.
Tackle Common Challenges with Confidence
If some steps stubbornly sit unevenly, consider removing and reapplying shims or replacing damaged stringers. Remember, patience is key—adjust in small increments rather than forcing large changes. I once over-shimmed a step and had to remove excess material, which taught me to take it slow. With practice, this method becomes a straightforward way to keep your stairs safe and functional.
Extra Tips for Lasting Results
To prevent future unevenness, inspect your deck’s support posts regularly and ensure they are properly anchored. Use stainless-steel fasteners, especially if your deck is near the coast, to resist corrosion. For more ideas on enhancing your outdoor space, check out top stairs designs or transition steps to create a polished look.Many homeowners and even seasoned DIYers fall into misconceptions about deck design, composite decking choices, and outdoor stairs that can compromise safety, durability, and aesthetic appeal. Let’s dig deeper into some common myths and advanced nuances often overlooked. For instance, many believe that choosing cheaper materials always saves money, but in reality, this often leads to costly repairs or replacements sooner than expected. Understanding the true longevity of materials like capstock composite boards is crucial; experts warn that not all composites are created equal, especially regarding UV resistance and warping tendencies (source: composite decking trends). One myth I frequently see is the assumption that deck fasteners are interchangeable—using non-stainless fasteners, especially in coastal environments, almost guarantees corrosion and compromised structural integrity. Advanced builders know that stainless steel screws are non-negotiable for durability; neglecting this can end up costing decades of performance. Furthermore, many underestimate the importance of proper stair stringer anchoring; a common mistake is installing stairs without accounting for soil movement or drainage, leading to wobbling or uneven steps over time. This trap can be avoided by understanding ground grading principles and employing adjustable supports. Have you ever fallen into this trap? Let me know in the comments. For more tips on ensuring your outdoor stairs are both safe and stylish, explore designing safe and stylish stairs. Also, be aware that physics and material science play significant roles; for example, the ‘hidden’ effect of thermal expansion in composite decking can cause board curling if not properly installed. A recent study emphasizes that allowing for expansion gaps during installation significantly reduces warping (source: composite fascia warping). Mastering these nuanced details ensures your outdoor living space stands the test of time and weather. Dive into your next project with informed confidence—because overlooking these advanced considerations can mean the difference between a dream deck and a costly nightmare.
Proper maintenance is vital to ensure your outdoor living space remains safe, beautiful, and functional for years to come. Having the right set of tools and a clear understanding of effective methods can make all the difference. I personally rely on precision laser levels for accurate measurements, as they eliminate guesswork and expedite the process, especially when aligning multiple elements like stairs or railings. Additionally, a high-quality cordless drill with variable speed controls helps in tightening fasteners securely without damaging materials, which is crucial when working with composite decking that requires specific torque settings. To prevent rot and moisture issues, I recommend using a moisture meter to monitor deck board and support post conditions regularly, catching issues early before they escalate to costly repairs.
For cleaning and routine inspection, a power washer equipped with a soft wash attachment allows for effective removal of dirt, grime, and algae without harming the surface, especially important for maintaining the aesthetic appeal of composite decking. Remember, the future of outdoor maintenance is moving towards smart solutions. Emerging technology like Wi-Fi-enabled sensors can now track humidity levels and structural integrity over time, providing homeowners with proactive alerts before problems manifest. As trends evolve, integrating these sensors into your maintenance routine can save money and extend the lifespan of your deck.
How do I keep my outdoor stairs looking and functioning well long-term?
One key to long-term stair health is regular tightening of fasteners and inspection for wood rot or warping. Applying a weatherproof sealant annually helps protect against elemental damage, especially in regions with heavy rainfall or snow. I’ve found that hassle-free maintenance is achieved by choosing stainless-steel fasteners and brackets, which resist corrosion and maintain structural integrity over time. Furthermore, installing proper drainage systems beneath your stairs prevents water accumulation, which is a common culprit behind deterioration. For more ideas on elevating your outdoor space, don’t hesitate to explore design tips and upgrade accordingly.
As I look ahead, the adoption of sustainable, low-maintenance materials will become increasingly prevalent. Innovations such as recycled composite boards that resist fading and warping are gaining popularity, making upkeep even easier and more eco-friendly. Relying on high-quality tools and staying informed about these trends empowers you to keep your outdoor areas safe and stunning for many seasons. So, I encourage you to try out a moisture meter or upgrade your fasteners this season—it’s a small investment with significant long-term benefits!
The Hardest Lesson I Learned About Outdoor Living Projects
One of my biggest mistakes was rushing the leveling process and ignoring the foundational issues beneath my stairs. It taught me that patience and thorough inspection can save hours of future work and prevent costly repairs. Now, I always double-check support posts and soil stability before adjusting the steps.
Why Relying Solely on Visuals Can Be Deceiving
I used to believe that a quick sight check was enough to identify uneven stairs, but subtle warping or soil shifts can go unnoticed. Using precise tools like a laser level revolutionized my approach, ensuring every step is safe and comfortable. Trusting measurements over sight saves you from surprises down the line.
How Small Adjustments Make a Big Difference
Stacking shims a fraction at a time and testing each change taught me the value of incremental progress. Over-shimming can cause new issues, so patience and fine-tuning are key. Don’t underestimate how these minor tweaks can enhance safety, aesthetics, and longevity.
Curated Resources to Elevate Your DIY Skills
- Laser Level: I swear by the laser level for its accuracy when aligning stairs and posts. It’s a game-changer for precision work.
- Stainless-Steel Fasteners: Investing in quality fasteners, such as those described here, ensures your staircase remains sturdy and corrosion-resistant—especially vital in outdoor settings.
- Soil Stabilizers: Proper ground preparation is often overlooked; I recommend consulting local experts or guides like soil inspection tips to prevent future shifts and wobbling.
Get Inspired to Build Confidently
Taking your outdoor stairs from uneven and unsafe to sleek and reliable is incredibly rewarding. Remember, mastering these small yet impactful details transforms your outdoor living space into a safe haven for family and friends. Embrace the journey, stay patient, and enjoy the process of creating something that lasts for decades.
What has been your biggest challenge when working on deck stairs? Share your experiences below—I’d love to hear your stories and tips!