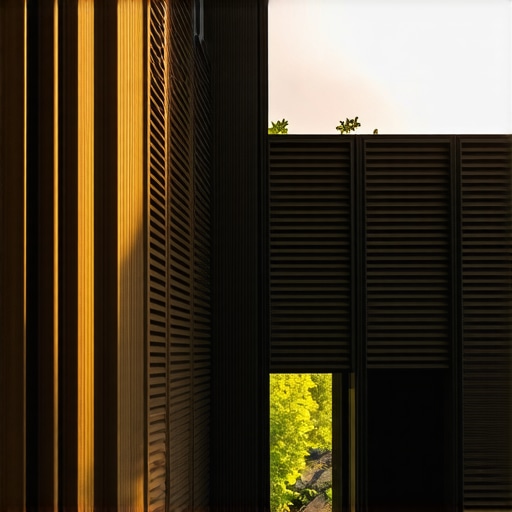
I remember the first summer I decided to build a privacy wall for my deck. I was excited, imagining afternoons lounging without prying eyes. But soon enough, I realized my solid wood structure blocked not just the neighbors’ view but also the fresh air and breezes that made outdoor living so enjoyable. Instead of feeling retreat-like, my space became stuffy and stifling—a real disappointment. That lightbulb moment taught me an important lesson: privacy doesn’t have to come at the expense of airflow.
Why Struggle with Stuffy Privacy Walls? My Personal Lesson
For years, I believed a tall, opaque privacy wall was the only way to achieve seclusion. I constructed a sturdy wooden barrier, thinking, “Better safe than sorry,” especially for keeping out nosy neighbors. But what I didn’t anticipate was how much this solid wall would hinder airflow, making my outdoor space uncomfortable at the height of summer. I was missing out on the gentle breezes that make outdoor lounging so delightful. Later, I learned that poor airflow isn’t just about comfort—it’s also about maintaining the health of your outdoor materials and preventing mold or rot. According to experts, good ventilation is crucial in outdoor structures to extend their lifespan and keep the environment pleasant (source: https://deckdesignbuild.com/privacy-policy).
Is Building a Louvered Privacy Wall Actually Worth the Effort?
When I first considered adding louvers to my privacy wall, I was skeptical. Would I sacrifice too much privacy for air? Could I maintain security while allowing breezes to flow? I made some early mistakes, like installing those louvers too narrow, which restricted airflow more than I liked. But through careful design and planning, I discovered I could attain both privacy and ventilation, creating a space that’s both cozy and airy. If you’ve faced similar issues—balancing seclusion with airflow—you’re not alone. And the good news is, with the right approach, you can enjoy both.
This initial challenge set me on a path to understand the ins and outs of building a privacy wall that actually enhances my outdoor experience. Today, I want to share the step-by-step process I followed—so you won’t have to stumble through trial and error like I did. Everything from selecting the best louvers to ensuring structural stability matters, and I’ll guide you through it.
Ready to transform your deck into a private oasis that breathes with comfort? Let’s dive into the practical steps to make it happen.
Choosing the Right Louvers for Optimal Airflow and Privacy
Decide on louver size and angle; wider blades allow more breeze while still providing privacy. I once installed narrow, tightly-angled louvers that restricted air but gave too little privacy, proving I needed a balance. Opt for adjustable louvers if possible, so you can fine-tune openness. Visit this guide for the latest trends in outdoor privacy solutions.
Measurements and Material Selection
Measure your space precisely; too narrow or too wide can compromise airflow or privacy. Use durable materials like aluminum or high-quality PVC. I once mistakenly used wooden louvers that warped in the sun, causing gaps. Never underestimate the importance of weather-resistant materials to ensure longevity and ease of maintenance.
Design and Structural Planning
Sketch your wall with louver placement and support structure. Think of it as building a sturdy fence that also breathes—use posts spaced properly, typically every 4 feet, to support the louvers. I learned that neglecting proper support led to sagging over time, similar to a poorly built staircase. For insights on seamless transitions, check out this article.
Framing and Anchoring
Attach a solid frame to your deck or wall—metal is preferred for rust resistance. Anchor posts into ground or existing structure with appropriate base plates and concrete. I once used unsuitable fasteners, which failed in heavy rain, emphasizing the need for quality hardware like stainless steel screws, detailed in this resource.
Installation Process Step-by-Step
Start by marking support post locations, ensuring level placement with a laser level. Secure posts using expansion anchors or concrete footings. Then, attach horizontal supports for the louvers, sliding them into place and securing every few inches. I once rushed this step, leading to misaligned blades that raked in the sun at odd angles. Precision here creates a balanced look and function.
Adjusting for Comfort and Privacy
Once installed, adjust the louver angles to maximize airflow during the day and privacy at night. Use a simple: flip, tilt, and lock mechanism if available. Don’t forget to seal or paint the supports for weather resistance, similar to adding a protective coat that extends the life of composite decking, as discussed in this article.
Maintaining Your Louvered Privacy Wall
Regularly inspect for loose fasteners and damage, especially after storms. Use a garden hose to rinse off dirt and debris—avoid pressure washers that can damage delicate blades. Consider applying a UV protective coating yearly to retain color and prevent warping. Proper maintenance ensures your breezy privacy wall stays functional and attractive for years to come. For ongoing upgrades and ideas, explore this resource.
Many homeowners assume that designing the perfect outdoor space is straightforward, but in my experience, there’s more beneath the surface that can trip up even seasoned enthusiasts. One common misconception revolves around deck durability—many believe that choosing the most popular composite decking guarantees a long-lasting result. However, not all composites are created equal, and overlooking factors like UV resistance and water absorption can lead to premature wear, as highlighted in recent studies on material performance (source: https://deckdesignbuild.com/composite-decking-trends-2025-the-ultimate-guide-for-outdoor-enthusiasts). Sometimes, the focus on aesthetics overshadows practical aspects like slip resistance and thermal expansion, which are critical for safety and longevity. For example, dark-colored composite boards absorb heat more intensely, making barefoot walking uncomfortable in summer. So, an advanced builder understands the importance of selecting the right color and finish, not just the style. Additionally, many think that deck fasteners are interchangeable—wrong. Improper fasteners can cause boards to warp or squeak over time. Using corrosion-resistant, hidden fasteners contributes significantly to a seamless appearance and is especially crucial for coastal environments with salt exposure. Moreover, when it comes to stairs, the common mistake is neglecting the precise calculation of riser heights and tread depths. Small deviations can make steps feel uneven or unsafe, which undermines the entire project. A professional approach involves meticulous measurement and code compliance, ensuring comfort and safety for users. Ever considered how seamless transitions between decks and stairs really impact usability? A well-designed transition not only looks sharp but also prevents tripping hazards and enhances accessibility. For advanced insights into stair integration, check out https://deckdesignbuild.com/creating-seamless-transitions-stairs-as-key-elements-in-outdoor-living. Finally, many underestimate the importance of proper drainage and venting underneath decks. Poor drainage can lead to mold, rot, and structural failure. Incorporating smart venting solutions, such as under-deck lighting and drainage gaps, extends the life of your deck and maintains a healthy outdoor environment. Don’t fall into the trap of thinking these details are minor—they’re what separate amateur projects from professional-quality outdoor spaces. Have you ever fallen into this trap? Let me know in the comments.
Keeping Your Outdoor Space Functional Over Time
Investing in the right tools is crucial to ensuring your deck, stairs, or privacy wall remains in top shape for years to come. I personally rely on a high-quality cordless drill like the Dewalt DCD791D2 for assembling components—its power and portability make routine tasks much easier and reduce the risk of damaging fasteners. For cleaning, a garden hose with a spray wand allows me to regularly remove debris without risking damage from high-pressure washers, which can harm composite surfaces if used improperly. Maintaining lighting systems is equally important to keep your space safe and inviting. Additionally, I recommend using a digital moisture meter, such as the Protimeter Surveymaster, to assess wood or composite moisture levels—helpful in preventing rot and deciding the best time for sealing or staining.
Why Regular Inspection Matters
Routine checks allow you to catch issues early, whether it’s loose fasteners, warped boards, or weathering damage. A cordless impact driver speeds up tightening loose screws, especially in hard-to-reach corners of stairs or decking. I also keep a standard set of deck-specific fasteners on hand—stainless steel for corrosion resistance near saltwater environments. Don’t overlook the importance of a carpenter’s level or a laser level for ensuring surfaces like stairs and framing are perfectly aligned, preventing safety hazards and structural problems down the line.
Choosing the Right Maintenance Products for Longevity
Applying a high-quality, UV-resistant sealant like Sikkens Cetol or Cabot’s Waterproofing Sealant extends the lifespan of your composite decking and wooden features. I specifically prefer sealants with added biocides to prevent mold and algae growth—especially in humid climates. When it comes to cleaning, I avoid harsh chemical cleaners that can degrade finishes; instead, I opt for eco-friendly, pH-neutral solutions that are gentle yet effective. For stairs, reapplying anti-slip tape or treads annually enhances safety and preserves the aesthetic appeal, especially after winter storms.
How do I maintain outdoor structures over time?
Regularly inspect and clean your outdoor features, reapply protective finishes as needed, and replace any damaged components promptly. Upgrading hardware to corrosion-resistant options, like stainless steel or aluminum, prevents premature failure—this is particularly vital for coastal projects where salt can accelerate deterioration. Staying proactive with maintenance not only preserves the beauty of your outdoor space but also saves costs associated with major repairs or replacements down the line.
Planning for Scale and Future Upgrades
If you’re considering expanding or adding features, ensure your tools and materials are compatible with existing structures. Modular components and easily accessible fasteners simplify upgrades and repairs. For example, when installing composite decking, choosing a system that allows for straightforward replacement of individual planks can minimize the time and expense involved in long-term upkeep. Thinking ahead about drainage solutions and venting—such as under-deck drainage systems—also helps prevent moisture buildup and structural damage, core components that shouldn’t be overlooked as your outdoor oasis grows in size.
Remember, detailed and consistent maintenance is key to extending the life of your outdoor projects. I encourage you to try using a moisture meter regularly—it’s a game-changer in preempting issues before they become costly repairs. For expert insight into effectively maintaining your deck’s structural components, check out this article. Equipped with the right tools and a proactive approach, you’ll maximize your outdoor space’s long-term beauty and functionality.
Lessons from the Trenches: My Hidden Pitfalls with Outdoor Privacy Solutions
One of the toughest lessons I learned was that aiming for complete seclusion often leads to sacrificing comfort and air quality. I once built a towering solid wall, only to realize it was trapping heat and stale air, making my deck less inviting. Now I know that embracing a bit of openness—like adjustable louvers—can strike the perfect balance between privacy and ventilation.
Trying to replicate a professional look with DIY methods sometimes backfires, especially when it comes to proper support and material selection. I learned that skipping precise measurements or choosing weather-inappropriate materials results in headaches down the road. Trusting expert resources and investing in quality hardware pays off in durability and safety.
An often-overlooked aspect is the seamless integration of stairs and transitions. I once neglected to align my steps properly, causing discomfort and safety concerns. Proper planning, exact measurements, and considering accessibility are key to creating an outdoor space that feels natural and safe to use every day.
Tools and Resources That Changed My Outdoor Game
Using a high-quality laser level made all the difference when setting up support posts and ensuring horizontal alignment—saving me time and frustration. I rely heavily on stainless steel fasteners; their corrosion resistance keeps my installations looking new and sturdy, especially near saltwater influences. An eco-friendly cleaner like Simple Green helps me maintain my composite decking without compromising its finish, extending its lifespan.
For comprehensive guidance on outdoor privacy solutions, I turn to experts who cover everything from material choice to design nuance, like the insights shared in this modern trend guide. Being equipped with the right tools and knowledge transforms a daunting project into a rewarding experience.
Your Turn to Make a Difference in Your Outdoor Space
Building a privacy wall that breathes and suits your lifestyle isn’t just about aesthetics—it’s about creating a lasting, functional sanctuary. With careful planning, quality materials, and a little patience, you can craft a space that offers both seclusion and comfort. Remember, the small details—like proper ventilation, secure fastenings, and seamless transitions—are what turn a good project into an outstanding one.
Are you ready to start designing a privacy wall that combines airflow with privacy in your outdoor living space? Share your ideas or ask questions below—I’d love to hear about your journey!