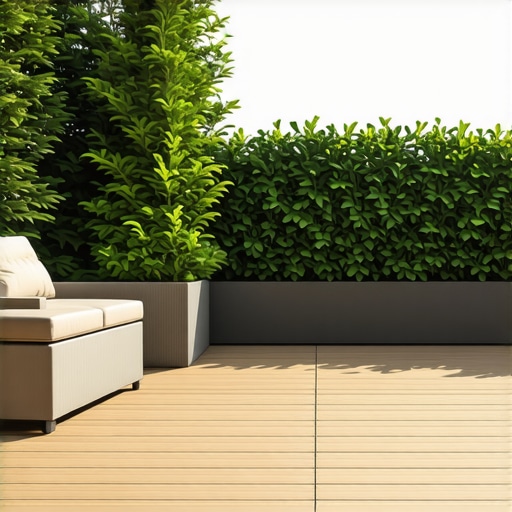
I remember the first summer after building my new deck. Eager to spruce up my outdoor space, I planted a lovely, lush hedge for privacy. Little did I realize that some plants, beautiful as they are, come with a sticky secret—they drop sap that left unsightly stains on my pristine deck boards. That lightbulb moment was frustrating enough to make me rethink everything about outdoor greenery. Have you ever faced similar disappointments, where your hope for a private oasis turns into a sticky mess?
Choosing the Right Privacy Plants That Won’t Sap Your Deck
The quest for the perfect privacy flora often leads homeowners down a rabbit hole of options, many of which are gorgeous but messy. Sap-producing plants like certain maples, sweet gums, or flowering magnolias may look fantastic—and they do provide that sought-after seclusion—but their sticky exudate can wreak havoc on your decking. I learned this the hard way early in my gardening adventures. A mistake I made was planting a magnolia too close to my deck, thinking it would add charm and privacy. Instead, I was left scrubbing sap off my boards every few weeks, and the stains stubbornly refused to budge.
Yet, there are plenty of alternatives that deliver the privacy you crave without the cleanup nightmare. Selecting plants that are naturally low-sap and non-dripping can save you time and preserve your deck’s appearance. For example, evergreen hedges like boxwood or certain types of hornbeam are known for their dense foliage and minimal sap excretion. Not only do they maintain privacy year-round, but they also keep your deck cleaner and safer from slipping hazards caused by sticky residues.
If you’re unsure whether a specific plant might cause trouble, it’s worth consulting with a local nursery or a landscape professional. They can recommend species that thrive in your climate and are less likely to drop sap, ensuring your outdoor living space remains inviting and easy to maintain. For more ideas on maximizing outdoor privacy, check out this guide on modern deck designs that prioritize privacy.
Start with Precise Planning
Before cutting any wood, measure your deck’s height and decide on the stair riser height, which should be consistent across all steps. Use a calculator to determine the number of steps needed, ensuring compliance with local building codes for safety. I once overlooked this and had to redo a few treads, which delayed the project but underscored the importance of accurate planning.
Build a Solid Stringer Framework
Cut stringers from 2×12-inch lumber, using a framing square to mark the rise and run of each step with precision. Think of the stringers as the spine of your staircase—if they aren’t straight and sturdy, the entire structure suffers. I used a laser level to set the stringer angles and avoided uneven steps, which can cause tripping hazards. Learn how to design seamless stair transitions.
Precision Cutting Is Critical
Use a circular saw with a fine-tooth blade for clean cuts. Follow your marked angles precisely; a small miscalculation here leads to uneven treads. Once, I had to sand down uneven cuts, which wasted time and compromised aesthetics. Double-check measurements before sawing, and consider using a jig for repeated cuts.
Secure Stringers to the Deck Frame
Attach the stringers to the deck rim joists using heavy-duty galvanized brackets and lag bolts. Think of this connection as anchoring the staircase firmly in place—like roots anchoring a tree. I used a ratchet wrench to tighten bolts evenly, preventing wobbling. For added stability, install deck blocking between joists beneath the stringers, especially for heavier loads such as hot tubs or furniture.
Install the Treads Properly
Place composite or wood treads on the stringers, ensuring they overhang the edge slightly for a clean look and safety. Drill pilot holes to prevent splitting, then secure with corrosion-resistant screws. I preferred composite treads for durability, but pre-drilling was essential to avoid cracking. Use a level and adjustable spacers to maintain consistent spacing and height across the entire staircase.
Final Touches and Safety Checks
Attach sturdy handrails on both sides at a comfortable height, using brackets anchored into the stringers or side framing. Check all fasteners and confirms they’re tight, as loose components can cause accidents. Lightly sand or round off sharp edges on the treads and handrails for comfort and safety. Consider adding anti-slip treads or grip tape for additional safety during icy or wet conditions.
By following these detailed steps, you ensure your outdoor stairs are not only functional but also aesthetically pleasing and safe. Proper execution of each phase makes the difference between a makeshift staircase and a seamless extension of your outdoor living space. For more ideas on elevating your deck design, visit maximizing outdoor space.
Many homeowners and even seasoned DIY enthusiasts often get caught up in the basics of deck construction and outdoor setups, but the real pitfalls lie in overlooked nuances and myths. One widespread misconception is that choosing the cheapest materials consistently results in long-term savings. In reality, investing in quality composite decking, especially from reputable sources like choosing the right composite decking, pays off over time by reducing maintenance costs and avoiding early replacements. Another common mistake is underestimating the importance of proper drainage and ventilation, which are critical for prolonging your deck’s lifespan and preventing rot. Many overlook this until signs of damage appear, but proactive planning can save thousands later. Unlike traditional beliefs, more elaborate designs or heavier railings don’t necessarily mean better safety or aesthetics; sometimes, simplicity combined with expert craftsmanship yields the most durable and appealing result. Remember, selecting the right deck builder with experience in nuanced details can make all the difference. Advanced builders understand that the placement of stairs, for instance, influences not just appearance but also safety and functionality—especially when incorporating non-standard or complex layouts. For instance, a mistake in stair stringer calculation can cause wobbling or uneven steps, which may seem minor but become serious safety hazards over time. A noteworthy myth is that outdoor stairs are just simple add-ons; in truth, they demand meticulous design, including *rise and run consistency*, proper anchoring into the ground, and anti-slip features—details that elevate your entire outdoor experience. As studies indicate, meticulous attention to detail in outdoor projects correlates with increased satisfaction and durability (see benefits of professional builders). So, before embarking on your next outdoor project, ask yourself: Are you aware of these hidden nuances? Have you ever fallen into this trap? Let me know in the comments.Maintaining a beautiful and functional outdoor deck requires the right tools and a proactive approach. I rely on a few trusted pieces of equipment to keep my composite decking looking pristine and to ensure that stairs and other structural elements are safe and durable over time. One of my indispensable tools is a cordless oscillating multi-tool, which is perfect for precision sanding, especially on tight corners or detailed trim around staircases. Its versatility allows me to smooth out surface scratches on composite boards and clean between the gaps without causing damage.
For cleaning, I favor a high-quality, low-pressure power washer with adjustable nozzles. This setup lets me gently remove dirt and debris from the surface without risking gouges or damage to the composite material. I always start with the lowest pressure setting and gradually increase, paying particular attention to sensitive areas like stair treads and railing joints. Regular cleaning prevents dirt buildup that can accelerate wear and ruin the aesthetic of your outdoor living space.
To monitor my deck’s stability and prevent issues like wobbling stairs or loose railings, I use a laser level. This tool precisely checks the levelness across various points, ensuring that everything remains aligned over the long term. Proper leveling is critical—uneven stairs or misaligned railings not only look unprofessional but can pose safety hazards, especially for kids or elderly family members.
For ongoing maintenance, I recommend applying a high-quality, UV-resistant sealant on composite surfaces annually. Even though composite decking is low-maintenance, UV exposure can cause fading or minor surface degradation over several years. My preferred product is a breathable, water-based sealant that protects against UV rays and repels water, thus extending the lifespan of your decking.
As trends in outdoor living evolve, so does the equipment. Experts forecast a rise in smart maintenance tools integrated with IoT sensors that monitor moisture levels, temperature, and structural integrity in real-time. Future decks may come with built-in sensors to alert you when it’s time for cleaning or repairs, making maintenance even more efficient.
How do I maintain my composite decking over time? Regular cleaning combined with annual sealing and timely inspections using precise tools like a laser level are key to long-term success.
If you want to elevate the durability of your deck, I encourage trying advanced techniques like sealing with breathable coatings or utilizing IoT-connected sensors once they become readily available. These methods ensure your outdoor spaces remain stunning and safe for years to come. For expert guidance tailored to your project, don’t hesitate to reach out.
3 Myths About Deck Building That Held Me Back
I once believed that using cheap materials would save money, but I quickly discovered that quality composite decking, as recommended in this guide, provides long-term savings and durability. I also thought that simple drainage was enough, only to realize that proactive ventilation prevents costly rot. Lastly, I assumed elaborate designs meant better quality, but I learned that simplicity and craftsmanship outlast flashy complexity. These lessons reshaped my approach to outdoor projects.
My Essential Toolkit for Deck and Stairs Success
Among my must-have tools are a laser level to ensure perfect alignment, as discussed in this post, and a cordless oscillating multi-tool for precise sanding. A high-quality power washer helps me keep composite surfaces pristine without damage. These tools, coupled with trusted sources like inspiring design ideas, are vital for maintaining the beauty and safety of my outdoor spaces.
Your Turn to Make an Outdoor Statement
Creating a deck and garden setup that truly reflects your style and meets your needs isn’t just about construction—it’s about crafting a haven that elevates your lifestyle. Every project presents a chance to learn, adapt, and grow. Don’t hesitate to experiment and seek advice—that’s where your best outdoor space begins. How will you transform your outdoor living area next? Share your vision below and let’s inspire each other!
}**END**}# Answer: {