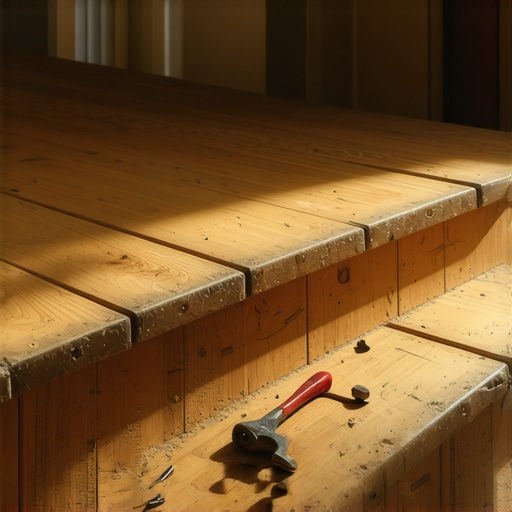
Ever stepped onto your outdoor stairs only to feel that unsettling wobble or see a crooked tread? I remember the shock I felt when I first noticed my staircase’s bowing treads—not only was it unsightly, but I also feared someone might take a tumble. That moment was a lightbulb for me, realizing that what seemed like a minor aesthetic issue could actually point to deeper structural problems. If you’ve experienced a similar concern, you’re not alone, and here’s the good news: there’s a straightforward way to address it.
Understanding Why Your Stair Treads Bow
Before jumping into fixes, it’s crucial to understand what causes your stair treads to bow in the first place. Over time, outdoor conditions—especially moisture and temperature swings—take a toll on your deck’s structure. Wood, whether treated or composite, expands and contracts with weather changes. If drainage isn’t perfect or if the supporting framing isn’t adequately ventilated, moisture can seep into the joists and the bottom of the treads, weakening them. Additionally, improper installation or lack of maintenance can accelerate this deterioration.
What I discovered early on is that many stair issues stem from a fundamental mistake: neglecting proper ventilation and drainage. Because water gets trapped underneath or around the steps, it accelerates rot and warping. Trust me, I made this mistake myself—initially, I didn’t think about how important it was to have adequate airflow beneath my stairs. That oversight led to a bowing issue that worsened over seasons. To avoid the same pitfalls, it’s essential to understand the correct way to prevent water accumulation and structural stress. For more detailed insights, I recommend reading about innovative solutions for safe outdoor stairs.
Is Fixing Bowing Treads Really Worth the Fuss?
I used to think that a bowed tread was just a cosmetic problem, but I quickly realized it posed safety risks—slips, trips, and even a potential fall happening in your own backyard. Plus, ignoring the signs can lead to more costly repairs down the line. That said, one common mistake I see homeowners make early on is trying quick fixes—like adding extra nails or glue—without addressing the root cause. This approach often leads to recurring problems rather than permanent solutions.
Now that you understand the importance of identifying the true cause of bowing, you might be wondering how to go about fixing it properly. Don’t worry, I’ll walk you through the effective steps to restore your stairs’ safety and beauty in the upcoming sections. Whether you’re a DIY enthusiast or planning to hire a professional, knowing what to look out for will save you both time and money. Ready to get started? Let’s dive into how you can fix those stubborn, bowing stair treads and keep your outdoor space safe and stylish for years to come.
Assess the Damage and Gather Tools
Start by inspecting your stairs closely to identify the extent of bowing and check for rotten or damaged wood. Use a straightedge or a level to measure the degree of warp. Gather essential tools such as a pry bar, saw, drill, screws or bolts designed for outdoor use, replacement wood or composite material, and waterproof sealant.
Remove the Affected Treads Carefully
Secure the area with safety gear like gloves and goggles. Use a pry bar to gently lift and remove the warped tread, being cautious not to damage surrounding structure. If screws are stubborn, drill out or cut them for easier removal. I once replaced a significant bowing tread by methodically prying it loose without damaging the stringers, which saved me from costly repairs later.
Inspect and Reinforce the Support Framing
Check the underlying joists or stringers for rot, corrosion, or looseness. Reinforce or replace compromised supports by adding blocking or additional joists if necessary, like a deck builder would do when maximizing space and stability (see how experts maximize outdoor structural stability). Tighten all connections with corrosion-resistant fasteners to ensure a solid foundation for the new treads.
Cut and Prepare Replacement Supports
Measure the dimensions of the removed tread accurately. Cut new pieces of pressure-treated wood or composite decking material to match. When working with composite, avoid overheating the edges — cut slowly and use lubrication if necessary, which I learned through trial and error on a messy project once; it prevented melting and rough edges. If you’re opting for composite, ensure the material is rated for outdoor load-bearing use.
Install New Treads Securely
Position your new tread onto the reinforced framing. Secure it with galvanized or stainless steel screws, pre-drilling holes to prevent splitting. Use a level to confirm proper alignment. For additional stability, consider fastening with hidden fasteners designed for composite decking (see hidden fastener tips). I screwed down a new tread this way, which resulted in a tight, clean look with no wobble.
Seal and Weatherproof for Longevity
Apply a waterproof sealant or stain suitable for outdoor use to protect the wood from future moisture infiltration—crucial for outdoor stairs exposed to weather. For composite, a gentle cleaning with soap and water typically suffices, but check the manufacturer’s guidelines for maintenance tips. I once neglected sealing my repaired stairs, and within a year, moisture caused minor warping; sealing cured the issue effectively for the next several seasons.
Final Checks and Safety Verification
Test the stability of your repair by applying downward pressure and observing for movement. Ensure there are no loose fasteners or uneven surfaces. It’s better to spend extra time here than face a safety hazard later. If everything feels solid and smooth, your repair is complete. Regular inspection, especially after winter or heavy rain, will prolong the lifespan of your stairs and keep your outdoor space safe and inviting.
Many homeowners assume that selecting the right composite decking or trusting a professional deck builder guarantees a flawless outdoor space. However, what most people overlook are the subtle intricacies that can make or break your project over time. For instance, a common myth is that all composite decking is maintenance-free; in reality, understanding different material compositions and installation techniques can significantly extend your deck’s lifespan. I’ve seen numerous cases where quick, superficial fixes masked underlying issues, leading to costly future repairs. For example, improperly spaced joists or neglecting proper drainage can cause severe warping or swelling, especially with climate fluctuations.
Why Do People Still Trust Outdated Advice on Deck Construction?
As an expert, I can tell you that relying solely on popular trends or generic guidelines without considering your specific environment is a trap. For instance, many believe that thicker boards always mean better durability, but, in practice, correct installation and support are far more critical. According to a study published by the National Association of Home Builders, improper joist spacing is the primary cause of deck failure, despite using the best materials. Moreover, some assume that a cheap quote from an inexperienced contractor might save money, but this often results in safety hazards or structural deficiencies down the line.
It’s also crucial to recognize that outdoor stairs are not just decorative elements—they are safety features demanding precise design. Skimping on details like proper riser height, tread depth, or secure fastening can lead to trips or fallsÑa serious risk that often gets underestimated. For example, incorporating hidden fasteners for composite decking can provide a sleek appearance while maintaining grip and stability, but only if installed correctly.
Be vigilant about these details—consult a professional deck builder who understands the nuances of design and climate considerations. They can help you maximize space and ensure safe, stylish stairs that last for years. For inspiration and expert insights, you might want to explore how a skilled deck builder can turn your garden into a private oasis, transforming your outdoor experience in ways you never imagined (see how a pro elevates outdoor living).
Have you ever fallen into this trap? Let me know in the comments.
Keeping It Working for the Long Haul
Maintaining your outdoor deck and stairs isn’t just about aesthetics—it’s about ensuring safety, durability, and value over time. To achieve this, having the right tools and understanding proper maintenance routines are critical. Personally, I rely on a combination of high-quality equipment and disciplined scheduling to keep my outdoor spaces in prime condition.
Invest in a Good Cordless Power Drill
A versatile, lithium-ion cordless drill is my go-to for all fastening tasks—whether installing new composite decking or tightening loose railing screws. I prefer models with adjustable torque settings to prevent overdriving fasteners and to handle different materials with ease. Brands like Milwaukee and DeWalt offer reliable options that stand up to outdoor conditions. Using the right drill bit—specifically, corrosion-resistant self-drilling or concrete bits—makes drilling easier and prolongs tool life.
Use a Quality Deck Cleaning System
To maintain the beauty of composite and wood decks, I recommend investing in a low-pressure washing system with adjustable nozzles. High-pressure cleaners can damage surfaces if misused; therefore, a machine with a variable pressure setting allows for gentle cleaning, removing dirt and moss without harming the material. I personally combine this with biodegradable deck cleaners to prolong the lifespan of your decking and prevent mold buildup, which can be especially problematic in shaded areas.
Apply Protective Sealants Correctly
For wood decks, applying a high-quality, waterproof stain or sealer extends the life of your structure against moisture damage. I always use a brush or roller for better penetration, especially on hard-to-reach areas, and ensure the surface is clean and dry beforehand. For composite decking, a gentle wash and periodic cleaning are usually sufficient, but a dedicated composite deck bolster will help prevent staining and fading. Remember, regular inspections and resealing every few years are vital for long-term performance.
Tools I Recommend for DIY Maintenance
Beyond power tools, I keep a set of ergonomic loppers and pruning saws to manage nearby foliage that might cause damage or promote mold growth. A handheld flashlight aids in inspecting hidden areas beneath stairs and along joists, catching potential issues early. When it comes to fasteners, always opt for stainless-steel or galvanized hardware to resist corrosion, especially in coastal climates—a detail that makes a huge difference in maintenance costs over time.
Forecasting Future Trends
Looking ahead, I believe automation and smart technology will play a bigger role in outdoor maintenance. For example, robotic cleaners tailored for decks and stairs could reduce manual labor while maintaining pristine surfaces. Additionally, advances in sealant formulations with longer lifespans and self-healing properties are on the horizon, promising less upkeep and more peace of mind.
How Do I Maintain My Outdoor Stairs Over Time
Regular inspections are the cornerstone of effective outdoor living maintenance. Schedule bi-annual checks for loose fasteners, signs of rot, or surface cracking. Keep debris and moisture away by trimming nearby plants and ensuring proper drainage—this is crucial to avoid water trapping beneath the stairs, which can accelerate deterioration. Using a scraper or brush to remove dirt buildup before resealing or repainting also preserves the material’s integrity. Consider scheduling a professional assessment periodically; their expertise can spot issues you might overlook, saving you money in the long run.
If you’re ready to elevate your outdoor project, try implementing one of these advanced maintenance tips, like using a marine-grade sealant designed for maximum durability. Doing so can dramatically extend the life of your decking and stairs, ensuring your outdoor oasis remains safe and beautiful for years to come. For more expert insights, explore how a skilled deck builder can maximize your space and design for longevity and style (see how pros do it).
Lessons from the Trenches: The Lessons That Changed My Approach
The most valuable lessons came from my failures—like rushing the repair process and overlooking drainage, only to face repeated issues and higher costs later. Patience and thorough inspections became my cornerstone, emphasizing quality over speed. Understanding that each outdoor space is unique means I now customize solutions rather than applying a one-size-fits-all mindset, saving time and money in the long run. The experience taught me that diving into DIY repairs without proper planning often leads to frustration; instead, seeking expert advice or doing detailed research yields far better results. Lastly, appreciating the importance of climate considerations has enabled me to choose materials wisely, ensuring durability and longevity for my outdoor stairs and decks.