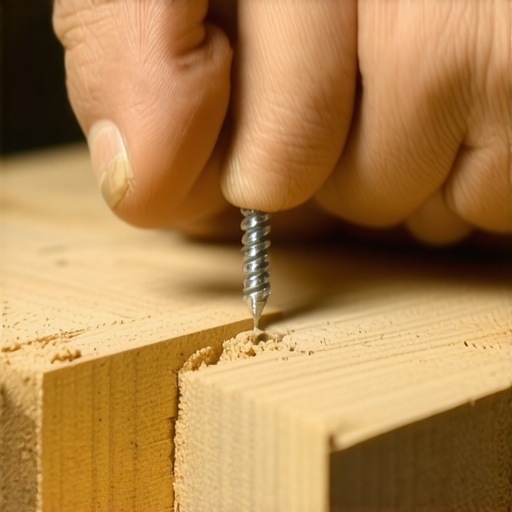
I’ll never forget the first time I spent hours installing a beautiful composite deck, only to step back and notice those pesky screw heads catching my eye like sore thumbs. It was like the entire surface betrayed me, ruining what should have been a sleek, polished outdoor space. Frustration bubbled up—why is it so hard to get that perfectly smooth finish?
If you’ve ever wrestled with uneven screw heads or wondered how the pros achieve that flawless look, you’re not alone. The secret lies in a simple, often overlooked technique that transforms your decking from decent to stunning. Today, I’m going to share with you the trick I wish I’d known from the start—commonly called the “hidden screw trick”—and how it can make your outdoor project look professionally finished.
Why the Surface Matters More Than You Think
A smooth, seamless deck surface isn’t just about aesthetics; it’s a safety feature and a mark of craftsmanship. Uneven screw heads can cause tripping hazards and collect dirt and debris, making maintenance a nightmare. Plus, if you’re investing in premium composite materials, why settle for a less-than-perfect finish?
Early in my decking journey, I made a costly mistake—over-tightening screws to ensure everything was flush. While that seemed logical, it led to warped boards and the dreaded “sunken” screw heads that stuck out like sore thumbs. It’s a mistake I see many DIYers make, often because they’re eager to finish quickly or aren’t aware of better techniques. Trust me: taking your time and using the right approach pays off in the long run.
For a step-by-step overview and tips from seasoned deck builders, I recommend checking out their comprehensive guide on transforming your outdoor space. It’s packed with insights that can help you elevate your project.
Will This Trick Actually Make a Difference?
Absolutely. When I first learned about the hidden screw technique, I was skeptical. But once I started using small, specialized tools to countersink screws just below the surface, my decks looked like they belonged in a magazine. It’s a subtle difference, but one that anyone who values quality will notice and appreciate.
In the following sections, I’ll walk you through the precise steps to master this trick, ensuring you don’t waste time or make the common mistakes that can mar your finish. Ready to turn your outdoor space into a showcase of craftsmanship? Let’s get started.
Preparing Your Tools and Materials
Start by gathering a quality countersink bit, a drill, and a screwdriver. Choose fasteners designed for composite decking—stainless steel or coated screws prevent rust and corrosion. I vividly remember the first time I used a countersink bit; the precision it offered made the screw heads sit just below the surface, leading to a super-smooth finish.
Positioning and Securing Deck Boards
Lay your boards carefully, ensuring they are aligned and spaced correctly. Use spacers to maintain even gaps, which helps in achieving a uniform look and allows for the natural expansion of composite materials. During my early projects, rushing this step resulted in uneven gaps, making the screw fixings more noticeable. Take your time to align each board meticulously. Expert tips can guide you through optimal alignment.
Drilling and Countersinking
Position the countersink bit over the screw hole and drill slowly. The key is to drill just enough so the screw head drops below the surface without damaging the decking material. It’s akin to gently carving a seat into a block of wood—you don’t want to split it. I once pressed too hard, causing a small crack, but quickly learned to use a light touch. The goal is a clean, flush surface. Remember, precision trumps speed here. Choosing the right tools makes this process smoother.
Fastening the Screws Correctly
Insert the screws slowly and turn steadily to prevent stripping the head or over-tightening. Feel for that distinct stop when the screw is flush. Over-tightening can sink the screw below the surface or warp the board, creating an uneven look. I suggest periodically checking your work under natural light—what seems flush in shadow might be slightly raised or sunk in bright sunlight. Using a cordless drill with a clutch setting helps maintain consistent torque and avoid overtightening. Proper fasteners are a small investment for a big visual impact.
Smoothing the Surface for the Perfect Finish
After all screws are set, use a sanding block or a detail sander with fine-grit sandpaper to gently buff any minor imperfections. This is a crucial step—the tiny smoothening can eliminate residual raised screws or rough edges—making your deck feel as good as it looks. When I sanded my first deck, I was surprised how just a few passes transformed the surface. Be careful around the screw holes so you don’t strip the fasteners or create new scratches. Imagine it as polishing jewelry: subtle, precise, rewarding. Finishing tips ensure your deck’s surface gleams.
Inspect and Finalize
Finally, walk across the deck in daylight to catch any inconsistencies or raised screws. If needed, tap down slightly raised screw heads with your drill or hammer. This meticulous inspection seals the job, ensuring your deck isn’t just functional but visually stunning. Thinking back, adopting this method consistently prevented me from noticing screw heads, elevating my DIY projects to a professional level. Mastering these steps turns a simple deck into an inviting outdoor oasis—ready for family gatherings and relaxing evenings. For additional creative ideas, explore custom composite decking options that suit your style.Many DIY enthusiasts and even some seasoned builders often operate under assumptions that can undermine the quality and safety of outdoor projects. One prevalent myth is that choosing the most affordable materials automatically yields the best results. In reality, investing in high-quality fasteners and properly seasoned wood or composite materials ensures longevity and safety, as highlighted in expert guides on transforming your outdoor space. Making cost-based decisions without considering durability and compatibility can lead to premature failure and costly repairs.
A common oversight involves deck substructure inspections. Many overlook the critical importance of verifying the integrity of underlying beams and ledger boards. Ignoring signs of rot or rust not only jeopardizes structural safety but also voids manufacturer warranties. An advanced mistake is neglecting proper ventilation beneath the deck. This can trap moisture, leading to underlying wood rot—an issue some underestimate, despite studies from the Wood Preservation Research Group indicating that moisture control significantly extends deck lifespan.
Furthermore, a hidden nuance that many miss is in stair design. Everyone focuses on aesthetics or code compliance, but the subtle details can dramatically influence safety and usability. For example, treads that are too narrow or lack proper overhangs can cause slips, especially in wet conditions. Consultations with creative stair solutions show that integrating wider treads and non-slip surfaces enhances both comfort and safety.
From an advanced builder’s perspective, overlooked anchoring methods can compromise a deck’s stability over time. Many default to simple ledger connections, but integrating hidden fastener systems and proper flashing techniques—like those discussed in ledger flashing mistakes—prevents water intrusion and subsequent decay.
Now, let’s address a question that often puzzles even experienced builders: How do climate variations influence decking choices and installation subtleties? For instance, in moisture-rich environments, selecting materials like PVC decking, which resists swelling and warping, can be game-changers. Proper expansion gaps become crucial, as neglecting them can lead to buckling or cracking. According to industry experts, understanding local climate effects and adapting construction techniques accordingly can significantly prolong your deck’s lifespan.
Have you ever fallen into this trap? Let me know in the comments. Remember, mastering these hidden nuances elevates your outdoor projects from simple additions to enduring masterpieces.Maintaining your outdoor living space requires more than just installing a beautiful deck—it’s about investing in the right tools and adopting smart routines that ensure durability over the years. Personally, I vouch for a few key pieces of equipment that streamline maintenance and boost quality. First, a high-quality cordless impact driver, like the Makita XDT13, is invaluable for quickly tightening or removing fasteners during routine checks or repairs; its adjustable torque settings prevent over-tightening, which can lead to damage over time. For cleaning, I recommend a soft-bristle deck brush paired with a biodegradable cleaner—nothing beats this combo for gentle yet effective grime removal without risking surface damage. An often overlooked tool is a moisture meter; I use the General Tools MM2 for monitoring wood health, especially crucial in climates with high humidity where moisture ingress can cause composite boards to warp or rot beneath the surface.
Prediction indicates that as smart technology advances, we may see integrated sensors in decks that alert homeowners to moisture levels or structural strain, simplifying long-term maintenance. To keep your deck performing optimally, periodic inspections with these tools are essential.
### How do I keep my deck in top condition over time?
Regularly using a moisture meter helps catch early signs of water infiltration, enabling you to address issues before they escalate. Additionally, applying a high-quality protective sealant designed for composite decking every couple of years preserves appearance and prevents staining. Always ensure your fasteners are tight and free from corrosion—replacing rusted screws with stainless-steel or composite-compatible fasteners enhances overall stability. For stairs and critical load-bearing points, diligent checks with your impact driver, coupled with visual inspections, can prevent costly repairs.
In the future, incorporating smart sensors directly into decking materials might allow real-time tracking of environmental stress, reducing guesswork and costly overhauls. Meanwhile, I encourage you to try out the impact driver for fixing loose boards or adjusting fasteners—it’s a game-changer for DIY upkeep. For more advanced tips on maintaining and scaling your outdoor living space, exploring professional insights can provide you with actionable strategies.
The Hidden Lessons From My Decking Journey
One of the toughest yet most rewarding lessons I learned was that even small details like screw head concealment can make or break the overall look of your deck. I once rushed through fastening, thinking perfection was just about sturdy construction, only to be disappointed by uneven, protruding screw heads that marred the surface. That experience taught me the value of patience and precision in every step, especially when using techniques like the hidden screw trick. Knowing that a subtle countersink can elevate your project from DIY to professional-grade keeps me motivated to perfect each step.
Another insight I gained is that investing in quality tools pays off in the long run. For example, using a specialized countersink bit, instead of just a drill, saves time and produces a cleaner finish. It’s those little upgrades that transform tedious tasks into satisfying moments of craftsmanship, reminding me that good tools are an essential part of achieving flawless results.
Additionally, I discovered that thorough preparation, like aligning boards precisely and spacing gaps correctly, prevents issues later on. Cutting corners here often leads to misaligned boards and noticeable screw heads, which are tough to fix after installation. This understanding reinforces that attention to detail upfront saves headaches and ensures durability, subtly influencing how I approach future projects.
Tools and Resources That Changed My Approach
For anyone serious about making their outdoor space look professional, a few key tools have become indispensable. A high-quality impact driver has made fastening far more consistent and less stressful, particularly when dealing with composite materials, which can be unforgiving. I trust brands like Makita or DeWalt because of their durability and ergonomic design, allowing me to work longer without fatigue.
Having a dedicated countersink bit is a game-changer; it allows screws to sit just below the surface for that perfect, flush finish. Paired with a moisture meter like the General Tools MM2, I can monitor underlying wood conditions, especially in humid climates where unseen moisture can cause problems over time. These tools empower me to do the job right from the start.
Beyond physical tools, I also rely on authoritative guides and videos from experienced deck builders. The article on transforming your outdoor space offers invaluable insights that help me anticipate challenges and choose the best materials and methods for my needs. Learning from seasoned professionals accelerates my skills and boosts my confidence.
Embrace the Craft and Elevate Your Outdoors
Building a beautiful, flawless deck is more than just a weekend project—it’s an act of craftsmanship that can transform your outdoor living experience. The little tips, like the hidden screw technique, combined with the right tools and a meticulous approach, make each project feel like creating a piece of art. Think of your deck as a canvas where details matter, and every element plays a role in elevating the entire space. With dedication and the right knowledge, you can create an outdoor oasis that stands the test of time and wows visitors for years to come. Ready to take your decking skills to the next level? Dive into the resources and start turning your vision into reality. And remember, every great builder started exactly where you are now—stoked with potential and eager to learn.