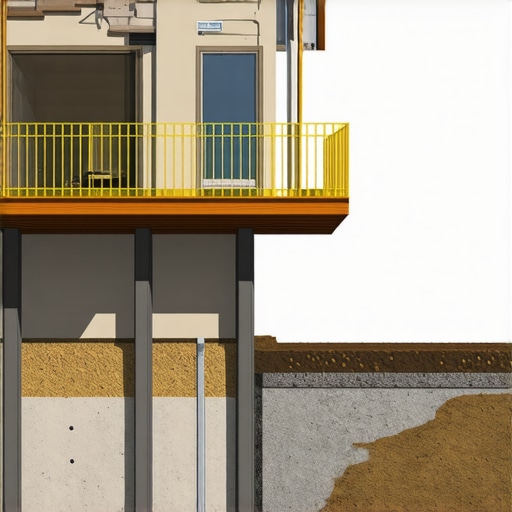
I remember the first time I built my own deck. Everything seemed straightforward—measure, cut, assemble. But then, a few years down the line, I noticed a pesky wobble in my stairs and some creeping unevenness. It was a lightbulb moment for me: I had made an early mistake that could have been easily avoided. That mistake? Not placing my deck footings above grade.
Levelling Up: Avoiding the Hidden Pitfall of Deck Footings
Since then, I’ve learned that the position of your deck footings is far more than a trivial detail; it’s the backbone of a safe, durable outdoor space. Today, I want to share what I’ve discovered about why your deck footings should always be above grade—and how this simple step can save you headaches, repairs, or worse, safety hazards down the line. We’ll explore real-world examples, common pitfalls, and how to get it right the first time.
Is Raising the Footings Overhyped? Think Again
Some folks might dismiss this as over-cautious or unnecessary, but the truth is, improperly situated footings can cause your deck to settle unevenly, leading to cracked boards, unstable stairs, or even structural failure. Early on, I made the mistake of sitting my footings flush with or below grade, thinking it would be fine. Turns out, moisture intrusion and soil movement made my deck an uneven, creaky mess—something I could have prevented with a simple adjustment. According to experts, proper footing placement enhances drainage, keeps moisture away from the wood, and prolongs your deck’s life.
If you’ve ever faced uneven deck boards, leaning stairs, or a squeaky ramp, chances are, a misstep with footing placement is to blame. But don’t worry—this isn’t a complicated fix, and with the right approach, your outdoor space can stand tall and safe for years to come. Ready to learn how to do it right? Let’s walk through the key steps to ensure your footings are above grade, giving your deck the stability it deserves.
Already faced this problem? Drop a comment below—I’d love to hear your experience and how you tackled it. And if you’re curious about the finer details of deck stability and safety, check out this article on safe stairs and footings.
Set Your Foundation with Precision
Begin by choosing a level, undisturbed area away from excessive moisture or soil movement. Use a transit level or a long straightedge paired with a carpenter’s level to establish a consistent elevation across your site. This initial step is crucial to prevent future uneven settling, which can cause deck components to shift or crack over time. I once used a water level—essentially a clear tube filled with water—to mark a consistent height across multiple points; it kept my measurements accurate, even through thick grass and uneven ground.
Mark the Footing Positions Accurately
Next, lay out your deck’s footprint on the ground with stakes and string aligned precisely according to your plan. Consider the placement of stairs, gates, and any features you desire—this is the blueprint that guides your footing placement. Double-check measurements, especially for the corners and support beams, because even a small discrepancy will ripple through the entire structure. When I built my last deck, I marked the spots with spray chalk, then verified each position with a tape measure; this simple step kept my layout square and level.
Excavate and Prepare for the Footings
Dig down to stable, clean soil at each marked point. The depth of your excavation depends on local frost lines and soil conditions but generally should extend below the frost line to prevent heaving caused by freeze-thaw cycles. For my project, I used a post-hole digger to reach the required depth—the process was messy but manageable. Ensure the bottom of each hole is flat and free of loose soil or roots because uneven bottoms can cause the footing to wobble or settle unevenly.
Install Forms and Pour Concrete
Place sturdy forms around each hole to contain the concrete, then add gravel or crushed stone at the base for drainage. Pour your concrete into each form, ensuring no air pockets—use a tamping tool or the handle of a shovel to vibrate the concrete slightly. My first pour was a bit rushed, leading to minor air gaps, but I learned to tap the forms to settle the mixture and ensure uniformity. Consider adding rebar or metal posts for added strength if your deck spans a large area or is near heavy loads.
Positioning Footings Above Grade
Once the concrete has cured—usually 24-48 hours—set your deck posts with bases or pier blocks on top of each footing, making sure they are a few inches above ground level. This elevation facilitates proper drainage and prevents water from pooling around your support posts, which is vital for resisting rot and corrosion. I used shims to fine-tune the height, aiming for consistent post height across the entire deck. Remember, leaving the bases above grade isn’t just about moisture; it’s about ensuring your deck remains stable and safe over the years.
Inspect and Adjust for Long-Term Stability
After everything is in place, double-check the levelness and alignment of all posts before attaching joists and decking. Use a long level or a string line stretched between posts to verify uniform height and straightness. Correct any discrepancies with shims or by re-tightening fasteners. A small effort during this phase pays dividends—especially when you consider building composite decking, like those described in choosing the right composite decking, which benefits from a perfectly level foundation to avoid unusual warping or uneven wear.When it comes to designing outdoor stairs and decking, many homeowners and even some builders fall prey to misconceptions that can compromise safety and longevity. One such myth is that choosing a cheaper, simpler stair design is always sufficient. However, the nuances of outdoor stair construction—like riser height, tread depth, and proper framing—are critical for safety and comfort. Overlooking these details often leads to trips, falls, or rapid wear, especially when using composite decking materials, which demand precise installation techniques for optimal performance. Many assume that installing composite decking is straightforward, but without understanding the specific requirements—such as adequate joist spacing, proper ventilation, and correct fastener choice—you risk warping, cupping, or premature degradation. It’s essential to recognize that composite materials have unique expansion and contraction properties compared to wood, making adherence to manufacturer guidelines non-negotiable. One often overlooked aspect is ensuring good drainage around stairs and decking to prevent moisture buildup that accelerates rot or mold growth. For deeper insights into optimal design practices and avoiding costly mistakes, check out this guide on safe stair design and ideas for custom composite decking. One advanced mistake I see often is neglecting to incorporate proper flashing and ledger board detailing, which can cause leaks and structural issues over time. Experts emphasize that integrating seamless transitions between stairs and decks not only enhances aesthetics but prevents potential water damage and safety hazards. A study by the North American Deck and Railing Association highlights that a well-constructed stair and deck system can reduce liability risks and extend the lifespan of your outdoor living area. Have you ever fallen into this trap? Let me know in the comments. Remember, paying attention to these details can save you from costly repairs and ensure your outdoor space remains a safe haven for years to come.
Maintaining your outdoor deck, especially when working with composite materials and complex stair designs, demands precision and the right equipment. Over the years, I’ve refined my toolkit to include some must-have tools that help ensure long-term durability and aesthetic appeal. One of my personal favorites is the Bosch cordless oscillating multi-tool. I rely on it for detailed work around railings, tight corners, and when sanding uneven surfaces—its versatility and control are unmatched for delicate touch-ups or removing old sealant from tricky joints.
Another essential is a laser distance measurer. I use the Leica Disto model because it provides quick, accurate measurements over various distances—crucial for ensuring support posts are aligned perfectly, which impacts the safety and visual symmetry of your stairs and deck layout. Accurate measurements saved me from costly rework when building a custom composite deck, especially when planning for integrated lighting and seamless transitions.
Power washers can be your best friend or worst enemy—if used improperly. I favor the Sun Joe SPX3000 because it offers adjustable pressure settings. I use lower settings for cleaning composite boards to prevent melting or warping, focusing on gentle, effective dirt removal. Regular cleaning with the right pressure can prevent mold buildup and preserve the deck’s appearance, extending its lifespan significantly.
For sealing and applying finishes, I swear by a high-quality HVLP spray system. I personally use the Wagner Control Spray Max because it provides fine, even coats without overspray. This ensures that composite surfaces and wood accents are evenly protected, helping to avoid premature degradation. Proper sealing not only maintains visual appeal but also enhances resistance to moisture, which is critical for stairs and joist areas.
How do I keep my deck functioning smoothly over the years?
Implementing a routine inspection schedule is vital. I check for loose fasteners, shifting support posts, or signs of weather damage every spring and fall. Using the right tools—like a torque wrench—helps me tighten connections accurately without overdriving hardware, which can cause damage. Additionally, incorporating advanced maintenance systems such as a drainage and sealing system ensures water flows away from critical joints, preventing rot and prolonging the life of your structure.
Looking toward the future, I anticipate smart sensors being integrated into decks, providing real-time data on moisture levels or structural integrity—much like what’s happening in advanced home automation. This could revolutionize how we monitor outdoor spaces, making maintenance predictive and less invasive.
One advanced tip worth trying is installing a wireless moisture meter on key support beams. These devices can alert you before visible damage occurs, giving you a head start on repairs. For guidance, check out this article about seamless transitions which emphasizes the importance of proactive support inspection for safety and visual harmony. Yet, don’t forget—the best maintenance starts with choosing the right tools and establishing consistent routines. Why not give a high-precision laser measurer or a versatile oscillating tool a try this season? Your deck will thank you for it.
What I Wish I Knew About Stairs and Outdoor Living That Could Save Your Project
One of the most eye-opening lessons I’ve learned as a deck builder is that the tiniest detail can make or break your entire outdoor space. I once underestimated how critical proper footing placement is, and it cost me in the long run—uneven stairs, wobbly support posts, and even premature rot. The biggest takeaway? Always keep your deck footings above grade to prevent moisture issues and soil movement from undermining your hard work. Trust me, this small change can extend your deck’s lifespan significantly and save you from costly repairs down the line.
My Top Tools and Resources That Transformed My Deck Building Routine
Over the years, I’ve refined my toolkit to include some game-changing tools that ensure my decks stand the test of time. The safe stairs and footing guide offers expert insights I can’t do without. I regularly use a laser distance measurer from Leica to guarantee precise support post height—and accuracy makes all the difference when aligning beams and planning for composite decking, which demands tight tolerances. For cleaning, the Sun Joe SPX3000 power washer gentle enough for composites keeps everything looking fresh without damage. Pairing these with my HVLP sprayer, I can apply finishes evenly for long-lasting protection—strictly necessary with outdoor stairs and decks exposed to weather. These tools have become indispensable in my mission to build structures that endure.
Life-changing Insights I Learned on the Job
One surprising realization? That assumptions about decking materials or quick fixes often lead to setbacks. For instance, I used to think composite decking was virtually maintenance-free—until I learned about proper joist spacing and ventilation that prevent warping. Making these adjustments, along with incorporating seamless transitions and careful drainage, turned my projects into stress-free, durable spaces. The key is detailed planning and not rushing the process; every step, from footing height to flashing details, impacts safety and longevity. The more I focus on the foundational aspects—like elevating footings above grade and ensuring perfect levelness—the easier it is to create a deck that’s both beautiful and resilient. Remember, paying attention to these lessons now saves future headaches and elevates your craftsmanship.
Engage and Elevate Your Outdoor Living Experience
As you plan your next deck or outdoor stairs, keep in mind that mastery comes from attention to detail and ongoing learning. Whether you’re designing for a modern aesthetic or aiming for a cozy retreat, understanding the nuances—like proper footing placement, supportive framing, and precise measurements—can transform your project. If you’re ready to take your outdoor living to the next level, consider exploring seamless transitions and stair integration that enhance both safety and style. And don’t hesitate to reach out for more expert insights—your dream outdoor space is within reach if you build it on a solid foundation. Now, I challenge you: what’s one detail you’ve overlooked in your last outdoor project that could have made a big difference? Share your experience below and let’s learn together!