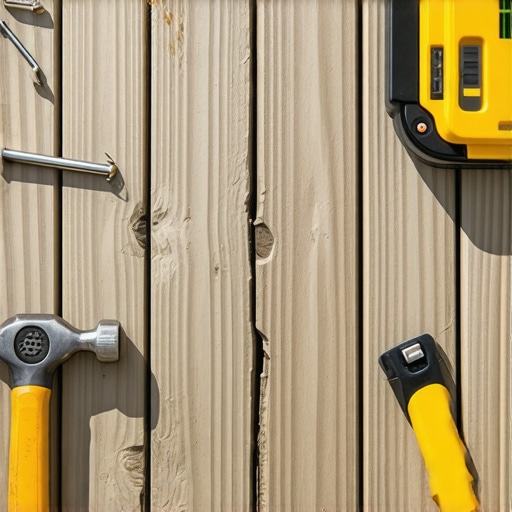
I remember the exact moment I noticed it—standing on my deck, coffee in hand, when I felt that unsettling wobble beneath my feet. The corner of my deck was sinking, and I knew this wasn’t just a minor inconvenience. It was a warning sign of underlying issues, and ignoring it could have led to serious safety hazards or costly repairs. That realization was a lightbulb moment for me, and I learned the hard way that fixing a sinking deck corner quickly can save you a ton of stress and money.
If your outdoor space feels uneven or wobbly, you’re probably wondering: “Is this fixable without tearing everything apart?” Well, today I’m going to share my personal approach to tackle this common problem efficiently and effectively. Whether your deck is made from traditional wood, composite, or a mix of materials, I’ll guide you through the steps to stabilize that pesky sinking corner—so you can get back to relaxing and enjoying your outdoor oasis.
Why Your Deck Corner Is Sinking and Why You Should Act Fast
First off, understanding the root cause of the sinking is crucial. Often, it’s due to unstable or shifting footings, soil erosion, or moisture damage that weakens the support beneath. In my early days of DIY, I ignored small signs of settling, thinking it was just cosmetic. But neglect can lead to uneven weight distribution, cracks, or even structural failure. According to the American Society of Civil Engineers, proper footing and foundation are critical to a deck’s longevity and safety. A small issue today can become a major safety concern tomorrow.
So, what makes fixing this problem urgent? The longer you wait, the greater the risk of further deterioration, which can increase costs and compromise safety. Plus, a wobbly deck isn’t exactly the ideal space for family gatherings or outdoor entertainment. My goal is to help you resolve the issue swiftly before it worsens.
If you’ve faced this sinking dilemma yourself, you know how frustrating it can be to find a reliable, straightforward solution. That’s exactly what I want to help you with today. But before diving into the how-to, let’s address a common worry.
Is a quick fix enough, or will I need to replace my entire deck?
Many homeowners worry that a sinking corner means total reconstruction. I’ve been there—I screamed inwardly at the thought of tearing everything down. However, after making a few mistakes early on—like rushing to lift and replace entire sections without checking the foundation—I learned that understanding the underlying cause is key. Sometimes, a simple reinforcement or a few strategic adjustments can solve the problem without the need for a full rebuild.
Now, armed with that knowledge, I’ll walk you through the practical steps to stabilize your deck’s corner and ensure it stays solid for years to come. Ready to get your deck back to level? Let’s jump into the DIY tricks that really work.
Assessing the Damage and Gathering Tools
First, evaluate the extent of sinking by measuring how much the corner has dropped using a level or a string line. Gather essential tools: a jack, shims, replacement joist hangers, concrete mix or adjustable pier supports, and safety gear. For example, I once used a hydraulic jack to raise a deck corner by 2 inches, which revealed rotted support joists beneath. Precise assessment prevents unnecessary work and guides your repair approach.
Preparing the Site and Supporting the Deck
Clear debris and vegetation around the sinking corner. Use your jack to gently lift the sagging section, aligning it as close to level as possible. Place sturdy supports or temporary shims under the joists to hold the deck in position. I recall positioning a small 4×4 post with a car jack, slowly raising the sagging joist while periodically checking with a level. This prevents sudden shifts that could cause additional damage.
Stabilizing the Footings and Foundations
Inspect the footings underneath the affected supports. If soil erosion caused the sinking, compact the soil or replace it with a solid concrete footing. In one instance, I excavated around the post, filled the hole with gravel, and poured concrete to create a stable base. Alternatively, adjustable pier supports can be placed beneath the joists for quick, reliable leveling—ideal if digging is challenging. This step is crucial because, like a house’s foundation, a deck’s stability depends on solid footing. For more on supporting structures, consider consulting a professional [here](https://deckdesignbuild.com/the-benefits-of-working-with-a-professional-deck-builder-in-your-outdoor-projects).
Replacing or Reinforcing Support Joists
Check the condition of support joists—look for splits, rot, or warping. Cut and install new pressure-treated lumber where needed. Secure with appropriate hardware like galvanized joist hangers, ensuring tight connections. A mistake I made early was using nails instead of screws, which led to loosening over time; now I prefer corrosion-resistant screws for durability. Reinforcing with additional blocking between joists distributes weight evenly, preventing future sinking. Precise installation strengthens the foundation, much like a sturdy frame in furniture.
Leveling and Securing the Deck Surface
After supporting the structure, adjust the deck surface with shims or spacers to achieve a flat, level surface. Use a carpenter’s level or laser level for accuracy. For example, I inserted thin plastic shims beneath a loose plank to eliminate wobble. Once level, tighten all hardware and recheck stability. This ensures safety and prolongs the life of your deck. If your flooring is composite, verify that the shims don’t damage surface integrity—consider using specialized leveling products. For seamless transitions between deck and stairs, check out [this guide](https://deckdesignbuild.com/creating-seamless-transitions-stairs-as-key-elements-in-outdoor-living).
Finishing Touches and Ongoing Maintenance
Seal all new joints and cut ends with water-repellent preservative or sealant to prevent rot. Regularly inspect the area for signs of shifting or deterioration—schedule maintenance annually. During my repair, adding a drainage gap allowed moisture to escape, preventing future rot. A well-maintained deck not only looks better but also ensures safety. For ideas on upgrading your outdoor space, explore [these modern design tips](https://deckdesignbuild.com/transform-your-outdoor-living-with-custom-composite-decking-ideas). Keep these steps in mind to turn your wobbly deck into a stable, inviting outdoor retreat.Many homeowners and DIY enthusiasts operate under assumptions about deck construction, outdoor living, and composite decking that can lead to costly mistakes. For instance, a widespread myth is that all composite decks are maintenance-free. While they generally require less upkeep than wood, neglecting regular inspections can still cause warping or deterioration over time. Choosing the cheapest materials or shortcuts to save money often backfires, especially when it comes to stair safety or support structures, which require precise engineering; cutting corners here can compromise safety and durability.
Why Do Some Decks Fail Even When Built by Professionals?
One nuance that many overlook is the importance of proper joist spacing tailored specifically for the decking material used. For example, composite boards typically demand closer spacing than traditional wood to prevent flexing and cracking, according to industry standards in [decking design guidelines](https://deckdesignbuild.com/choosing-f-the-right-composite-decking-for-durable-low-maintenance-outdoor-areas). Neglecting this detail can cause premature wear and even structural failure. Another mistake is assuming that a standard set of stairs fits all outdoor projects. In reality, stairs should be custom-designed to match the total height, load capacity, and aesthetic of your space, as highlighted in [outdoor stairs design](https://deckdesignbuild.com/creating-seamless-transitions-stairs-as-key-elements-in-outdoor-living). Overlooking minor nuances like proper flashing, slip resistance, and handrail height can lead to safety hazards. Recognizing these overlooked details—and understanding their impact—sets apart good backyard projects from failures. Don’t forget, consulting with an expert or a professional [can save you headaches](https://deckdesignbuild.com/the-benefits-of-working-with-a-professional-deck-builder-in-your-outdoor-projects). Have you ever fallen into this trap? Let me know in the comments.Maintaining your outdoor deck, especially one constructed with composite decking and intricate stairs, requires the right set of tools and a bit of know-how. My go-to equipment isn’t just about convenience; it’s about precision and durability. A high-quality infrared thermometer, for example, allows me to monitor surface temperatures when applying sealants to ensure even curing—critical for long-term protection against moisture. I personally prefer the  that shows a homeowner using an infrared thermometer on a composite deck surface, with alt text “Infrared thermometer measuring deck temperature” and title “Infrared Thermometer for Precise Surface Monitoring.” This tool has become indispensable in ensuring the longevity of my outdoor living spaces, especially when considering future trends like heat-resistant composite materials in 2025.
For cleaning, I rely on a pressure washer fitted with a soft-bristle nozzle to gently remove debris without damaging the surface. However, for stubborn stains or mold, I prefer eco-friendly cleaning solutions—my own blend of vinegar and biodegradable detergents—applied with a pump sprayer. This combination preserves the composite’s integrity while maintaining a pristine appearance.
When it comes to tightening or replacing fasteners, nothing beats a ratcheting impact driver with adjustable torque settings. I set mine to low torque for delicate composite boards to prevent cracking, and it’s perfect for securing railings or stairs. Using the right bit—like a star-shaped Torx—is crucial here, as it reduces cam-out and provides optimal grip.
For structural assessments, I utilize a digital spirit level with a built-in laser. It helps me accurately check the pitch of stairs or the levelness of your deck surface—essential, especially if you’re planning to add custom features or extensions. I’ve found that investing in a tool that offers both precision and durability is well worth it, especially since my projects often involve working with heterogeneous materials like treated wood and composite.
Looking ahead, professional-grade moisture meters are predicting significant growth in outdoor maintenance technology by 2025. These devices measure hidden moisture in supporting joists or posts, helping prevent rot before it becomes visible or costly. In fact, the latest models can even connect via Bluetooth to your smartphone, offering detailed analysis over time.
Want to elevate your maintenance game? I highly recommend trying the advanced tip of integrating a moisture meter into your routine. Regularly monitoring moisture levels, especially after rain or heavy dew, helps catch issues early. To get started, consider consulting with a professional for setup or more detailed assessments—reach out through our [contact page](https://deckdesignbuild.com/contact-us-2) to discuss options.
By investing in these specific tools and staying ahead of emerging trends, you ensure your outdoor spaces remain beautiful, safe, and durable for years to come. Remember, consistent maintenance can dramatically extend the life of your deck and outdoor living features, including stairs or seamless transition elements. Do you have a favorite maintenance device? Share your experience in the comments or explore more expert tips on [transforming your outdoor space](https://deckdesignbuild.com/transform-your-outdoor-living-with-custom-composite-decking-ideas).
How Overconfidence Led Me Astray and What I Learned
Initially, I believed I could handle deck repairs with minimal experience, thinking that a few basic tools would suffice. That overconfidence caused me to overlook subtle signs of soil erosion and support rot, which later worsened the sinking problem. Now, I understand that thorough assessment is essential—never skip inspecting footings and joists before starting a fix.
The Power of Patience Over Quick Fixes
In my rush to stabilize the deck, I once used quick-setting concrete without proper preparation, only to find the support shifted within weeks. I realized that taking time to prepare the foundation—like compacting soil and choosing the right supports—yields much more durable results. Patience in restoration work pays off with long-lasting stability.
Learning When to Call in Reinforcements
There was a moment I struggled with a stubborn support post, attempting to lift and reinforce it alone. That’s when I learned the importance of knowing my limits and consulting professionals for complex issues, especially when structural integrity is involved. Recognizing when to seek expert advice can save time, money, and ensure safety.
Curated Resources That Turned My Projects Around
- Deck Designer Online Tools: These helped me visualize improvements before making physical changes, saving me from costly mistakes.
- Pressure-Treated Lumber from Local Suppliers: Sourcing quality materials ensures durability and peace of mind in repairs.
- Professional Consultation Services: An investment that clarified complex issues I couldn’t resolve alone—see how professionals can assist in your project through this resource.
- Online Forums and Community Groups: Sharing experiences and troubleshooting with fellow DIYers provided real-world solutions and encouragement.
Embrace the Journey and Build Confidence
Remember, tackling deck repairs isn’t just about fixing wood and supports—it’s about growing as a homeowner and craftsman. Each challenge teaches patience, attention to detail, and the value of expert guidance. If you’re ready to elevate your outdoor space with confidence, don’t hesitate to reach out for professional support. Your deck’s future depends on the wisdom you gain today.
What tricky support issue have you faced in your outdoor projects? Share your experience below and let’s learn together!