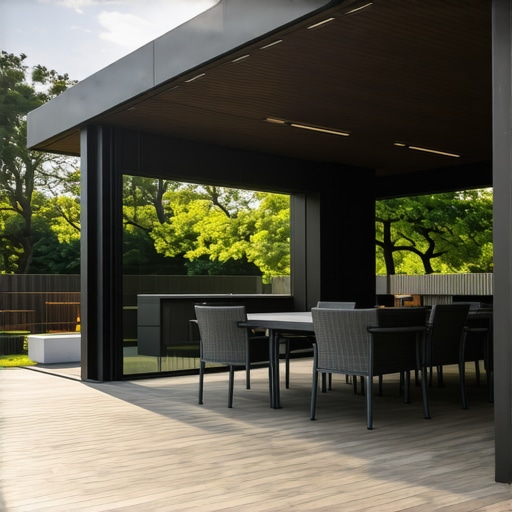
One summer afternoon, I was lounging on my deck, coffee in hand, when I realized something was missing. The neighbors’ lively chatter, birds chirping — all was lovely, but I yearned for a bit of privacy without sacrificing that incredible outdoor view. The problem? My existing elevated deck didn’t have any screening, leaving me exposed to the world, bugs, and all the nosy neighbors. That lightbulb moment made me think: If I could find a way to add stylish, functional screening to my deck—without tearing it apart or starting from scratch—I’d be set for countless relaxing evenings.
The Challenge of Upgrading an Old Deck
Over the years, I’ve come to realize that many homeowners face this exact dilemma. Building a new deck with perfect screens can feel overwhelming, especially when your current one already serves as a valuable outdoor space. The idea of tearing out and rebuilding just for some privacy and shade sounds daunting—not to mention expensive. I found myself wondering: Is it possible to retrofit my existing deck with good screening solutions that are both durable and attractive? The answer, as I discovered through my own experience and lots of research, is a resounding yes. Today, I’ll share the insights and practical steps I used to enhance my outdoor oasis.
Is Screening in an Existing Deck Really Worth the Effort?
Early on, I made the mistake of thinking that adding screens would involve major construction work or that it would ruin my deck’s aesthetic. Actually, many of the best screening options are designed specifically for retrofitting, making the process much smoother than I initially feared. I learned that choosing the right materials and understanding the structural nuances can prevent costly mistakes and ensure lasting satisfaction.
According to experts in outdoor design, a well-implemented screening can boost your outdoor living quality significantly—adding privacy, shade, and even reducing wind or debris. And with the latest trends in composite decking and outdoor accessories, you can seamlessly integrate screens that match your deck’s style and durability standards. Curious how I managed to do it without a full rebuild? Keep reading, because I will walk you through every step.
Getting Started: Assessing Your Existing Deck
Before jumping into ideas, take a good look at your current setup. Measure your deck’s dimensions, note the location of your support posts, and identify potential attachment points. Considering the weight and placement of screens is crucial—some options can be mounted directly to your existing structure, while others may require additional framing. Don’t forget to think about access points, as you’ll want easy entry and exit, especially if you plan to include features like gates or removable panels.
Once you’ve evaluated your space, the next step is envisioning the style—do you want a semi-transparent mesh for breeze and visibility, or a solid panel for complete privacy? The choice depends on your lifestyle and aesthetic preferences. For durable, low-maintenance options, I recommend exploring [composite decking](https://deckdesignbuild.com/choosing-f-serving a comprehensive guide to selecting the right decking materials.](https://deckdesignbuild.com/choosing-f-composite-decking-for-durable-low-maintenance-outdoor-areas). This ensures your screening won’t become a hassle over time, even in harsh weather conditions.
Are you facing the same challenge—trying to create a private sanctuary on your current deck? If so, you’re not alone. Many homeowners discover that adding screens can be surprisingly straightforward and highly impactful. Stay with me, because in the upcoming sections, I’ll walk you through the best methods to retrofit your deck with screens that stand the test of time and enhance your outdoor experience.
Measure and Plan Your Screening Design
Start by measuring your deck’s dimensions accurately—use a tape measure to record length, width, and height at various points to account for uneven surfaces. For example, I laid out a simple grid on paper, marking support post locations and ceiling heights. This prevented surprises later. Decide on the screening type: semi-transparent mesh for breeze or solid panels for complete privacy. I chose a weather-resistant composite-aluminum lattice that matches my deck’s modern style, which I learned about from this guide. Planning beforehand saves time and prevents costly adjustments.
Choose Durable Materials for Long-Lasting Results
Materials should withstand weather, bugs, and UV exposure. I opted for composite panels with a aluminum core—these don’t warp, rot, or crack. To attach them securely, I used stainless steel screws, as regular nails tend to loosen over time. When selecting materials, think of them as the armor of your deck: strong, lightweight, and resilient. Consulting this resource helped me understand which composite decking options are best suited for outdoor screens, especially in my humid climate.
Attach Supports and Framework Precisely
Support framing is key to ensuring stability. I built a perimeter frame using pressure-treated 2x4s, anchoring it to the existing deck support posts with heavy-duty brackets. For the intermediate supports, I installed vertical posts every 4-6 feet, ensuring they were plumb using a level. Think of it like constructing a skeleton for a tent—you need strong, even supports to keep everything firm. Use a drill with the correct bits and pre-drill holes to prevent splitting the wood. During installation, I checked the alignment frequently to keep the screens straight and taut, similar to this advanced design.
Secure Panels for Maximum Stability
Now, hang your panels onto the framework. I used rust-resistant clips designed for composite materials, sliding them into the support slots and screwing them down tightly. For panels with pre-made holes, I aligned them carefully to avoid warping. As I worked, I made sure the panels were tightened enough to stay taut but not so tight as to crack. To achieve a clean look, I used a router to round off sharp edges on the supports, preventing injury and giving it a polished appearance. This process is akin to installing siding on a house—precision makes all the difference.
Enhance Accessibility and Finishing Touches
Integrate access points like removable panels or hinged sections. I installed simple latch mechanisms on one side for easy entry, similar to a garden gate. Sealing edges with waterproof caulking prevented water ingress, extending the lifespan of your screens. Consider adding decorative elements like planter boxes or lighting to complement your new screening—I’ve found that smart placement of solar-powered LED strips along the top edges creates a cozy ambiance at night. This step turns a functional retrofit into a personalized outdoor retreat, all while reinforcing the importance of details—like the seamless transitions between spaces.Even experienced homeowners and contractors often fall prey to subtle errors that can compromise the safety, durability, and aesthetic appeal of outdoor decks. One widespread misconception is that choosing the cheapest materials or overlooking the nuances of composite decking can save money upfront but lead to costly repairs later. According to a study by the American Society of Civil Engineers, improper material selection and installation account for over 70% of deck failures within the first five years. This underscores the importance of understanding the hidden nuances that can make or break your outdoor project.
A frequent oversight involves neglecting the importance of proper stair stringer and railing design. Many assume that standard measurements suffice, but overlooking local building code nuances and safety standards can result in dangerous conditions, especially for children and the elderly. For instance, integrating graspable handrails and correct tread depths is not just about aesthetics—it’s about preventing trips, slips, and falls, which constitute a significant portion of outdoor injury statistics. Exploring building codes like those detailed at this resource can help you avoid these pitfalls.
One advanced mistake that even seasoned DIYers make is miscalculating the expanding and contracting behavior of composite decking. Many assume that once installed, the boards will stay perfectly aligned, but thermal expansion can lead to warping, cracking, or buckling if gaps aren’t properly accounted for during installation. Using the correct fasteners and spacing techniques—like those recommended in this guide—can prevent these issues. Failure to do so results in uneven surfaces and diminished longevity, which could have been easily avoided with proper planning.
Make sure you don’t overlook the structural support beneath your deck and stairs. Improper joist spacing or inadequate framing can lead to sagging or even collapse under heavy loads. Ensuring your structure conforms to the latest codes and incorporates features like blocking and adequate flashing is crucial. If you want a comprehensive overview of how to reinforce your structure, you might find this article insightful.
Lastly, a common trap is ignoring maintenance considerations from the start. Many think that composite decking eliminates the need for upkeep, but materials like aluminum or certain composites still require regular cleaning and inspection. Moreover, proper sealing and protective coatings on stair components can extend their lifespan significantly. Not paying attention to these maintenance nuances can turn a beautiful outdoor space into a costly eyesore prematurely.
In summary, mastering the details—from selecting the right materials and designing safe stairs to accounting for environmental factors and maintenance—distinguishes a good deck from a great one. Do you know a mistake that often goes unnoticed but can cause major issues later? Share your experiences in the comments and let’s keep this conversation going. If you’re ready to dive deeper into creating safe, durable, and stunning outdoor living spaces, consider reaching out through our contact page.
Ensuring your deck and stairs stay functional, attractive, and safe over the years requires more than just good construction—it hinges on using the right tools and adopting effective maintenance routines. From specialized equipment to software that streamlines planning, I rely on specific resources that deliver precision and durability. In this section, I’ll share my go-to tools and practices that have helped me keep my outdoor living space in top condition.
Prioritize Accurate Measurements with a Laser Distance Measurer
One tool I swear by is a high-quality laser distance measurer. Unlike traditional tape measures, laser tools provide quick, precise readings—even over long distances or uneven surfaces. I use one to measure deck dimensions, support post heights, and gaps for panel fitting. This accuracy ensures my installation stays level and tight, preventing issues like warping or uneven panels that can compromise the integrity of your screening or stairs. Investing in a reliable laser measure is a small step that saves headaches down the line.
Invest in Heavy-Duty Power Tools for Precision Work
For cutting composite decking and framing materials, I depend on a variable-speed, carbide-tipped circular saw. It offers clean cuts without signs of melting or burning the plastic layers—critical when working with synthetic materials. Supplementing this with a high-quality jigsaw and a plunge router allows me to customize edges, add decorative trims, or fit panels seamlessly. Keep in mind, the right saw blades are essential—use blades designed specifically for composite material to extend their lifespan and ensure clean cuts. Proper tools make the difference between a professional-looking retrofit and a DIY mess.
Software Solutions for Long-Term Planning and Design
Visualization and planning are crucial for long-term results. I utilize design software like SketchUp or specialized outdoor planning apps to map out planned modifications before I start any physical work. These programs help me simulate the placement of supports, panels, and lighting, minimizing errors and optimizing space usage, especially when incorporating features like hidden storage or multi-level decks. These digital tools also let me predict material quantities and costs accurately, which keeps the project within budget and on schedule.
Implement Routine Maintenance for Lasting Beauty
Once your deck and screening are in place, a regular maintenance schedule is vital. I recommend inspecting for loose fasteners every season, especially after harsh weather events. Using a torque driver ensures that screws and bolts are tightened correctly—over-tightening can damage composite panels, while under-tightening leads to instability. Additionally, cleaning your deck with a gentle detergent and soft-bristle brush prevents mold buildup and maintains the surface’s vibrant appearance. A dedicated deck cleaner, like one designed for composite surfaces, simplifies the process. Incorporating these small steps preserves your investment and keeps your outdoor space looking pristine year after year.
How do I maintain my outdoor deck and stairs over time?
Maintaining outdoor structures like decks and stairs involves regular inspections, proper cleaning, and timely repairs. Using tools like a torque driver and soft brushes helps catch issues early—loose fasteners or minor surface stains can be addressed before escalating into costly repairs. For stairs, pay close attention to handrails and risers, ensuring they’re secure and free from damage. Keeping a maintenance checklist and scheduling inspections semi-annually can prolong the life of your deck and stairs significantly. Remember, preventive care beats reactive fixes—so don’t wait until a problem surfaces to take action.
Looking to upgrade your maintenance routine? Consider adopting a regular inspection routine with these targeted tools and methods. For comprehensive guidance on designing safe stairs, be sure to refer to this expert resource. Implementing these practices might be the most cost-effective way to enjoy your outdoor living space for decades to come. Ready to take your deck maintenance to the next level? Start with a detailed inspection and tackle any loose fasteners or debris—your future self will thank you.
Why I Wish I Embraced Simplicity Sooner
One of the most eye-opening lessons I learned was that overcomplicating a deck retrofit can lead to unnecessary stress and costs. I initially thought I needed elaborate framing or top-secret tools, but the truth is, straightforward solutions often provide the best results. Simplifying my approach—not overthinking the materials or steps—allowed me to focus on durability and aesthetics, resulting in a cleaner, more satisfying finish. This experience underscored that sometimes, less truly is more when it comes to creating a private outdoor sanctuary.
How Personal Experience Shaped My Choices
Living through the process gave me an invaluable perspective on selecting materials and designing supports. For instance, I discovered that choosing weather-resistant composite panels not only saved me from ongoing maintenance but also enhanced my deck’s resilience against climate challenges. My hands-on encounters made me realize the importance of trusting quality resources and tailored solutions instead of generic off-the-shelf products. These lessons now guide my future outdoor projects, emphasizing lasting performance over fleeting trends.
The Value of Paying Attention to Small Details
Seemingly minor adjustments, like rounding off support edges or pre-drilling holes, made a significant difference in the longevity and professional look of my screening. Small tweaks prevented issues such as warping, cracking, or loose panels, which are common pitfalls among homeowners. Being meticulous about these details reinforced the idea that mastery lies in the fine points—using the right fasteners, ensuring level supports, and sealing edges. These are game-changers that elevate a DIY project from amateur to artfully crafted.
Where Better Knowledge Can Save Your Time and Money
My journey highlighted that investing in trusted resources—like specific guides on composite decking trends or safety standards for stairs—can prevent costly mistakes. Knowing when to seek expert advice or consult detailed tutorials saved me from redoing work or facing safety hazards later. In particular, understanding how to plan for environmental factors and structural support is crucial. These insights aren’t just lessons learned—they’re invaluable tools for anyone looking to successfully upgrade their outdoor space.
Taking the First Step Toward Your Dream Deck
Transforming your outdoor living area is achievable and rewarding when approached with patience and the right knowledge. The process of retrofitting a deck with privacy screens taught me that with careful planning, quality materials, and attention to details, anyone can create a private outdoor oasis that stands the test of time. Remember, your outdoor space is an extension of your home—worthy of effort and pride. So, why not embrace the challenge and start today? Your perfect outdoor retreat awaits.
What’s Your Next Outdoor Upgrade?
Have you ever faced decisions about adding privacy or durability to your deck? Share your experiences or questions below—I’d love to hear how you’re planning to personalize your outdoor space or troubleshoot challenges.