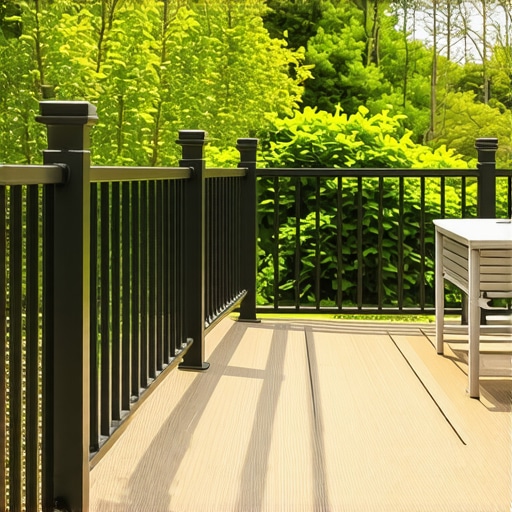
Can you imagine stepping onto your deck, only to have a railing wobbly and rattling, making you second-guess the entire outdoor setup? That’s exactly what happened to me early on — a loose railing that seemed harmless at first, but quickly became a safety concern and a source of frustration. My lightbulb moment came when a simple gust of wind nearly wobbled the entire structure, revealing how flimsy my previous fixes really were. That experience made me realize: nails are just not reliable for deck railing brackets.
Taking a Stand: Why Nails Just Don’t Cut It for Railing Brackets
From the beginning, I thought quick-fix nails would do the trick. They’re cheap, easy, and accessible. But I learned the hard way that this approach often leads to loose fittings, creaking noises, and, worst of all, potential safety hazards. Nails tend to back out over time due to wood movement and weather exposure, especially without proper fasteners. According to professionals, nails are more prone to corrosion and loosening, which can compromise structural integrity—something no homeowner wants lurking under their beautiful deck.
Early on, I made a mistake by relying solely on nails for securing my brackets, and that taught me a valuable lesson. That’s why I switched to a more robust fastening method that I’ll share in this post. Not only did it enhance the durability of my deck, but it also gave me peace of mind knowing my family can safely enjoy the space. If you’ve faced similar issues or want to prevent them, keep reading—I promise you’ll learn something that can make a real difference.
Is the Hype About Mechanical Fasteners Overblown?
Many skeptics wonder if upgrading from nails to screws or bolt systems is truly worth it. I understand the hesitation; it sometimes seems like overkill. However, studies show that properly installed fasteners significantly outperform nails in resisting weather-related wear and load stress. My initial mistake was underestimating the importance of choosing the right fastener—don’t make the same error. For more tips on selecting the best fasteners, check out this guide on deck fasteners.
So, if you’re tired of shaky railings and want a safer, cleaner-looking deck, stay with me. Next, I’ll walk you through the step-by-step process that turned my shaky deck into a sturdy outdoor haven—and I’ll show you how you can do it too.
,
Choose the Right Fasteners for Heavy-Duty Security
Start by selecting high-quality stainless steel or coated galvanized screws designed for exterior use. Unlike nails, these fasteners resist corrosion and provide a firm grip, even in fluctuating weather conditions. I learned this firsthand when I replaced my nails with #10 or #12 inch decking screws, which significantly reduced wobbling. For composite decks, ensure your fasteners are compatible to prevent stress and splitting. Check out this guide for selecting suitable materials.
Pre-drill Holes to Prevent Timber Splitting
Pre-drilling is crucial, especially for hardwoods or when installing near the edges of your decking or railing posts. Use a drill bit that matches the screw diameter to create a pilot hole. This step reduces wood splitting and makes screwing easier, ensuring a tighter hold. I spent extra time pre-drilling when installing my safety railings last summer; initially messy, but it paid off with solid connections that held through storms. Remember, a stable railing starts with proper pre-drilling.
Implement Proper Spacing and Anchoring Techniques
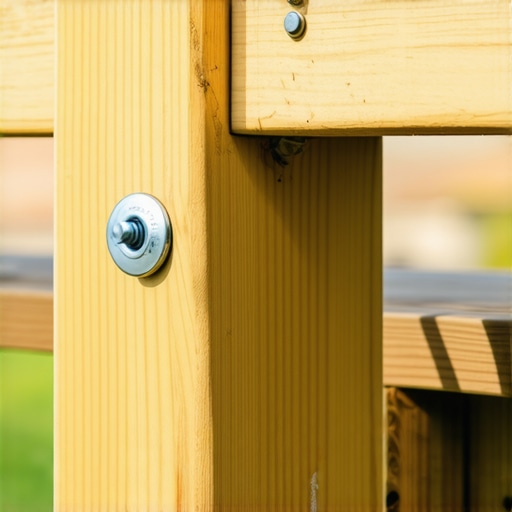
Spacing your fasteners correctly ensures even load distribution. Typically, screws should be spaced about 16 inches apart along the railings and posts. For added stability, use washers to distribute pressure and prevent the screw heads from pulling through the material. I used a ruler and level to maintain consistent spacing during my last project, which eliminated chances of wobbling. For complex designs or larger spans, consider using metal brackets or reinforcement plates, especially if your deck supports heavy loads like hot tubs. Discover more on effective anchoring at this page.
Tackle the Assembly Step-by-Step
Begin by positioning your railing brackets accurately, ensuring they’re level and aligned with your posts. Tighten the screws incrementally, alternating sides to maintain even pressure. Avoid overtightening, which can crack the material or distort the structure. I remember tightening my first few screws too much, which caused some warping; quick lesson learned. Use a power screwdriver with a clutch to control torque, keeping your connections secure without damaging the materials. Double-check the stability by applying gentle pressure — if it wobbles, revisit the fasteners.
Inspect and Maintain Regularly
Once installed, periodically check your railing fasteners for signs of loosening or corrosion, especially after severe weather. Tighten any loose screws and replace corroded fasteners promptly. This routine maintenance extends the lifespan of your deck and keeps safety top priority. I made a habit of inspecting my deck every spring, which helped me catch a loose screw before it became a bigger problem. Remember, solid fasteners mean peace of mind and safer outdoor spaces, making your investment last longer.
 Many DIY enthusiasts believe that choosing the most affordable materials guarantees a cost-effective project, but this can be a dangerous misconception. For instance, opting for untreated softwoods without proper sealing may save money initially but often leads to quicker deterioration, higher maintenance costs, and safety risks down the line. The common myth that composite decking requires no maintenance is also a trap—proper cleaning and occasional inspections are essential to prolong its lifespan and maintain safety standards.
A frequent mistake I’ve seen is oversimplifying stair design, assuming standard dimensions fit all spaces. However, overlooking the nuances of stair rise and run, especially for accessibility and code compliance, can result in dangerous uneven steps or violations. Consulting standards like those outlined in this resource can prevent costly corrections later.
### Why Do Some Decks Fail Despite Following All Tips?
Here’s a question for advanced builders: How does wood movement influence fastener selection and overall structural integrity over time? Even with meticulous planning, materials expand and contract with temperature and humidity fluctuations, which can loosen fasteners or cause boards to shift. Using high-quality stainless steel or coated screws, and including expansion gaps, minimizes these issues. According to expert studies, neglecting these nuances can reduce deck lifespan by years, turning a user-friendly project into a safety hazard. For comprehensive guidance, consulting with professional deck builders through this link is highly recommended.
Applying advanced knowledge about composite decking trends and installation techniques, such as maximizing space with modern designs, can elevate your project beyond basic construction. Recognizing these hidden details is crucial for any serious outdoor living enhancement.
Have you ever fallen into this trap? Let me know in the comments.
Investing in Reliable Equipment to Protect Your Deck
To ensure your outdoor living space remains beautiful and safe, having the right tools on hand is crucial. I personally rely on a high-quality cordless impact driver, such as the Makita XDT14, because its brushless motor provides sustained power and precision when installing fasteners or adjusting deck components. The cordless feature offers mobility, allowing me to move freely around the project without being tethered to an extension cord, which is vital when working in larger outdoor areas.
Additionally, I recommend a digital moisture meter like the Protimeter Surveymaster for ongoing maintenance. This device helps detect hidden moisture levels within your wood or composite materials, preventing issues like rot or warping before they become visible. Regular checks with this tool allow you to address minor problems early, prolonging your deck’s lifespan.
Software and Planning Tools That Make Maintenance Easier
Beyond physical tools, utilizing project management software like Trello or Asana can streamline your maintenance schedule. These platforms enable you to set reminders for periodic inspections, cleaning, or fastener tightening, ensuring your deck stays in top shape over the years. I particularly appreciate Trello for its visual boards, which help me track different areas of my deck and schedule specific tasks for each.
For detailed design adjustments or improvements, digital visualization tools such as SketchUp can be invaluable. They allow you to experiment with layout modifications, thicknesses, or accessories like planters and lighting, without physically lifting a finger. The long-term benefit of such planning is a more resilient, functional, and aesthetically pleasing outdoor space.
How Do I Maintain Composite Decking Over Time?
Keeping composite decking in prime condition requires a few straightforward steps. Regular cleaning with a gentle brush and a mix of warm water and mild soap, such as the DeckWise Cleaners, prevents grime buildup. Occasionally, a more thorough power wash with low pressure can remove stubborn stains or mildew. For protection against fading and surface wear, applying a specialized coating like the SlipDoctors Deck Grip can enhance safety and preserve the deck’s appearance. For trendy design ideas and durability insights, explore this guide on choosing the right composite materials.
In the future, I predict that smart maintenance systems integrated into decking will become more prevalent. Imagine sensors that notify you when your deck needs cleaning, tightening, or repainting—bringing automation to outdoor upkeep and reducing long-term costs.
Scaling Your Outdoor Space Without Hassle
If you plan to expand or enhance your deck, investing in modular systems like concealed fasteners and adjustable supports makes scaling seamless. Proper planning with visualization tools ensures new sections blend perfectly, maintaining both safety and style. Regular maintenance, coupled with advanced tools, will let your outdoor area evolve effortlessly over time.
Interested in Making Your Deck Last Longer? Try This Tip
One advanced tip is to incorporate a preventative maintenance schedule using digital planning tools combined with moisture meters and power tools tailored for outdoor use. By proactively addressing potential issues, you’ll enjoy a safer, longer-lasting outdoor space and potentially save money on costly repairs. For expert insights on professional maintenance practices, consider contacting a seasoned deck builder through this contact page. Keep your deck working for years to come by investing in quality tools and consistent care—your outdoor sanctuary deserves it.
What I Wish I Knew About Weather and Material Compatibility
Early in my deck-building journey, I underestimated the impact of climate fluctuations. I thought selecting any rust-resistant fastener would suffice, but I learned the hard way that some materials still degrade faster under specific conditions. Now, I always consider the local weather patterns when choosing fasteners and decking materials, ensuring longevity and safety. This insight saved me from unnecessary repairs and reinforced the importance of tailored choices for outdoor spaces.
My Breakthrough: Embracing the Power of Proper Fastener Installation
One lightbulb moment was realizing that even the best fasteners won’t perform if installed incorrectly. Pre-drilling, for instance, not only prevents wood splitting but also ensures each screw holds firm over time. I now see the value in taking the extra step—meticulous placement and torque control—transforming shaky railings into solid, secure structures that withstand weather and use.
The Hidden Benefits of Investing in Quality Tools
Using inexpensive or outdated tools was a costly mistake. Upgrading to a high-quality impact driver and moisture meter made my work more precise and enjoyable. Accurate measurements and consistent power delivery mean fewer mistakes and safer decks. These tools became game-changers, dramatically improving my confidence and the durability of my outdoor project.
What I Learned About Maintenance That Everyone Overlooks
Regular inspection and routine upkeep are critical, yet often overlooked. I discovered that a simple monthly check for loose screws or signs of corrosion can prevent disasters. I now schedule seasonal maintenance that keeps my deck in peak condition and ensures my family’s safety. The peace of mind I gained through proactive care is priceless and a lesson I wish I embraced sooner.
Discovering the Balance Between Aesthetics and Safety
While designing my deck, I realized that beauty should never compromise safety. Proper spacing, secure fasteners, and thoughtful layout not only create an inviting space but also prevent accidents. Striking this balance has led to outdoor areas that are both stunning and secure, encouraging family gatherings and relaxation without worry. This harmony is the cornerstone of my approach to outdoor living design.
Curated Toolbox for Lasting Outdoor Creations
Throughout my projects, a few tools and resources stood out. The guide on composite decking choices helped me select durable materials. My impact driver and moisture meter are indispensable. Additionally, project planning software like Trello keeps me organized and proactive. These resources—trusted through hands-on experience—are essential for anyone committed to building lasting, safe outdoor spaces.
Keep Pushing Boundaries: Your Outdoor Space Awaits
Building a deck that stands the test of time and weather is a rewarding challenge. My journey taught me that attention to detail, proper tools, and ongoing maintenance make all the difference. I encourage you to embrace these lessons, experiment boldly, and cherish your evolving outdoor oasis. With dedication, your deck can become a safe, beautiful haven that enhances your home for years to come. What design idea or technique are you eager to try next? Share your plans below! Also, consider exploring custom innovative decking ideas to inspire your project.