I remember the day I stepped outside, eager to enjoy my newly built deck, only to be met with puddles of stagnant water pooling beneath it. That stuck feeling of frustration hit hard—I had spent so much time and effort on my outdoor oasis, and now I was faced with the headache of water damage and mold lurking below. If you’ve ever experienced this, you know how disheartening it can be. The good news? There’s a practical, cost-effective solution I wish I’d known about earlier—installing an under-deck drainage system.
Say Goodbye to Water Woes: Rejuvenate Your Old Deck with a Proper Drainage Setup
Creating a functional and inviting outdoor area isn’t just about aesthetics; it’s about ensuring durability and comfort over time. An under-deck drainage system acts like a personal raincoat for your deck’s underside—channeling water away efficiently and keeping your space dry for years to come. Today, I’ll walk you through how I tackled this project on an aging deck with an outdated framework, and how you can do the same without drowning in complicated instructions. Whether you’re planning a full overhaul or just want to fix persistent water issues, this guide is your first step to a dry, beautiful deck.
Is Installing a Drainage System on My Old Frame Really Worth It?
At first, I was skeptical. Would it be worth the effort on an already aging structure? Turns out, yes—especially because water infiltration can accelerate wood decay, leading to costly repairs. I learned early on that neglecting proper drainage was a mistake. A well-implemented under-deck drainage system not only protects your investment but also transforms your space into an all-weather retreat. Industry experts emphasize that properly managed moisture is crucial for deck longevity, with studies indicating that decks without adequate drainage often fail prematurely due to rot and mold (source: https://deckdesignbuild.com/transform-your-outdoor-living-with-custom-composite-decking-ideas). So, if you’re tired of rain ruining your backyard experience, read on—I’ll share the ins and outs of making this upgrade happen.
Now that we’ve set the stage, let’s dive into the essential steps to get your old deck ready for a moisture-proof makeover.
Assess Your Deck Structure Thoroughly
Begin by inspecting your existing deck for damage and stability. Look for rotted wood, loose boards, or sagging joists. Use a level to check for unevenness, which could indicate shifting supports. Document these issues to determine if repairs are necessary before proceeding. I once tackled this step by setting up a scaffold around my deck, carefully examining every joist, which revealed hidden rot that needed replacement—saving me from future collapse.
Plan Your Drainage Layout and Material Selection
Create a detailed plan for your drainage system, considering the deck layout and existing supports. Decide whether to install a plastic or metal catch basin kit, ensuring compatibility with your deck’s size. Think of it as laying the foundation for a raincoat—your system must cover all water pathways effectively. I used this approach when adding a drain to my deck, mapping out water flow from the roof gutters to the yard, which prevented pooling and water damage.
Install Support Blocks and Frame Reinforcement
Before adding the drainage channel, reinforce the existing support structure. Use pressure-treated blocking between joists at strategic points to prevent movement. Remember, a solid frame is like the backbone of a building—without it, everything collapses. When I did this, I secured additional blocking and braces, ensuring my drainage system wouldn’t shift or sag under weight or moisture exposure. For more insight into framing techniques, check out deck builder insights.
Lay Down the Drainage System Carefully
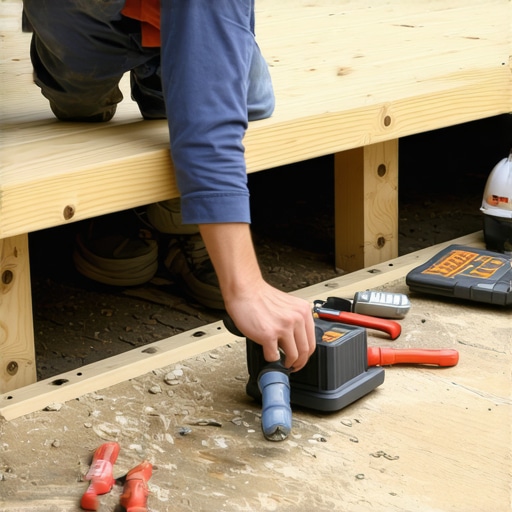
Position the drainage panels or pipes underneath the deck, ensuring a slight slope—typically 1/8 inch per foot—to direct water away. Use adjustable supports or spacers to maintain consistent elevation. Picture this step like creating a tiny river beneath your feet, flow guiding water away from the structure. During my project, I used a laser level to ensure the slope was uniform, which made a noticeable difference in water runoff efficiency.
Secure and Seal All Components Properly
Fasten the drainage panels securely to the joists with appropriate clips or screws, making sure they don’t lift or shift over time. Seal joints and edges with waterproof tape or sealant to prevent leaks. Think of it as dressing your system in a waterproof coat—impermeable and durable. When I did this, sealing the edges prevented water from seeping into the wood, dramatically reducing mold growth underneath.
Test the System and Make Adjustments
Before finishing, pour water at the highest point to test flow and check for pooling or leaks. Observe how water travels through the system, and make tweaks if necessary—adding supports or adjusting slopes. This step is like a dress rehearsal for your deck’s weatherproofing. My initial test revealed some standing water, prompting me to re-align a few panels, which improved drainage significantly.
Finish With Protective Coatings and Final Checks
Once verified, consider applying a waterproof membrane or sealant to your deck surface and edges. This acts as an extra barrier against moisture. Also, inspect all fasteners and seals periodically, especially after heavy rains. Proper finishing transforms your deck into a resilient outdoor sanctuary, ready for seasons of enjoyment. After completing my system, I noticed my deck stayed dry even during prolonged rains, confirming the effectiveness of my installation.
When it comes to outdoor living, many homeowners and even some professionals fall prey to myths and oversights that can compromise safety and aesthetics. A prevalent misconception is that all composite decking is virtually maintenance-free and universally suitable, but the reality is nuanced. Not all composite materials offer the same durability or appearance; premium options like capped-polymer composites tend to resist moisture and staining better, as detailed in experts’ guides. Misjudging this can lead to costly replacements down the line.
Another key nuance is in stair design—many believe that following standard dimensions is sufficient. However, proper stair stringer calculations considering your specific house grade and safety standards can prevent future accidents. For example, choosing treads and risers without accounting for local codes or personal needs may result in uneven steps or uncomfortable ascent. For advanced design insights, reviewing resources like this article on seamless stair transitions can be invaluable.
A common trap involves underestimating the importance of support structures beneath stairs. Installing support posts or blocking that are not adequately rated for outdoor exposure risks warping or collapse, especially in climates with fluctuating moisture levels. In fact, improper framing is one of the leading causes of deck and stair failure—underscoring the importance of consulting expert-built plans and adhering to safety standards. This is especially critical when integrating stairs with decks built using composite decking, which may have specific framing requirements. For comprehensive guidance, consider exploring outdoor construction trends.
Specifically, advanced DIYers or builders might overlook how composite decking’s expansion and contraction due to temperature changes impacts stair assembly. Failing to incorporate appropriate gaps or flexibility can cause warping, cracking, or tripping hazards. A meticulous approach—such as spacing boards with the right gaps and using weather-resistant fasteners—is vital. For details on best practices, the article on DIY stair failures offers crucial tips.
Have you ever fallen into this trap? Let me know in the comments. Keeping these nuances in mind not only ensures safety but also enhances the longevity and beauty of your outdoor spaces. Remember, detailed planning and expert advice are your best allies in creating stunning, durable decks and stairs that stand the test of time.Maintaining your outdoor deck and stairs over time requires the right tools and techniques to ensure longevity and safety. I personally rely on a selection of precise equipment to keep my composite decking looking its best and functioning properly. One indispensable tool is a digital moisture meter; it helps me monitor the moisture levels in wood and composite materials, preventing rot before it starts. For cleaning, I prefer a pressure washer with adjustable settings, as it effectively removes stubborn dirt without damaging delicate surfaces. When it comes to sealing and staining, a high-quality sprayer—such as a Wagner Control Spray—allows me to apply protective coatings evenly and efficiently, reducing surface imperfections.
To inspect structural integrity, I use a pry bar combined with a torque wrench to verify the tightness of fasteners and the stability of joists. These tools provide a hands-on approach, giving me confidence that my deck remains secure after weather changes.
Looking ahead, I believe the trend in outdoor living emphasizes smart, integrated maintenance solutions. Tools with IoT capabilities, like moisture sensors that connect to your smartphone, could revolutionize how we care for our decks in real-time.
How do I maintain my deck and stairs over time?
Regular inspections are your first line of defense. Use a moisture meter quarterly to detect hidden moisture issues, especially after heavy rains. Keep your surfaces clean with gentle pressure washing—avoiding high pressure near joints or delicate composite edges—to prevent dirt buildup that can promote mold growth. Seal or stain your decking every few years, applying with a quality sprayer for a seamless finish. Don’t forget to check fasteners and support structures periodically; a torque wrench can help you tighten fittings without over-driving, preserving the integrity of your project.
If you want to streamline maintenance, consider installing a programmable drip irrigation system for plants nearby, reducing water runoff onto your deck and minimizing damage. By combining these tools and methods, you’ll enjoy a safe, attractive outdoor space for decades. For expert insights on selecting the most durable composite decking, visit this guide. Start with a simple step: invest in a quality moisture meter and schedule quarterly checks to spot issues early. Your future self will thank you!
What the Builders Won’t Tell You About Durability and Design
My journey with decking and outdoor stairs has taught me that the smallest overlooked detail can make or break your project—whether it’s choosing the right support materials or understanding how temperature affects composite expansion. I once underestimated the importance of proper support spacing, which led me to rework my stairs after a few seasons. That lightbulb moment reinforced that meticulous planning and expert guidance are essential for lasting beauty and safety in outdoor living spaces.
Top Tools That Changed How I Maintain My Deck and Stairs
Investing in a high-quality moisture meter and a reliable pressure washer transformed my maintenance routine. Regular inspections with these tools helped catch issues early, saving me money and heartache. I trust brands like these experts’ guides for nuanced insights into composite care and repair. Staying proactive with the right equipment keeps my outdoor areas looking pristine year-round.
Now It’s Your Turn to Elevate Your Outdoor Space
Remember, the magic of a beautiful, resilient deck or staircase lies in the details—supporting, sealing, and maintaining them properly. With informed decisions and quality tools, you can create an outdoor oasis that endures every season. Don’t wait for water damage or mold to spoil your space—start implementing these tips today and enjoy a safe, inviting retreat for years to come.