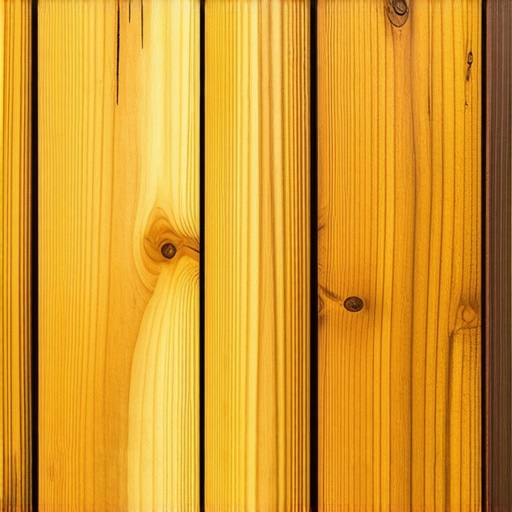
Have you ever stepped onto a newly constructed or refurbished deck only to feel like you’ve walked into a mismatched puzzle? I remember the first time I tried mixing different deck stains and paint tones. What should have been a seamless, inviting outdoor space ended up looking like a patchwork quilt—clashing colors and uneven finishes everywhere. It was frustrating, and honestly, a little disheartening. That lightbulb moment made me realize that achieving a harmonious color palette on your deck isn’t just about choosing pretty shades; it’s about understanding how to blend them intelligently, without making your space feel chaotic.
The Key to Cohesion in Deck Colors
Today, I want to share practical insights I’ve gathered from years of outdoor design work and personal trial and error. Whether you’re building a brand-new deck or updating an existing one, knowing how to mix deck colors effectively can transform your outdoor living area into a true oasis. The goal isn’t just to avoid the glaring patchwork effect but to craft an inviting, stylish space that feels intentional and polished. From selecting the right shades to understanding how lighting impacts color perception, I’ll guide you through proven strategies to achieve that perfect balance. If you’re eager to make your outdoor space look professionally designed without the hefty price tag, stay with me. By the end, you’ll have a clear plan to help you select and blend your deck hues confidently.
Is Switching Deck Colors Really Worth the Effort?
I’ll admit, early on, I made the mistake of thinking I could just pick two or three shades and hope for the best. Wrong. The biggest lesson I learned was that without a thoughtful approach, even the most beautiful colors can clash or look mismatched. Rushing into it without knowing about undertones or how different materials affect color can lead to a disjointed look. Trust me, I’ve seen stunning decks ruined by ignoring these details. If you’ve ever experienced a similar mishap, you’re not alone—and I’ve been there. Now, I also know there’s a way to get it right. For more on choosing durable, low-maintenance options, check out [this guide](https://deckdesignbuild.com/choosing-the-right-composite-decking-for-durable-low-maintenance-outdoor-areas).
So, what’s next? How do you ensure your deck doesn’t end up as a confusing mosaic of mismatched colors? The answer lies in understanding the principles of color harmony and application techniques—topics I’ll delve into in the upcoming sections. Before we dive into the specifics, let me ask—have you ever faced the challenge of blending multiple deck colors without it looking like a mishmash? If so, you’re in the right place. Let’s get started on transforming your outdoor space into a seamless, beautiful retreat.
,
Start with a Clear Color Palette
Begin by selecting a cohesive color scheme that complements your outdoor environment and home exterior. I recall my first attempt, where I picked shades based solely on personal preference, which resulted in a disjointed look. To avoid this, consult color theory basics—complementary, analogous, or monochromatic palettes. Use tools like online color scheme generators or paint swatches from your local supplier to narrow down choices. Keep in mind the natural surroundings; greens, browns, and grays often blend seamlessly with outdoor spaces.
Test Colors Before Committing
Always test your chosen shades on a small, inconspicuous section of your deck first. I learned this the hard way when I applied a bright stain to a corner, hoping it would tie all colors together—only to find it clashed harshly with the existing tone. Apply sample coats and observe how the colors look at different times of day, as sunlight significantly impacts perception. Remember, a color that looks perfect in the store may look entirely different under outdoor lighting conditions.
Consider Material and Finish
Different decking materials and finishes can alter color appearance. Composite decking, for example, often has embedded pigments that resist fading, but the final hue can vary due to the surface texture and light reflection. I once paired a matte-colored stain with glossy railings, which created a jarring contrast. To ensure harmony, choose materials with similar finishes—smooth with smooth, matte with matte. This consistency fosters a unified aesthetic and avoids visual chaos.
Plan Your Color Distribution
Decide how you’ll distribute your chosen colors across the deck. Do you want a dominant shade with accents, or an even blend? For a balanced look, I recommend using the main color on larger surfaces like decking and stairs, while secondary shades highlight features like railings or border trims. Visualize your layout beforehand or sketch it out. When I built my last deck, I used a darker border to frame the lighter main area, which visually anchored the space.
Use Transitional Elements for Seamless Blending
Transitional features like step treads, fascia boards, or custom trim can help blend different shades smoothly. For example, applying a medium tone to the step risers between light-colored treads creates a natural gradient. I once applied a stark color change at a stair landing, resulting in a disjointed look—adding a transitional strip softened the transition and made the design feel intentional. This technique is especially useful when combining multiple shades or materials.
Balance Colors with Lighting
Lighting dramatically affects how colors appear outdoors. Morning sunlight, midday bright sun, and evening shadows can all shift your perception. To compensate, observe your deck at various times before making final decisions. I installed some adjustable deck lighting and was surprised to see how certain colors looked more muted or vibrant under different lights. Incorporating soft ambient lighting can also add warmth and harmony, making your color choices more forgiving and visually appealing at night.
Adjust and Refine as Needed
Finally, don’t be afraid to tweak your colors after initial application. Sometimes, I found that a slight stain deepen or a new trim color enhanced the overall harmony. Remember, achieving perfect color cohesion is an iterative process. If you’re unsure about your choices, consulting a professional deck builder can offer valuable insights—check out this resource for more information.
Many homeowners delve into composite decking with the expectation of a maintenance-free, durable solution, but they often overlook critical nuances that can impact long-term satisfaction. Contrary to popular belief, not all composite materials are created equal; choosing the wrong type can lead to premature wear or aesthetic disappointment. For instance, many assume that all composite decks resist fading equally, but according to a study by the Wood Plastic Composite Association, UV stability varies significantly among brands, necessitating careful selection — learn more about [choosing the right composite deck](https://deckdesignbuild.com/choosing-the-right-composite-decking-for-durable-low-maintenance-outdoor-areas).
Keeping your outdoor living area in top shape requires not just careful planning but also the right tools and maintenance techniques. Over the years, I’ve identified a set of specialized equipment and digital tools that make routine inspections, repairs, and long-term upkeep much more manageable. Investing in high-quality gear pays off by extending the lifespan of your deck and ensuring safety. Here, I’ll share my personal recommendations for tools I rely on and why they stand out in professional and DIY projects alike.
Save Time with a Laser Level
A laser level is a game-changer for ensuring your deck remains perfectly aligned over the years. I personally use a cross-line laser that projects precise horizontal and vertical lines, which helps during initial construction and periodic recalibration. It’s invaluable when checking for warping or uneven settling of the structure, especially if your deck is built on uneven terrain. A reliable laser level ensures that your deck surfaces stay flush, preventing water pooling and structural issues. In the future, I believe laser technology will become more affordable and even more accurate, making it an essential part of any outdoor construction toolkit.
Power Drill with Clutch for Secure Fastening
My go-to power tool for routine maintenance tasks is a cordless drill fitted with a variable clutch. This allows me to control the screw depth precisely, which is crucial when securing composite boards without damaging the material’s surface. I prefer models with a high-torque motor and long-lasting batteries, so I can work efficiently without interruptions. Properly driven fasteners prevent loosening over time. As composite materials evolve, so do the fasteners and drilling techniques required for a seamless finish. Incorporating these drills into your toolkit makes ongoing repairs or updates quick and professional-looking.
Inspection Cameras for Hidden Issues
When inspecting underlying support structures or checking for moisture build-up, I swear by compact inspection cameras. These devices help detect issues like rot, mold, or termite damage that aren’t visible to the naked eye. I especially recommend models with flexible probes and high-definition screens. Regular inspections using such gadgets can catch small problems before they escalate, saving you money and hassle in the long run. As technology advances, expect these tools to become more affordable and even more detailed, making preventive maintenance more accessible for homeowners.
Cleaning Equipment that Gets the Job Done
Maintaining a clean surface is fundamental. I use a pressure washer with adjustable settings to remove dirt, algae, and stains effectively without damaging the composite surface. Pairing it with a soft-bristle brush allows me to reach into textured finishes. For more delicate areas, I switch to chemical cleaners specifically designed for composites, which protect the material’s integrity. Efficient, gentle cleaning preserves the aesthetic and prevents moisture retention that can lead to degradation. In the future, I anticipate advancements in eco-friendly cleaning agents that are even gentler yet equally effective.
Smart Planning Tools for Design Refinement
Beyond physical equipment, digital tools like 3D modeling software and color visualization apps help me plan and refine outdoor spaces. These platforms provide a realistic preview of how different color schemes or layout adjustments will look, reducing guesswork. They’re particularly useful for complex deck projects or when integrating stairs and other features seamlessly. As technology progresses, expect more intuitive interfaces and augmented reality features that bring your outdoor design visions to life before a single board is laid.
How do I maintain my deck’s appearance over time?
Routine inspections and cleaning are fundamental, but investing in the right tools can make this process faster and more effective. For example, using a laser level periodically helps detect shifts or warping early, preventing costly repairs. Regularly testing fasteners with a drill ensures security and safety. For hidden issues, inspection cameras reveal problems before they become serious. Incorporating these tools into your maintenance routine guarantees your outdoor space remains both beautiful and safe for years to come. Want to discover more advanced techniques? Try integrating a high-quality inspection camera into your next maintenance session—and enjoy the peace of mind it brings. To get personalized advice tailored to your deck, consider consulting a professional deck builder.
Lessons That Changed My Deck-Design Perspective
One of the most impactful lessons I learned was that patience trumps haste. Rushing to select colors without testing can lead to unpredictable results. I once painted a small section of my deck with a tone I loved indoors, only to find it clashed under natural sunlight. Now, I always test samples over several days, observing how lighting affects the hues. Additionally, embracing subtle contrasts rather than bold clashes transformed my approach; harmony is often found in understated differences. Remember, building a beautiful deck is as much about thoughtful planning as it is about the actual construction.
Another insight was the importance of understanding undertones. A shade might look perfect at first glance but can turn discordant once dry or under different lighting. I recommend choosing a primary color palette based on undertones—warm, cool, or neutral—and ensuring all selected paints or stains align within that spectrum. This awareness has prevented many costly mistakes and elevated the overall aesthetic of my outdoor spaces.
The third lesson steered me toward the power of transitional elements. Using trim, fascia, or edging in intermediate shades creates a seamless flow between contrasting tones. For example, a medium-tone border around a lighter deck surface can tie disparate colors together beautifully. This small step added sophistication and cohesion to my design and can do the same for your project.
Tools and Resources That Elevate the Decking Journey
- Laser Level – Ensuring perfect alignment isn’t just for the initial build. A reliable laser level helps maintain a pristine, level surface over time, saving headaches and future repairs. My preferred model offers clear lines and long battery life, making it an indispensable part of my toolkit.
- Quality Fasteners – Rust-resistant, high-strength fasteners are the backbone of a durable deck. I trust stainless steel or coated fasteners from trusted brands because they withstand the harsh outdoor elements and preserve the aesthetic integrity of my deck for years.
- Inspection Cameras – Hidden issues like rot or moisture buildup can spell disaster if overlooked. Keeping a compact inspection camera handy enables me to peek beneath the surface without dismantling entire sections. Regular check-ins with this tool uncover problems early, ultimately saving money and stress.
- Color Visualization Apps – Before committing, I use digital tools that allow me to experiment digitally with color schemes. These apps help me visualize how different tones play together, giving confidence that my choices will look stunning in real life.
Your Next Outdoor Adventure Awaits
Building a harmonious, eye-catching deck isn’t reserved for professionals—it’s something passionate homeowners like you can achieve with a little insight and the right tools. Remember, blending deck colors and finishes is an art grounded in patience, understanding, and experimentation. Every step you take toward mastering these techniques will bring you closer to creating an outdoor living space that feels truly yours. If you’re ready to elevate your project, explore how consulting a professional deck builder can turn your vision into reality. Now, tell me—what’s the most challenging part of designing your perfect outdoor retreat? Share below, and let’s inspire each other to create stunning decks that stand the test of time.