Ever spent a sunny afternoon proudly working on your outdoor space, only to realize that your deck isn’t as solid as you thought it was? I remember the first time I built a deck against my stone house and noticed that the frame wobbled when I stepped on it. That lightbulb moment made me realize how crucial proper securing methods are—especially when your foundation isn’t a traditional wood frame but solid stone. It’s a challenge many DIYers face, and I’ve learned firsthand that tackling this correctly isn’t just about convenience; it’s about safety and longevity.
The Real ‘Why’ Behind Proper Deck Anchoring to a Stone Structure
When I started my outdoor project, I assumed that attaching the deck frame to my stone house would be straightforward. But I quickly found out that stone presents a different set of rules compared to wood or concrete. A poorly secured deck can lead to dangerous wobbling, compromised structural integrity, and even costly repairs down the road. Trust me, I learned this the hard way early on, using shortcuts that seemed quicker but ended up costing me time and money. According to industry experts, improper fastening of a deck to a stone foundation can cause movement, cracking, and moisture intrusion, which accelerates deterioration. So, ensuring you have a reliable method from the start is essential for peace of mind and durability.
Today, I promise to share practical, proven techniques to anchor your deck securely to your stone house, avoiding common slip-ups and ensuring your outdoor oasis stays safe and stable for years to come. Whether you’re new to outdoor construction or have some experience, understanding the nuances of working with stone can make all the difference.
Will Your Approach Hold Up Over Time?
One mistake I made early on was relying solely on standard lag bolts without considering the unique properties of stone. It seemed logical at the time—simple and quick—but I learned that not all fasteners are created equal, especially when dealing with natural stone. For example, using the wrong type of anchors can lead to looseness or even damage the stone surface. If you’ve faced similar doubts or have concerns about whether your method will last, you’re not alone. The key is understanding the best practices and knowing which materials and techniques will truly stand the test of time, saving you headaches later.
For more tips on integrating seamless connections into your outdoor space, check out creating seamless transitions and how to incorporate sturdy, weather-resistant hardware that complements your home’s aesthetic.
Now, with that foundational knowledge in mind, let’s dive into the step-by-step process that will make securing your deck frame to a stone house a straightforward, even satisfying, project—one that results in a durable, beautiful outdoor feature built to last.
,
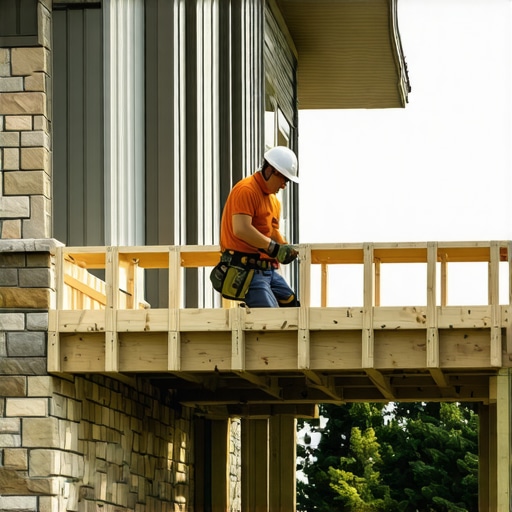
Drill Into the Stone Carefully
Start by selecting the right masonry bit corresponding to your fasteners. When I installed brackets on my stone facade, I used a hammer drill with a masonry bit, mimicking the precision of a sculptor chiseling stone. Mark the spots where the ledger will attach, and slowly drill into the stone, applying steady pressure. Keep a spray bottle nearby to cool the bit and reduce dust, which helps prevent cracking. This careful prep ensures your anchors hold firmly without damaging the stone’s integrity.
Use Appropriate Masonry Anchors
Brand new anchors can feel intimidating, but choosing the right type simplifies the process. Expansion anchors like wedge or sleeve types are reliable, especially for uneven surfaces. For my project, I opted for epoxy anchors, which provided superior grip inside drilled holes. Inject the epoxy into the hole using a caulking gun, then insert the threaded rod or anchor bolt, allowing it to set overnight. This method locks your deck frame securely, even with the natural irregularities of stone.
Align and Secure the Frame
Position your ledger board against the stone, ensuring it’s level using a laser level—a tool I highly recommend for accuracy. Shim the ledger as needed to maintain evenness across the entire length. Pre-drill holes through the ledger in alignment with your masonry anchors. Attach the frame using heavy-duty masonry lag bolts, tightening them incrementally to prevent stone stress. I learned from experience: over-tightening can cause cracks, so tightening firmly but carefully is key.
Add Weather-Resistant Fasteners
Since outdoor exposure introduces moisture, opt for stainless steel or galvanized fasteners to prevent rust. I replaced standard bolts on my deck with marine-grade stainless steel, which outperformed in humid conditions. These fasteners resist corrosion and maintain their strength over time, essential for long-term stability. Make sure all hardware is compatible with your anchor system to avoid slip or failure down the line.
Double-Check Structural Safety
Before finishing, gently test the firmness of your attachment points. If any movement is detected, tighten or reposition the anchors as needed. For added security, consider installing additional brackets at critical points, especially if your deck will carry heavy loads. Remember, precision during installation directly impacts safety and durability—think of it as anchoring a sailboat during a storm.
Maintain and Inspect Regularly
Once your deck is secured, schedule periodic inspections, especially after harsh weather. Look for signs of loosening or stone displacement. In my experience, catching issues early can prevent costly repairs later. Keeping your connections tight and free of debris ensures your outdoor living space remains safe and inviting for years.
For further insights on blending seamless transitions between outdoor elements, visit creating seamless transitions. When considering materials, explore composite decking trends for durable, low-maintenance options. And for professional assistance, see how expert deck builders can elevate your project at working with a professional. Remember, meticulous installation now will reward you with a safe, beautiful outdoor space for years to come.When it comes to designing durable and beautiful outdoor spaces, many people rely on popular beliefs that may actually hinder their projects. For example, a widespread myth is that using standard fasteners suffices for all deck constructions. However, in my experience, especially when attaching decks to stone or uneven surfaces, opting for specialized, climate-resistant fasteners makes a significant difference in longevity. Choosing the wrong hardware can lead to premature corrosion or structural failure. This nuance becomes especially critical in coastal or humid environments, where materials are under constant attack from moisture. Experts like those at the Wood Climate Research Program emphasize that selecting high-quality, corrosion-resistant fasteners is essential to prevent costly replacements and safety hazards.
Another common misconception involves composite decking. Many believe that all composite materials perform equally, but the reality is more complex. Not all composites are created with the same formulations or manufacturing standards. For example, capped composite boards with advanced polymer resins deliver better UV resistance and moisture protection. Exploring the latest trends, such as those in composite decking innovations, can help you make informed choices that stand the test of time.
Advanced deck design also involves understanding how stairs integrate with the overall landscape. It’s tempting to overlook the importance of proper stringer support and drainage, but these details impact safety and longevity. Incorrect calculations for riser heights or ignoring water runoff can result in uneven steps or rot. For a deep dive into avoiding these pitfalls, see designing safe and stylish stairs.
What about outdoor living beyond the deck surface? Many overlook how transitional elements, like seamless stair transitions or built-in planters, influence overall aesthetics and durability. Integrating these features carefully with expert guidance ensures your space looks cohesive and withstands the elements. My own projects have shown that neglecting simple details—like proper flashing or vapor barriers—can lead to hidden damage and costly repairs later. For innovative ideas, check creating seamless transitions.
**A crucial mistake often made is underestimating the complexity of working with natural stone or uneven terrain.** Many assume that standard anchoring techniques suffice, but the unique properties of stone demand specialized drilling and anchoring methods. Using the wrong anchors not only risks damaging the stone but can compromise your entire structure over time. Remember, regular inspections and maintenance are vital; moisture intrusion, for example, can accelerate deterioration if unnoticed. As I always recommend, a professional assessment often pays for itself in safer, longer-lasting results—more about this is available at benefits of working with a professional.
So, have you ever fallen into these traps or believed a common myth that didn’t quite hold up? Share your experiences in the comments below. Let’s continue the conversation about building not just beautiful, but enduring outdoor spaces that stand the test of time.
Maintaining a durable and beautiful outdoor space requires more than just quality materials; it demands the right tools and a consistent routine. Over the years, I’ve perfected my toolkit for deck and stairs maintenance, ensuring that my outdoor living areas remain safe and inviting. One of my go-to power tools is a high-quality cordless drill, which makes both installing hardware and performing fastener replacements quick and precise. I rely on a cordless impact driver for tightening high-torque fasteners, especially when securing composite decking, where the right amount of torque prevents board splitting and ensures longevity. My favorite impact driver is the DeWalt DCF887, thanks to its compact design, power, and variable speed control. Its adaptability lets me work comfortably in tight spaces, especially when installing concealed fasteners for a sleek look.
For cutting materials accurately, I recommend a laser-guided circular saw, like the Makita 7-1/4 inch, with a guide rail for perfect, straight cuts. Precision is vital for seamless transitions between stairs and decks, as highlighted in creating seamless transitions. Using this setup minimizes material waste and ensures safety—especially important when customizing stairs for unique slopes or curves.
When it comes to maintenance software, I utilize digital moisture meters, such as the Protimeter Surveymaster, to monitor humidity levels in wood and composite components. This helps me identify early signs of moisture intrusion, preventing rot and degradation. Regular inspections with such tools are crucial for long-term results—I recommend scheduling these biannually, especially after heavy rainstorms or winter freezes. Documentation of inspection data over time can reveal patterns and guide preventive measures, making your investment in outdoor living even more valuable.
Power washing is another vital routine, but it must be done correctly to avoid damage. I use a pressure washer with a variable nozzle, setting it no higher than 1500 psi for composite surfaces, and I always keep the wand at least 12 inches away from the surface. Don’t forget to add a biocide treatment periodically, which I do using a sprayer like the Chapin 61800—this keeps algae and moss at bay, especially in shaded corners. As seen in tips on composite decking, routine cleaning extends the life of your deck and keeps it looking its best.
In the future, I predict a rise in smart maintenance tools that leverage IoT technology to monitor deck health remotely, providing real-time alerts for needed repairs. Embracing these innovations now can save time—and money—by catching issues early and automating routine care.
Ask Yourself: How do I stay ahead of wear and tear on my outdoor living spaces?
One of my favorite approaches is to implement a scheduled maintenance plan, combining manual inspections with technological sensors. For example, installing moisture sensors in critical joints allows me to get immediate alerts on potential problems, giving me the chance to act before rot or failure occurs. I encourage you to try using a digital moisture meter or installing simple sensors to keep your outdoor structures functioning without surprises. With the right tools and routines, you’ll ensure your deck remains a stunning and safe retreat for years to come.
The Surprising Pitfalls No One Warns You About in Deck Construction
One of the hardest lessons I’ve learned is that quality materials are just the start. The true test comes in understanding how they interact over time, especially in challenging environments like stone or uneven terrain. I once underestimated the impact of subtle shifts in temperature or moisture cycle, which eventually led to small cracks and loosening fasteners—reminders that patience and ongoing vigilance are key to longevity.
The Hidden Wisdom I Wish I’d Discovered Early
- Choosing the Right Anchors Matters More Than You Think: I initially used generic anchors, but they failed me in exposed settings. Now, epoxy anchors and stainless steel fasteners are my go-to, providing peace of mind that the structure will last through storms and years of use.
- Poor Leveling Kills the Look and Function: Skipping precise leveling during installation can cause uneven wear and even structural stress. Investing in a laser level upfront saved me countless headaches, and I recommend it to anyone serious about quality.
- Moisture Management Is Non-Negotiable: Regular inspection with moisture meters revealed hidden issues long before they became serious. I learned that proactive maintenance not only extends the lifespan but also keeps the space safe for family and friends.
Tools and Resources I Depend On for Outdoor Success
My toolkit is tailored for durability and precision. A impact driver like the DeWalt DCF887 helps me secure fasteners tightly without damaging components. For cutting, a guided circular saw ensures clean, accurate slices—crucial when aligning stair risers or custom curves. To keep tabs on moisture levels, I rely on a digital meter such as the Protimeter Surveymaster, catching early signs of decay before they escalate. These tools, coupled with my ongoing education through resources like latest composite decking trends, keep me ahead of the curve.
Your Next Step Toward Outdoor Excellence Starts Now
Building a deck that withstands time and weather is an evolving craft. With a foundation rooted in real-world lessons and reliable tools, you’re empowered to create outdoor spaces that truly last. Don’t let common missteps hold you back—embrace the knowledge and inspiration to make your project a timeless success. Remember, each step you take today sets the stage for a safe, beautiful outdoor retreat for years to come.
What’s the biggest challenge you’ve faced when securing your outdoor space? Share your story below—let’s learn from each other’s experiences!
,