Last summer, I was finally finishing up my dream deck, basking in the glow of my own hard work. That is, until I stepped back, took one last look, and realized… the last board just wouldn’t sit flush. No matter how carefully I tried, it kept wobbling or, worse, showing unsightly gaps. It was a frustrating moment, but it was also a lightbulb moment. I knew I was missing a crucial step that could make or break the sleek look I was after.
If you’ve ever faced a similar struggle—trying to hide those stubborn screws or perfectly align that final piece—you know that installing hidden fasteners on a deck’s last board can seem like a tiny detail, yet it feels anything but. The last row is often overlooked, becoming an afterthought that compromises your deck’s appearance and safety.
But here’s the good news: mastering how to install hidden fasteners on that final board isn’t just possible; with the right approach, it’s straightforward. Today, I promise to share proven techniques and insider tips to help you secure that last piece seamlessly, giving your deck a professional, finished look.
### Is It Really Worth the Hassle to Hide Every Fastener?
I’ve been there—initially skeptical about the effort involved. I wondered if the extra work was justified, especially when surface-fastening seemed quicker. But I soon learned that what’s underneath matters just as much as what you see. Properly hidden fasteners protect your deck from water infiltration and rot, especially important when dealing with composite decking that’s designed for durability but still vulnerable at seams.
In my early days, I made the mistake of relying solely on surface screws for the last board, thinking it was faster. That one slip-up led to uneven gaps and rattling, which meant more work fixing issues later. Trust me, taking the time to learn these techniques from the start saves headaches down the line. According to industry experts, proper fastening methods can extend the lifespan of your deck by years—and who wouldn’t want that?
Now, let’s dive into how you can do it like a pro. From selecting the right tools to understanding specific fastener types, I’ll walk you through each step. Whether you’re a seasoned DIYer or a first-timer, these tips will help you achieve a flawless finish that stands up to weather and wear. Ready to turn that last, stubborn board into a showcase feature? Let’s get started.
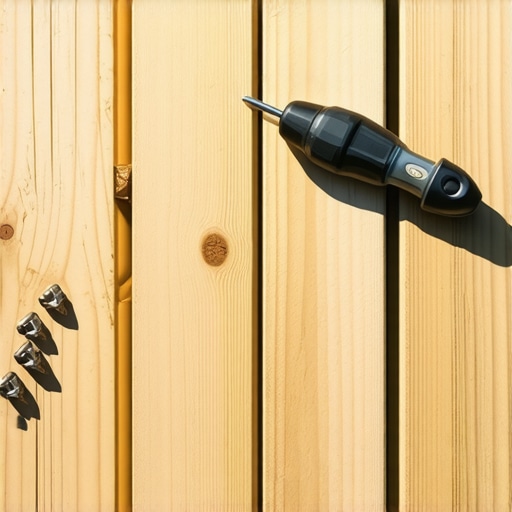
Prepare Your Tools and Materials
Gather a reliable set of hidden fasteners compatible with your deck’s material, a screwdriver or impact driver, a drill with appropriate drill bits, a tape measure, and a pencil for marking. Having the right tools on hand ensures efficiency and precision throughout the process.
Measure and Mark Your Final Board
Position the last board in its place, aligning it carefully with the previous boards. Use a tape measure and pencil to mark the exact points where the fasteners will be installed, ensuring even spacing. Remember, accurate markings prevent misalignment that could weaken the deck’s appearance and integrity. I once mismeasured, which caused an uneven gap, so double-check your measurements.
Pre-drill Pilot Holes
Pre-drilling helps prevent splitting, especially when working near the edges. Use a drill bit slightly smaller than the fastener’s diameter to create pilot holes at your marked points. This step promotes a clean, professional look and guarantees the fasteners sit flush. I learned this the hard way when skipping pilot holes resulted in cracked boards.
Install Hidden Fasteners
Align the fasteners with your pre-drilled holes. Most fasteners come with a driver bit or tool. Secure each fastener firmly but avoid overtightening, which can strain the composite material. A magnetic screw guide can make placement easier, especially when working alone. During my last project, I used a special tool for hidden fasteners, which cut installation time in half and provided a tight, flush finish.
Align and Secure the Final Board
Carefully position the board, carefully fitting it into place. Adjust as needed so the fasteners lock into the clips or guides integrated with the board. Check for even gaps between boards; a consistent spacing enhances aesthetic appeal and safety. Using a rubber mallet to gently tap the board into place helps achieve a snug fit without damaging the material.
Inspect and Finalize Installation
Once all fasteners are installed, inspect for flushness and alignment. Look for any wobbling or uneven gaps. Tighten fasteners if necessary, and ensure no screws are protruding. This meticulous check guarantees a durable, visually appealing deck. An example: I once missed a fastener, which caused squeaking when walked upon. Fixing it immediately saved me from future issues.
Seal and Protect Your Deck
Finish by applying a protective sealant compatible with your composite decking. This step preserves your deck’s look and extends its lifespan by preventing water infiltration around fasteners. Proper sealing around these points avoids early deterioration, a tip I emphasize learned after encountering water damage at unsealed joints. For tips on maximizing your outdoor space, consider consulting this guide.
Many homeowners and even some professional deck builders harbor misconceptions when it comes to outdoor living, especially regarding composite decking and stairs. One widespread myth is that all composite decking is maintenance-free. While it’s true that composite materials generally require less upkeep than wood, they aren’t entirely maintenance-free. Dirt, mold, and algae can accumulate, particularly in shaded, moist areas, leading to discoloration and deterioration over time. Regular cleaning and occasional sealing are essential to preserve its appearance and longevity, contrary to popular belief that it doesn’t need any upkeep.
Are All Composite Deckings Equally Durable Under Solar Stress
A common oversight is assuming that all composite decking handles UV exposure identically. Not all composites are manufactured with the same UV inhibitors or color stabilization technologies. Some brands may fade quickly or develop chalky surfaces after intense sun exposure, which can compromise aesthetics. Consulting experts or studying third-party reviews, like those from [Decking Trends](https://deckdesignbuild.com/composite-decking-trends-2025-the-ultimate-guide-for-outdoor-enthusiasts), helps you select the most resilient options for year-round outdoor use. Another fundamental misconception concerns stairs: many believe that standard stringer design suffices, but improperly built stairs can pose serious safety risks. For instance, unsupported or uneven risers can cause wobbling or even collapse, especially when exposed to weather extremes. Proper stringer support, tailored to the span and load, is critical. For complex designs, involving a professional can prevent costly missteps later—see how a skilled deck builder can turn your space into a safe oasis by checking [here](https://deckdesignbuild.com/how-a-skilled-deck-builder-can-turn-your-garden-into-a-private-oasis). The misjudgment of material deterioration is another peril. Many think that composite decks won’t rot, but failure to account for mechanical damage or improper installation near waterproofing details might lead to early problems. It’s essential to understand that high-quality composites with mineral cores or capped polymers, such as those discussed at [Mineral Core Benefits](https://deckdesignbuild.com/why-mineral-core-composite-is-the-best-choice-for-fire-pits), resist decay better but still require correct mounting and sealing practices. Overlooking these nuances in favor of cheaper, lower-grade products often results in more repair work down the line. Remember, investing in a well-designed outdoor space with quality materials and expert craftsmanship pays off in longevity, safety, and style. To ensure your project aligns with best practices, consider reaching out to professionals via [our contact page](https://deckdesignbuild.com/contact-us). Make sure your outdoor living space is built to last—don’t fall prey to these widespread myths that can undermine your efforts. Have you ever fallen into this trap? Let me know in the comments.Creating a durable and beautiful outdoor living area requires not only careful planning but also the right tools and ongoing maintenance. Investing in high-quality equipment ensures that your deck, stairs, and composite materials remain functional and attractive for years to come. One tool I highly recommend is a ** cordless impact driver with a clutch setting,** which provides the power needed for driving fasteners without over-tightening, especially useful when installing hidden fasteners on a deck’s last boards. Additionally, a **digital moisture meter** helps monitor moisture levels in wood and composite materials, preventing rot and warping over time. Regular cleaning is crucial; I use a **low-pressure electric washer** specifically designed for composite decks—avoiding high-pressure stream that could damage the surface. To keep fasteners secure, I routinely check for any loose screws using a **magnetic screw guide,** making adjustments before small issues develop into costly repairs. Software like **Deck Design Software** streamlines planning and visualization, ensuring proper spacing and alignment before installation, which saves time and reduces waste. Looking ahead, advancements in **smart tools** with integrated sensors may soon help automate maintenance alerts, leading to even longer-lasting outdoor structures. How do I maintain my composite decking and stairs over time? I recommend applying a **specialized sealant** annually, particularly around fasteners and joints, to prevent water infiltration and UV damage. This proactive approach extends the decking’s lifespan and preserves its appearance, aligning with the latest industry insights from experts like those at [Decking Trends](https://deckdesignbuild.com/composite-decking-trends-2025-the-ultimate-guide-for-outdoor-enthusiasts). To get started, try upgrading your toolkit with an impact driver equipped with a clutch and use a moisture meter after heavy rains—these small steps make a big difference. For more detailed maintenance routines tailored to your specific materials, don’t hesitate to reach out through [our contact page](https://deckdesignbuild.com/contact-us). Staying ahead with proper tools and consistent care will ensure your outdoor oasis remains stunning for years to come.
The Lessons That Took Me by Surprise
One of the most profound lessons I learned was the importance of patience over haste. In my eagerness to finish, I initially skipped careful measurements, which led to uneven gaps and wobbly boards. That experience taught me that meticulous preparation—not just the big-picture vision—makes all the difference in creating a flawless outdoor space.
Another insight was understanding that the smallest details, like pre-drilling pilot holes, dramatically reduce the risk of splitting and ensure a cleaner, more professional finish. It’s a simple step, but overlooking it can compromise the entire project. Embracing these micro-moments of care transformed my confidence and the final result.
Lastly, I realized that investing time in researching the right fasteners and tools, such as impact drivers and hidden fasteners, saves endless frustration and rework. Quality equipment and materials aren’t just conveniences—they’re essentials that elevate the durability and appearance of your deck, making every dollar spent worthwhile.
Tools and Resources That Changed My Approach
For quick, precise fastener installation, I rely on the specialized tool for hidden fasteners. It’s been a game-changer, cutting installation time in half and ensuring a flush surface. Additionally, reading the latest trends in composite decking helped me choose materials resistant to UV fading and mold, which is vital for longevity.
For planning and visualization, I use the deck design software. It prevents costly mistakes and ensures consistent spacing and alignment. Lastly, being informed by the expert articles on durable composites gives me peace of mind that my choices withstand the test of time and weather.
Embrace Your Outdoor Transformation Journey
Building or finalizing an outdoor deck isn’t just about the physical structure—it’s a personal journey of creativity and learning. Every project has its unique challenges, but with the right knowledge, tools, and patience, you can achieve a stunning transformation that brings lasting joy. Don’t hold back; start today, and imagine the memories you’ll create on your new outdoor oasis. If you’re ready to elevate your home’s exterior, consider reaching out to professionals for expert guidance here. Your perfect outdoor space is just a few thoughtful steps away!