Have you ever set up an outdoor kitchen on your multi-level deck, only to realize that the counter height feels awkward the moment you start preparing food? I made that mistake early on—built the counter too high, and suddenly chopping vegetables became an upper-body workout. It was a clear sign I hadn’t paid enough attention to something seemingly small but hugely impactful: the height of the outdoor kitchen counter. That lightbulb moment taught me a valuable lesson about balancing comfort with functionality, especially on multi-level decks with stairs and varying elevations.
Why Counter Height Matters More Than You Think
The right counter height on your outdoor kitchen isn’t just about aesthetics or following a random number. It’s about creating a space that invites you to cook, entertain, and enjoy your backyard without strain or frustration. When your counter is too low, you’ll find yourself bending over constantly; if it’s too high, chopping and prep work become uncomfortable or even painful. And on a multi-level deck, these issues are amplified—hopping between different levels and stairs can turn what should be a relaxing meal prep into a series of awkward adjustments.
Choosing the correct height can make the difference between a functional, enjoyable outdoor oasis and a space that causes more frustration than relaxation. Based on my personal journey—and plenty of trial, error, and advice from seasoned deck builders—I’m here to guide you through making that critical decision.
Is the Standard Height Really Enough for Outdoor Cooking?
Early in my project, I assumed that a standard countertop height—around 36 inches—would work perfectly outdoors. Turns out, I overlooked the importance of considering both the typical user’s height and the specific layout of my multi-level deck. Building that mistake into my plan was a lesson in how small details can have big consequences. I learned that the ideal height isn’t a one-size-fits-all, but rather a tailored solution based on personal comfort and the unique features of your outdoor space. For more insights, you might find this article on designing sustainable outdoor kitchens helpful.
As we move forward, I’ll show you how to evaluate your needs and adapt your outdoor kitchen counter height to suit your deck’s geometry and your lifestyle. Ready to transform your outdoor cooking area into a comfortable, functional space? Let’s dive into the practical steps that helped me—and can do the same for you.
Assessing Your Needs and Environment
Start by measuring your standing height and consider how you plan to use your outdoor kitchen. Do you prefer standing while cooking or sitting? On my project, I used a tape measure to note my height—also factoring in gloves and apron layers—and mapped out where I would prep and serve food. This initial step ensures the counter won’t cause strain during prolonged use.
Choosing the Right Counter Height
Most standard outdoor counters sit around 36 inches, but I found that adjusting by 2-3 inches made a big difference. For me, a height of 38 inches aligned better with my height, reducing back bend and arm fatigue. Think of your outdoor kitchen like a tailored suit—perfect fit enhances comfort. When selecting height, consider your primary activities and your deck’s layout.
Account for Deck Architecture and Multi-Level Features
Multi-level decks often include stairs and varying elevations, which complicate uniform counter placement. I tackled this by drawing a detailed plan, marking where the counters would sit at each level. Using a level and string line, I mapped out consistent heights across different sections to prevent awkward transitions. This approach kept the flow natural, avoiding the “stairs leading to a counter that feels out of sync.”
Measure Stairs and Platforms Carefully
To integrate counters with stairs, measure riser heights and tread depths meticulously. I used a combination square and tape measure to get exact dimensions, then factored in overhangs and clearance for comfortable movement. Remember, the goal is seamless transitions—like discreetly blending stair risers into counter legs.
Create Transition Zones for Smooth Flow
Transitions between levels should be inviting, not jarring. I built custom step nosings with matching composite decking to match the main counter height, ensuring safety and visual harmony. For example, I added a small step with a 1-inch rise between the main deck and a lower grilling area, tested several prototypes, and settled on a design that felt natural underfoot.
Adjust and Test Before Final Installation
Once your measurements are set, mock up the counters with temporary supports. I used scrap lumber to simulate counter heights and stepped onto them to evaluate comfort. This hands-on test revealed unexpected issues—like counter edges being too sharp or heights feeling awkward—which I corrected before fixing the final structure. It’s faster and less messy than iterative adjustments after installation.
Incorporate Safety and Accessibility Considerations
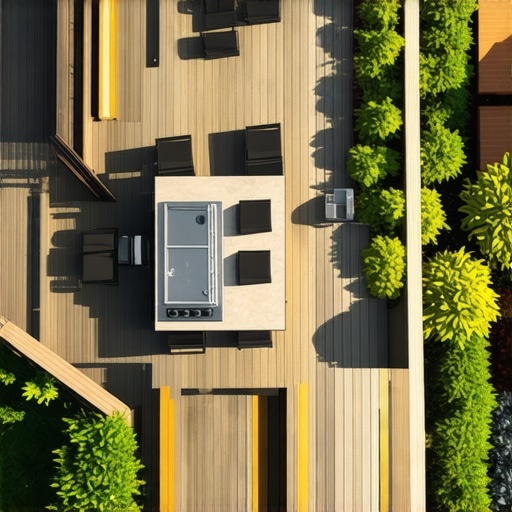
For multi-level decks, ensure that counters don’t obstruct stair access or create tripping hazards. I added visual markers—bright paint stripes on edges—and kept clear pathways. Also, consider future accessibility needs; adjusting counter height slightly higher may help, especially if you or guests have mobility challenges.
Leverage Professional Help for Complex Designs
Complex multi-level integrations can benefit from a professional deck builder’s expertise. They can help optimize space, ensure code compliance, and provide durable materials for exterior conditions. Learning from my experience, I booked a consultation and was glad I did—my outdoor kitchen turned out safer and more comfortable, with seamless transitions across levels. Check out how professional builders can simplify your project.When it comes to decorating your outdoor living space with composite decking, many assume they’re fully informed. However, even seasoned DIYers often overlook subtle yet crucial details that can make or break the longevity and safety of their decks. Let’s dissect some widely held beliefs and reveal the hidden nuances that experts know, which can save you from costly mistakes. One common myth is that all composite decking is maintenance-free. While it’s true that high-quality capped composites require less upkeep, they still demand proper installation and regular inspections to prevent issues like warping or mold. Relying solely on the product’s promise of ease can lead to neglecting critical support structures or drainage considerations. This is where the wisdom of consulting a professional deck builder proves invaluable. A surprising trap many fall into involves overlooking the importance of precise joist spacing. Too wide, and the deck risks bouncing; too narrow, and you waste material and complicate installation. Experts recommend adhering strictly to manufacturer specifications, as improper spacing can void warranties and compromise safety. In the realm of stairs—an often neglected element—many build without considering the seamless transition between deck levels. This oversight not only impacts aesthetics but also safety and code compliance. Proper riser height, tread depth, and handrail placement are vital, and advanced builders know that integrating stairs with varied deck heights requires meticulous planning. Transition design is a subtle art, yet its mastery elevates an ordinary deck into an elegant outdoor oasis. What’s more intriguing is the misconception around material choices for stairs, with some people assuming wood is always best. However, aluminum stringers and composite treads now offer superior durability and minimal maintenance—saving you time and headaches in the long run. Navigating these complexities underscores the importance of detailed planning and expert advice. So, have you ever fallen into this trap? Let me know in the comments. Remember, understanding these hidden nuances can significantly enhance both the safety and beauty of your outdoor space.
Keeping It Working: Essential Tools for a Durable Outdoor Space
Ensuring your composite decking and outdoor living areas stand the test of time requires precision, proper maintenance, and the right equipment. From routine cleaning to long-term upgrades, having a well-stocked toolkit can make all the difference. I personally swear by a few specialized tools that streamline the process and safeguard my investment.
First, a high-quality pressure washer with adjustable spray nozzles is indispensable. I’ve found that a model with a rinse, soap, and scrub setting allows me to clean the deck surface thoroughly without risking damage to the composite material. It’s tempting to blast away grime with the strongest spray, but a gentle touch preserves the deck’s appearance and longevity. Remember, regular maintenance is key to preventing mold, staining, and deterioration.
Next, a precision angle grinder fitted with a diamond-tipped blade is perfect for addressing stubborn stains or for trimming composite boards during custom projects. I’ve used this to clean up slight warping or to fix small chip damages, ensuring a seamless surface. It’s worth investing in a model with variable speed control to prevent scorching the material. Proper safety gear, especially eye protection and dust masks, is a non-negotiable when operating power tools near composite surfaces.
For visual alignment and consistent spacing, I rely on laser levels. These tools save me from the frustration of uneven joints or misaligned stairs, especially when working across multiple levels. A laser level guarantees straight lines and precise measurements over large areas, which is crucial for aesthetic appeal and structural integrity.
When it comes to fasteners, I recommend using a collated screw gun with adjustable torque settings. This accelerates installation and ensures screws are driven to the optimal depth, preventing over-tightening or underdriving. Using corrosion-resistant, color-matched screws reduces visible hardware and extends the lifespan of your deck’s fastenings.
For ongoing monitoring, a moisture meter can detect hidden issues beneath the surface. Spotting areas of excess moisture early helps prevent rot or buckling—an invaluable tool for decks built on slopes or near water sources. I check the substructure periodically, especially after heavy rains, to ensure everything remains dry and stable.
How do I maintain my outdoor living setup over time?
Beyond tools, developing a routine maintenance schedule is vital. Regular inspections, cleaning, and minor repairs now save big money later. Additionally, upgrading your hardware and decking materials as newer, more durable options become available can keep your outdoor space looking fresh and functioning flawlessly. For example, staying informed about latest trends and innovations can inspire you to retrofit or expand your project with the most resilient materials.
Thinking ahead, consider automation tools for lighting and irrigation. Smart systems connected to your smartphone can manage water flow and illumination efficiently, reducing wear and tear caused by manual operation.
Finally, if your project involves complex multi-level designs or stairs, consulting a seasoned professional deck builder can ensure long-term performance and safety. They can provide tailored advice and support tailored to your climate, usage patterns, and aesthetic preferences. Don’t hesitate to try out these advanced tools and tips—I guarantee you’ll see increased durability and satisfaction in your outdoor living space.
The Hidden Truths I Discovered About custom outdoor decks
One of the biggest lightbulb moments was realizing that the perfect deck isn’t just about good materials—it’s about meticulous planning and anticipating future needs. I underestimated how much detail goes into creating a seamless, durable outdoor space, leading to costly adjustments later. This taught me that thorough site assessment and thoughtful design are the backbone of a successful project.
Another lesson was that flexibility during construction can save you from headache—building in adjustable supports or mock-ups allowed me to tweak heights and transitions before finalizing. Overlooking this step could result in uneven surfaces or awkward transitions, especially on multi-level decks.
Lastly, I learned that investing in the right tools and professional help isn’t a sign of weakness but a smart move. It ensures safety, quality, and longevity—key when your outdoor space becomes the hub of family gatherings and entertainment.