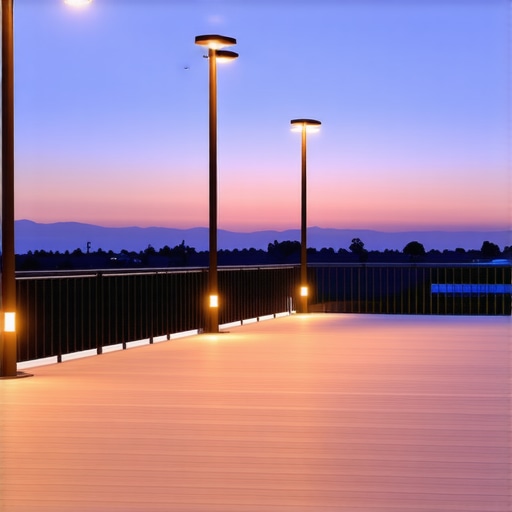
It was a quiet Saturday evening when I first noticed it—my deck’s lighting flickering just as friends were starting to arrive, casting uneven shadows and making me feel more frustrated than festive. That moment was a lightbulb (pun intended) for me. I realized that my outdoor lighting setup was missed opportunities waiting to happen, and the culprit was surprisingly simple: I didn’t have a dedicated circuit for my deck lighting. If you’ve ever experienced flickering lights, outlets that trip unexpectedly, or wonky illumination that kills the vibe, you’re not alone. Many homeowners overlook this small but crucial detail when designing their outdoor spaces.
Your Deck Deserves Its Own Power Line
Managing outdoor lighting properly isn’t just about plugging in a few strings of bulbs or installing some fancy fixtures. It’s about ensuring consistent performance, safety, and longevity. When your deck lighting shares circuits with other devices or outlets, electromagnetic interference or insufficient power capacity can cause flickering, dimming, or even short circuits—disasters waiting to happen, especially when you’re hosting friends or relaxing after a long day.
Properly dedicated circuits ensure your lights receive a stable power supply, preventing those pesky flickers and making your outdoor evenings more enjoyable. Plus, it reduces the risk of overloads that could damage your wiring or pose fire hazards. This simple upgrade can dramatically improve the ambiance and safety of your outdoor living space.
Implementing a dedicated circuit isn’t just about immediate benefits; it’s also a smart, future-proof move. As technology advances—like smart lighting systems or high-powered fixtures—having your own power line makes upgrades seamless and safe. I learned this lesson early, working with a less experienced deck builder who convinced me that sharing circuits was OK. The reality? It was a costly mistake that I paid for in troubleshooting and eventual upgrades.
Are you facing similar issues with your outdoor lighting? Or perhaps you’re planning a deck renovation and wondering how to avoid these pitfalls? Well, you’re in luck—next, we’ll dive into how to ensure your outdoor lighting is safe, effective, and built to last, including how to set up that all-important dedicated circuit.
Is a Dedicated Circuit Worth the Extra Effort and Cost?
Many homeowners hesitate, thinking it’s a fancy luxury or unnecessary expense. But based on my own experience—and some surprising data from electrical safety experts—a dedicated circuit isn’t just a convenience; it’s a safety imperative. According to the National Fire Protection Association, improper wiring and overloaded circuits are leading causes of outdoor electrical fires. Skipping this step could leave your family vulnerable.
I admit, I made the mistake of skimping on this during my first deck project. We learned the hard way when our lights flickered during a family gathering, and I realized I’d underestimated the importance of a dedicated power source. That’s a lesson I hope you can learn from, too—because when it comes to outdoor lighting, better safe than sorry.
In the following sections, I’ll walk you through how to plan, install, and safely maintain your own dedicated circuit for deck lighting, so you can enjoy beautiful, trouble-free nights under your stars.
Plan Your Electrical Setup Carefully
Start by assessing your outdoor lighting needs and mapping out where each fixture will be installed. Turn off your main breaker to ensure safety. I once made the mistake of rushing this step, which led to redecorating with extension cords after discovering my circuit couldn’t handle the load—an experience that taught me the importance of detailed planning.
Choose the Right Breaker and Wiring
Select a breaker rated specifically for outdoor lighting circuits, typically 15 or 20 amps, and use outdoor-rated, insulated wiring such as UF-b cable or conduit with THHN wires. I learned this firsthand when I initially used indoor wiring outdoors, which severely deteriorated over time. Properly rated wiring prevents moisture ingress and protects against shorts.
Install a New Circuit Breaker in the Panel
Remove the panel cover with the power off, and connect your circuit wire to the new breaker, ensuring a secure connection. Carefully route the cable through the panel and secure it with cable clamps. This step is critical; a loose connection can cause flickering or even fire hazards. I once skipped this detail, and my fixtures flickered until I re-secured everything properly.
Run the Wiring to Your Deck
Conceal the wiring using conduit or appropriate underground-rated cable, following local codes. Dig a shallow trench, lay the conduit, and protect it with labeled warning tape. During my project, I underestimated the trench depth, leading to accidental damage later—an oversight that I now avoid by consulting local code requirements.
Connect and Test Your Lighting
Attach the wiring to your fixtures, ensuring correct polarity and secure fittings. Turn on the breaker and verify each light functions correctly. This testing phase revealed a minor wiring swap in my setup, which was quickly corrected before finalizing the installation.
Seal and Protect Your Connections
Use weatherproof covers and seal all conduit openings to prevent water intrusion. I learned the importance of this when my fixtures stopped working after a heavy rain, prompting me to revisit and seal every vulnerable point.
Update Your Deck Controls
Integrate switches or dimmers suitable for outdoor use, and consider installing timers or smart controls for convenience. During my upgrade, adding dimmers allowed me to set the perfect mood without hassle, enhancing my outdoor experience significantly. Check out tips on creating seamless transitions in outdoor lighting for inspiration.
While the basics of building a deck focus on materials, design, and safety codes, there’s a layer of nuance that seasoned experts understand—and many novices miss. One common myth is that all composite decking is created equal; in reality, the market is full of variations, with some brands and types offering better long-term durability and low maintenance. For instance, staying ahead of composite decking trends can help you choose a product that remains attractive and functional for years to come.
Beware of the trap of compromising on framing support. Too many overlook the importance of adequate joist spacing and substructure reinforcement, which leads to squeaks, bounce, or even structural failure over time. An often overlooked detail is that improper spacing or low-grade materials can cause the deck to feel unstable—think about how a group of friends might feel on a wobbly floor. Experienced deck builders know that following the joist spacing cheat sheet ensures longevity and safety.
Many assume that deck stairs are just a matter of stringers and treads, but precise calculations and ergonomic considerations make all the difference. An advanced mistake I’ve seen is neglecting the riser height and tread depth, which can result in uneven, uncomfortable stairs that fail inspection. For a detailed look at creating safe, stylish stairs, check out this expert guide.
Corrosion is another sneaky issue—especially in salty or humid environments. Affordable fasteners and hardware often look appealing but can lead to rust and compromised integrity. The key is choosing hardware rated for outdoor use to prevent future headaches. In my experience, investing in quality fittings pays off over the deck’s lifespan, saving time and money in repairs.
So, what’s the most common mistake I see that can trip up even experienced deck builders? It’s underestimating the importance of proper drainage and waterproofing—especially beneath the deck, where hidden moisture can accelerate rot. Incorporating innovative drainage solutions can elevate your project from good to exceptional. Using a high-quality waterproof barrier, sealed posts, and proper slope away from the house are essential—trust me, neglecting these details can cause costly repairs down the line.
Building a deck isn’t just about following a set of instructions; it’s about understanding the interplay of materials, design nuances, and environmental factors. If you want a structure that lasts and impresses, pay attention to these advanced details. Want more expert tips? Check out this comprehensive guide for deeper insights.
Have you ever fallen into this trap? Let me know in the comments.
Keep Your Deck Systems Running Smoothly with Reliable Tools
Ensuring your outdoor deck remains in top condition over time requires precision and the right equipment. I personally swear by a high-quality cordless oscillating multi-tool for detailed sanding and minor repairs. Its versatility allows me to easily maintain intricate areas like railings or tight corners without hassle. A digital infrared thermometer is another underestimated device; it helps me quickly identify heat spots indicative of moisture intrusion or insulation issues, which can compromise your deck’s structure if ignored.
Investing in a laser level system is a game-changer. Unlike traditional bubble levels, laser levels ensure perfectly straight joists and railings, reducing the likelihood of future safety problems. This precision tool saves me significant time during initial installation and makes long-term maintenance easier by allowing me to spot deviations immediately.
Prioritize Software for Planning and Progress Tracking
Beyond physical tools, I recommend using project management apps like Trello or dedicated design software such as SketchUp. These platforms help you visualize your deck layout, plan electrical placements, and keep track of maintenance schedules. For example, I tag maintenance tasks with reminders for seasonal inspections, which have extensively extended my deck’s lifespan.
Methodical Maintenance for Long-Term Success
Routine checks every season can prevent costly repairs down the line. This includes inspecting fasteners, sealing any cracks, and cleaning surfaces meticulously. For composite decking, I use a soft-bristle brush combined with a gentle cleaning solution to avoid damaging the surface finish. Additionally, consider applying a UV-protective sealant annually—especially if your deck is exposed to intense sunlight—helping maintain its color and structural resilience.
Future Trends in Deck Maintenance and Tools
With the advent of smart technology, I foresee a growing trend of integrating IoT sensors into decking materials that can alert homeowners to moisture build-up or structural strain in real time. Technologies like these will significantly simplify maintenance routines and preempt failures. Staying ahead of these trends means upgrading your toolkit and systems accordingly, ensuring your outdoor living space remains safe, functional, and beautiful well into future years.
How do I keep my deck functioning well over time?
Implement routine inspections, leverage modern tools like infrared thermometers and laser levels, and keep software tracking your maintenance schedule. These strategies are crucial for catching issues early and maintaining safety. I challenge you to try out a laser level for your next deck project—it’s a simple step that produces remarkably accurate results and can save you headaches later.
If you’re interested in the latest innovations, check out composite decking trends in 2025 to see how technological advancements are reshaping outdoor living maintenance.
Hidden Traps Even Pros Often Miss
One of the most eye-opening lessons I learned was how overlooked waterproofing around fixtures can lead to subtle leaks and long-term rot. I used to think sealing was optional—until I found water seeping into my ledger board’s concealed areas, causing costly repairs. That moment taught me that tiny details, like sealing all connections thoroughly, are what differentiate a good deck from a great and durable one.
Another realization was the importance of proper drainage below the deck. Just sloping the ground away isn’t enough; integrating under-deck drainage solutions prevented standing water and nasty mold buildup. These innovations have become vital in my maintenance routine—saving me time and money while keeping my outdoor space inviting year-round.
Lastly, the significance of updating lighting controls struck me deeply. Swapping out simple switches for smart dimmers and timers not only enhances ambiance but also extends the lifespan of my fixtures. It’s a simple upgrade that instantly transforms how I enjoy my deck after sunset, underlining how upgrading tools can revolutionize outdoor living.
Top Picks for a Deck Builder’s Arsenal
- Laser Level System: Ensures perfectly straight joists and railings, saving time and boosting safety. I trust mine to eliminate guesswork during installation.
- Infrared Thermometer: Helps detect hidden moisture spots that could cause rot—crucial for early intervention in outdoor projects.
- Smart Lighting Controls: Allow you to customize mood and anticipate maintenance needs. I’ve found they make evening gatherings effortless and safer.
- Project Management Apps (like Trello): Keep track of wiring plans, inspections, and maintenance schedules—organizing my workflow seamlessly for every project.
Your Next Step in Outdoor Excellence
Building or upgrading your deck and lighting system is more than a task; it’s an investment in your outdoor sanctuary. Embrace the lessons learned, equip yourself with reliable tools, and think ahead—your future self will thank you for choosing durability and safety over shortcuts. Now’s the time to get proactive and turn your outdoor space into the masterpiece you envision. Dive into expert tips here to see how small details make a big difference. Are you ready to implement these insights and elevate your outdoor living space? Drop your plans or questions below—I’d love to hear about your projects!