It was a bright Saturday morning when I finally decided to give my outdoor deck a much-needed upgrade. As I stood there, inspecting the wobbly railing posts, I couldn’t help but recall the many times I had installed railings, only to find them loose and unstable months later. That frustrating wobble, that nagging doubt about safety—that was my lightbulb moment. I realized that despite following all the standard installation tips, something crucial was missing, something I hadn’t noticed at first: the hidden bracket.
Why Most Railing Posts Don’t Last Without This Secret Weapon
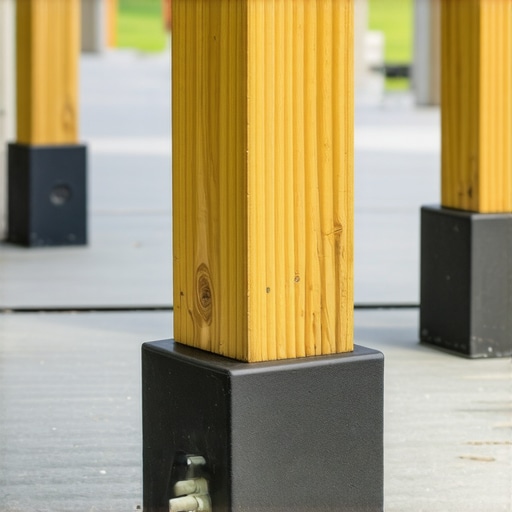
Many DIY enthusiasts and even seasoned deck builders overlook a small, seemingly insignificant component that can make or break the stability of your railing posts: the hidden bracket. It’s not the visible, decorative hardware people notice; it’s a discreet support inside the post that’s responsible for anchoring it securely to the surface below. This tiny brace acts as the backbone of your railing, providing the rock-solid foundation that keeps the entire structure safe and sturdy.
Without this bracket, even well-installed posts are vulnerable. Over time, the weight of the railing, environmental stressors, and ground shifts can cause posts to loosen or wobble. I learned this the hard way early on—my first few railing installations felt sturdy at first, but after a season of weather, they were barely hanging on. The secret is that most brackets used in standard installations aren’t designed to handle high wind areas or heavy loads without this specialized hidden support.
Now, I make sure to incorporate this component in every project. Trust me, it’s a game-changer. It might seem like a small detail, but it’s the one feature that guarantees your railing remains rock solid for years. If you’re tired of loose posts and shaky railings, this is the fix you’ve been missing.
Thinking of upgrading your deck or replacing old posts? I recommend checking out [this article](https://deckdesignbuild.com/why-hidden-fasteners-can-be-a-problem-in-high-heave-areas) to understand how proper fastener choice impacts long-term stability. Incorporating the right hidden bracket can save you headaches—and costly repairs—down the line.
Ready to ensure your outdoor space remains safe and stylish? Let’s explore how this little-known bracket can make all the difference, and how you can implement it in your next project.
Select the Right Hidden Brackets
Start by choosing heavy-duty, corrosion-resistant brackets designed for outdoor use. I recommend inspecting local supplier options for high-quality hardware. Remember, a sturdy bracket is your deck’s backbone, much like a strong tongue-and-groove joint in a well-constructed wooden table. One time I bought cheap brackets, and within a year, I had to redo the entire railing; it was messy but a valuable lesson in quality. Now, I only select brackets rated for high wind areas.
Prepare the Post and Base Surface
Lay out your post location accurately. Use a chalk line to mark the precise spot, ensuring the post will sit directly over the support. Clean the surface thoroughly with a wire brush to remove any debris or loose material. Think of this as sharpening your tools before starting a woodworking project: it ensures cleaner, more reliable assembly. Once, I found a layer of dirt and paint residue that I neglected, which caused my post to sit unevenly—took double the time to fix later.
Cut and Position the Bracket
Measure the depth at which the bracket should sit within the post, typically about one-third in from the bottom. Use a saw to make a clean, straight cut, then insert the bracket into the post at the marked location. Secure it temporarily with clamps. This step is akin to fitting a puzzle piece precisely; any mismatch can cause wobbling. I once was impatient and rushed this step, only to discover the post wobbled after installation, requiring me to redo the entire process.
Anchor the Bracket to the Base Surface
Position the post with the bracket attached onto the support surface. Use a drill with appropriate masonry or wood bits to drive fasteners through the bracket into the base. Tighten screws firmly—think of it as tightening bolts on a bicycle; proper torque prevents future loosening. I once over-tightened, causing the bracket to deform slightly, which made aligning the post difficult. Proceed with caution and follow manufacturer torque specifications.
Install and Secure the Post
Slide the post onto the bracket assembly, ensuring it seats fully and aligns with adjacent posts. Use a level to verify vertical placement; it’s crucial for aesthetic and safety reasons. Once aligned, secure the post to the bracket with additional fasteners if necessary. Remember, a level kept me from ending up with crooked railings, which would be a real eyesore and safety hazard. I recommend temporarily clamping all posts before final tightening to visualize the overall line.
Final Checks and Reinforcements
After installation, shake the post gently to ensure it’s firmly anchored. Re-tighten fasteners if needed. Use anti-corrosion sealant on fasteners for added longevity. Regular inspection and maintenance prevent future wobbling—think of it as routine oiling of hinges. In my experience, periodic checks saved me from unexpected loose posts after a storm or heavy winds, preserving the safety and beauty of my deck.
While many assume that selecting a premium composite decking material guarantees a maintenance-free and long-lasting outdoor space, there are subtle nuances often overlooked that can significantly impact your project’s success. A common myth is that all composite decks are created equal; in reality, differences in formulation, installation techniques, and environmental considerations can make or break your outdoor living experience.
What Advanced Homeowners Miss About Composite Deck Longevity?Maintaining a durable, beautiful outdoor deck requires more than just initial construction; it hinges on the right tools and a disciplined maintenance routine. Over the years, I’ve refined my toolkit to include specific equipment that ensures precision, longevity, and ease of repairs for composite decking, stairs, and outdoor living structures. Investing in quality tools not only saves time but also helps uphold the integrity of your deck through every season.
One indispensable device in my arsenal is the **digital torque screwdriver**. Unlike standard screwdrivers, this tool allows me to tighten fasteners to exact specifications, which is critical when working with coated or hidden fasteners that demand precise torque to prevent stripping or over-tightening. Proper fastener tension is essential for preventing squeaks and loosening over time, especially in high-wind areas or when the deck is exposed to environmental shifts.
For measuring levels and ensuring perfect alignment, I rely heavily on a **laser level**. Traditional bubble levels are helpful, but a laser level projects a consistent, straight line over a large area—making it easier to keep stair risers, railings, and decking boards perfectly aligned across the entire project. This not only enhances aesthetic appeal but also maintains safety standards.
When it comes to cleaning and preparing the surface, I recommend using a **high-pressure washer with adjustable settings**. This allows you to remove dirt, mold, or old sealant without damaging the decking boards. However, I always use the lowest effective pressure setting, particularly around sensitive composite material, to avoid causing splintering or loosening clips. For deep-cleaning stubborn stains, I opt for a **specialized composite deck cleaner** that is environmentally friendly and designed to restore the surface without harming the material.
Routine inspections are just as vital. I keep a **sturdy cordless drill with impact driver attachment** handy for quick repairs, such as tightening loose joists or replacing fasteners. The impact driver offers the torque needed for stubborn screws, saving time and reducing hand fatigue.
To assist with long-term planning, I utilize **deck design software** like **SketchUp** with custom decking plugins. This helps predict how your deck might settle or shift over years, and plan reinforcement accordingly. Planning for future scaling or addition of features like privacy screens or built-in seating is much easier with precise visualization.
Predicting future trends, I see a move toward **smart outdoor technology**—like integrating solar-powered LED lighting systems controlled via apps—becoming more popular. Investing in compatible tools now, such as **wireless multimeters** and **smart actuators**, can set the stage for future upgrades.
How do I maintain composite decks over time? Regular cleaning to prevent mold buildup, inspecting fasteners, and applying protective sealants when needed are key. A tip I highly recommend is to **use a deck brace system** to reinforce stair stringers and prevent sagging, ensuring safety and stability for years to come. For a comprehensive guide, check out the latest trends in [composite decking](https://deckdesignbuild.com/composite-decking-trends-2025-the-ultimate-guide-for-outdoor-enthusiasts).
Try incorporating a **laser level** and a **precision torque screwdriver** into your next project—these tools have transformed my construction process. The investment pays off by increasing accuracy, reducing errors, and extending the lifespan of your outdoor structures. Remember, proper maintenance begins with the right equipment—making your outdoor living space both beautiful and resilient over the long term.
Unearthing Lessons from My Decking Journey
One of the most impactful lessons I learned was the importance of seemingly small components like the hidden bracket. Overlooking this detail cost me time and money, teaching me that precision and quality materials are indispensable for longevity. Another insight was how regular maintenance, including inspecting fasteners with a impact driver, can dramatically extend the life of your deck. I also discovered that integrating proper drainage solutions prevents premature rot, reinforcing the idea that proactive planning trumps reactive repairs. Lastly, realizing that every project teaches you something new underscores the value of patience, continuous learning, and investing in the right tools to achieve professional results.
Tools and Resources That Transformed My Outdoor Projects
My essential toolkit starts with a high-quality laser level, which ensures perfectly aligned railings and stairs—crucial for safety and aesthetics. A digital torque screwdriver is vital for tightening fasteners to manufacturer specs, preventing loose components over time. To keep my decking looking fresh, I rely on a specially formulated composite deck cleaner and a low-pressure washer that cleans without damaging delicate surfaces. For design inspiration and planning, I turn to SketchUp with custom outdoor living plugins, helping me visualize modifications before breaking ground. Lastly, exploring the latest trends in composite decking keeps me informed and inspired for future projects.
Create Your Own Outdoor Oasis Today
Transforming your outdoor space into a safe, stylish haven is within reach, and understanding the real secrets—like proper hidden brackets and essential tools—sets you apart. Every successful project starts with a detailed plan, quality materials, and patience to see it through to perfection. Don’t wait for the next storm or seasonal shift to realize your deck needs attention—proactive care preserves its beauty and safety for years to come. I encourage you to take that first step, armed with the right knowledge and tools, toward creating your dream outdoor living area. Remember, the best time to start is now—your perfect outdoor space is just a project away.